Step 2
Step 3
21
Installation Procedures
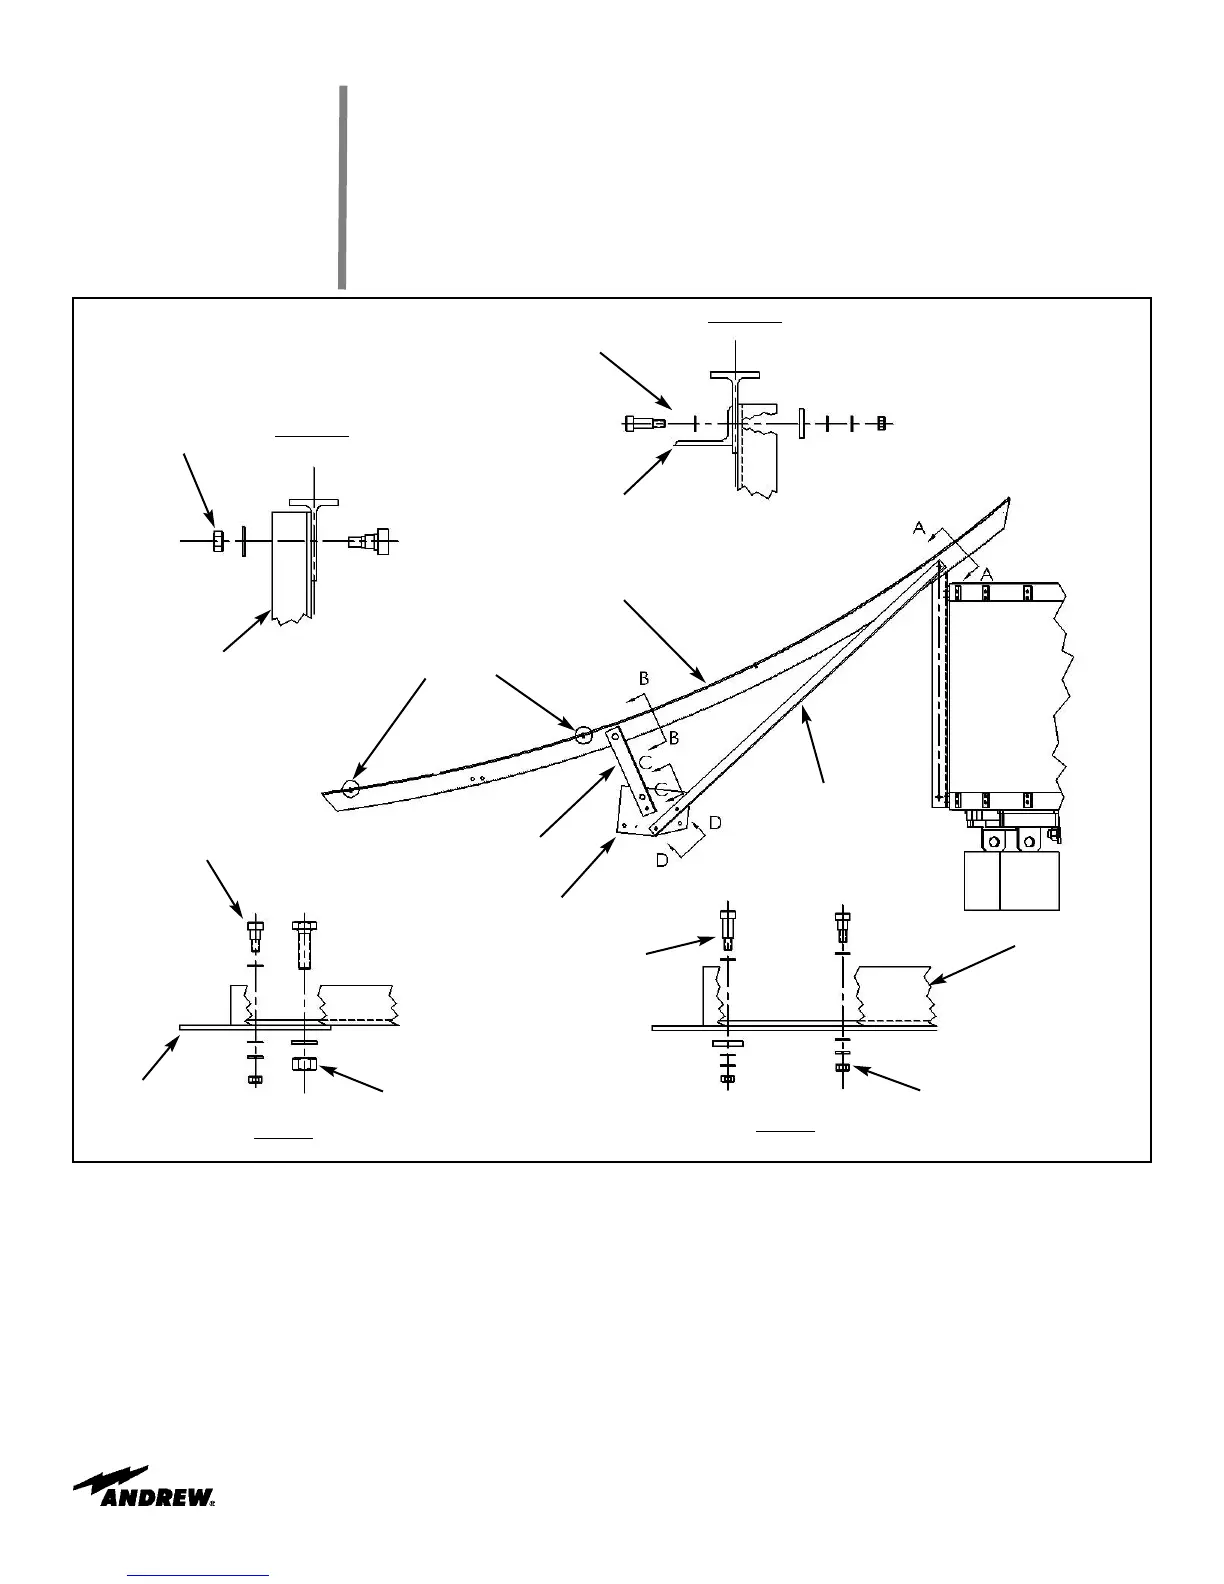
Once all 16 Short Struts are installed and securely fastened, re-install Rear Enclosure
Panel. Carefully rotate the enclosure right-side-up as shown in Figure 12. Place tempo-
rary wood blocks under each of the enclosure’s three support pads with the additional
block positioned in between.
Install Ribs (222673) to enclosure strut as shown in Figure 12. Attach Target Screws
supplied from Alignment Kit (223711) as shown and tighten. Leave all other hardware
loose.
Figure 12
Eccentric Bolt, 300084A
1/2” Washer, 9997-101
1/2-13 Lock Nut, 9979-54
(Truss, Short Strut, 300077)
Truss, Short Strut, 300077
Section A-A
View D-D
View C-C
Section B-B
Install Target Screws
1/2-13x1.0, Shoulder Bolt, 9858-18
1/2” Washer, 9997-101
1/4” Spacer, 209765-1
3/8” Lockwasher, 9974-63
3/8-16 Nut, 9999-60
3/8” Washer, 9997-79
(Inner Strut, 300080)
Inner Strut, 300080
Rib, 222673
Truss Plate, 300081
1/2”x1/2” Shoulder Bolt
3/8” Nut, 9999-60
Lockwasher, 9974-63
3/8” Washer, 9997-89
1/2” Washer, 9997-101
5/8”x2.0 Bolt & Nut, 45980-1
Washer, 9997-227
(300081)
1/2”x1/2 Shoulder Bolt, 9858-19
1/2” Washer, 9997-101
1/4” Spacer, 209765-1
3/8” Washer, 9997-89
3/8” Lockwasher, 9974-63
3/8” Nut. 9999-60
1/2”x1.0 Shoulder Bolt, 9858-18
1/2” Washer, 9997-101
1/4” Spacer, 209765-1
3/8” Washer, 9997-89
3/8” Lockwasher, 9974-63
3/8” Nut. 9999-60
(300080)
Hole #27
Hole #20
 Loading...