EN 3837 EN
HG I
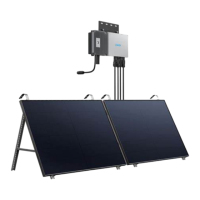
Solar Panel Support Beam (×4)
Vertical Support Scaolding (×4)
Lower Support Beam (×4)
D
E
F
J
K
L
U-Shaped Rack (×4)
M6×100 Hexagon Flange Bolt (×16) M6×65 Hexagon Flange Bolt (×12) M6×12 Hexagon Flange Bolt (×24)
Fastening Clamp (×8)
Limit Support (×4)
M6 Flange Nut (×20) 304 Stainless Steel Hose Clamp (×10)
Silicone Buer Pad (×4)
C
mm
618
B
mm
110 0
A
mm
1200
M
N
O
P Q R
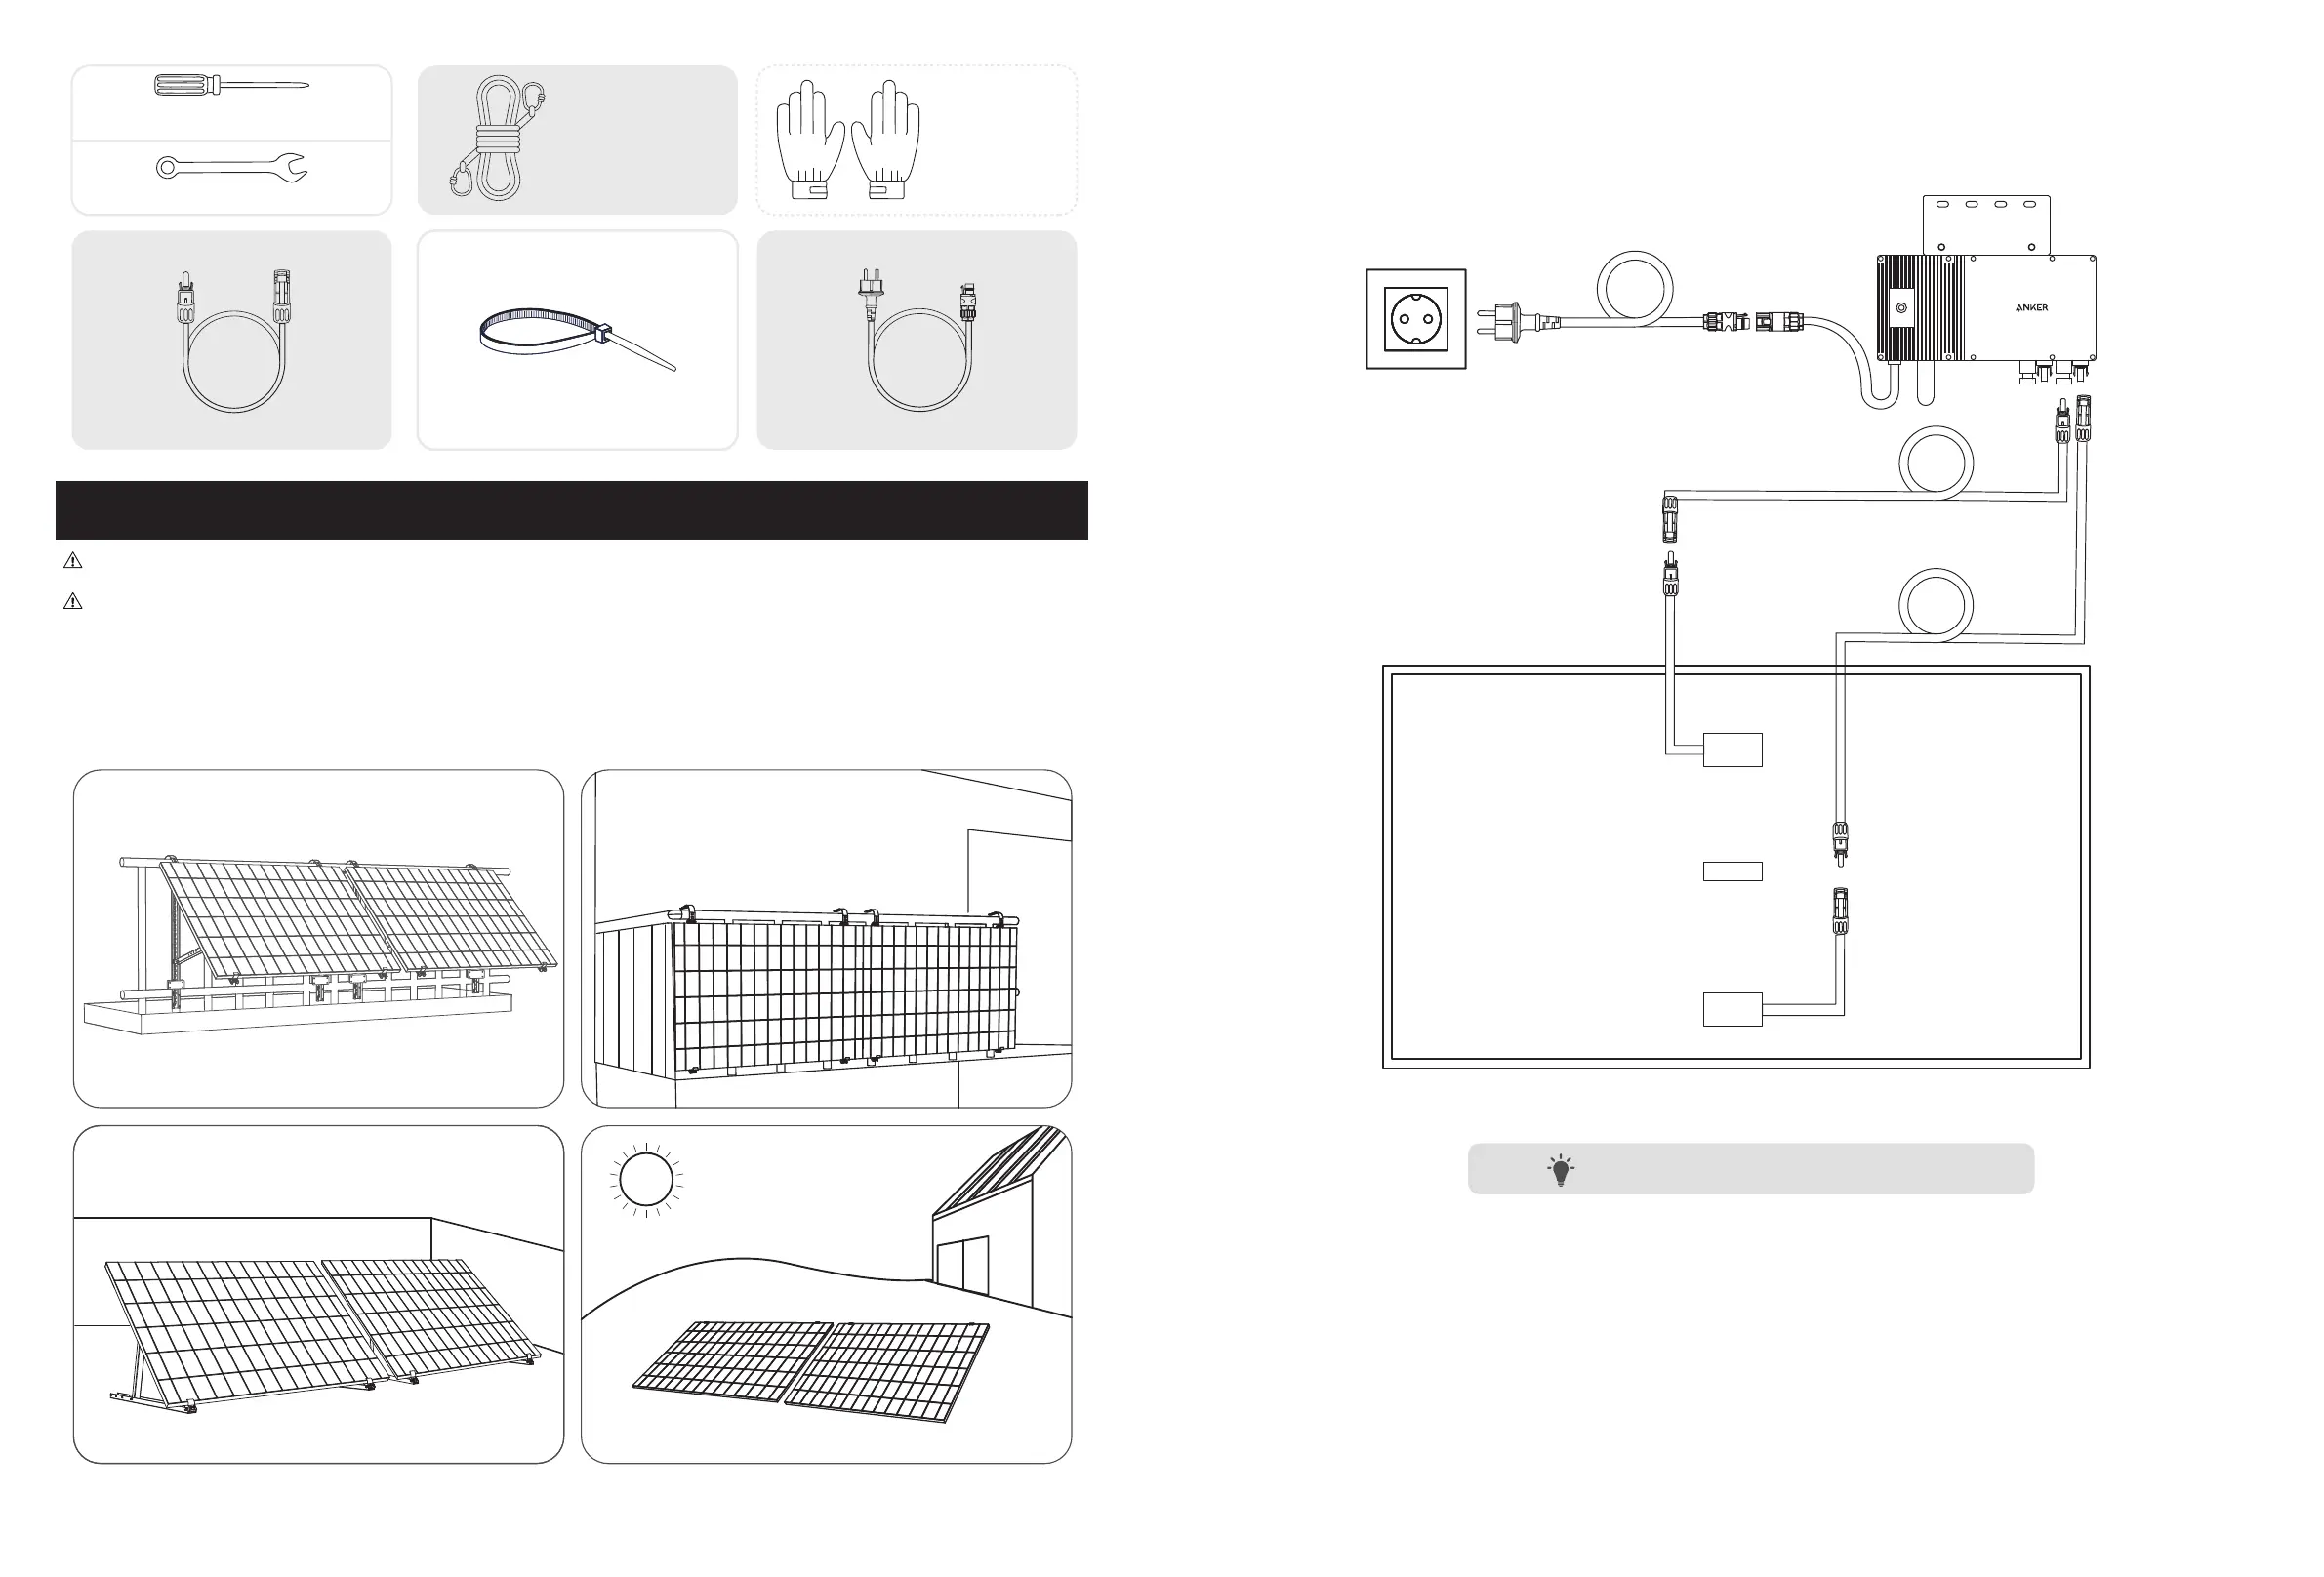
Phillips Screwdriver
Hexagon Wrench
Mounting Auxiliary Rope
Solar Panel Extension Cable Zip Tie Schuko Connection Cable
Work Gloves
(Not included)
Male Pin Female Socket Schuko Connector
Pre-Installation
If you wish to verify and commission your solar system immediately, complete the installation when the weather is sunny.
During installation or removal, we recommend that at least three people work together.
Selecting a Location
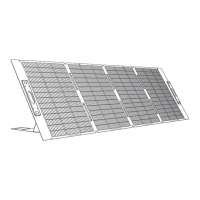
The solar panel can be installed on the balcony or the ground. Dierent locations require dierent installation methods and
accessories. Select an appropriate location before installing the solar panels.
Measuring the Distance
Determine the position of the microinverter and solar panel with the Schuko connection cable and solar panel's extension cable.
5m
1.5m
T
·
Additional extension cables may be required.