4
For Example :
The employees who all work from
8:00–17:00 and they all take a lunch break
from 12:00–13:00.
With these settings in place, an employee can simply make time for attendance.
Select the Set and press OK to save the time setting and move to the next step.
We recommended setting the time range of punch-in and punch out more
than the working time can get more accurate working hours for employee.
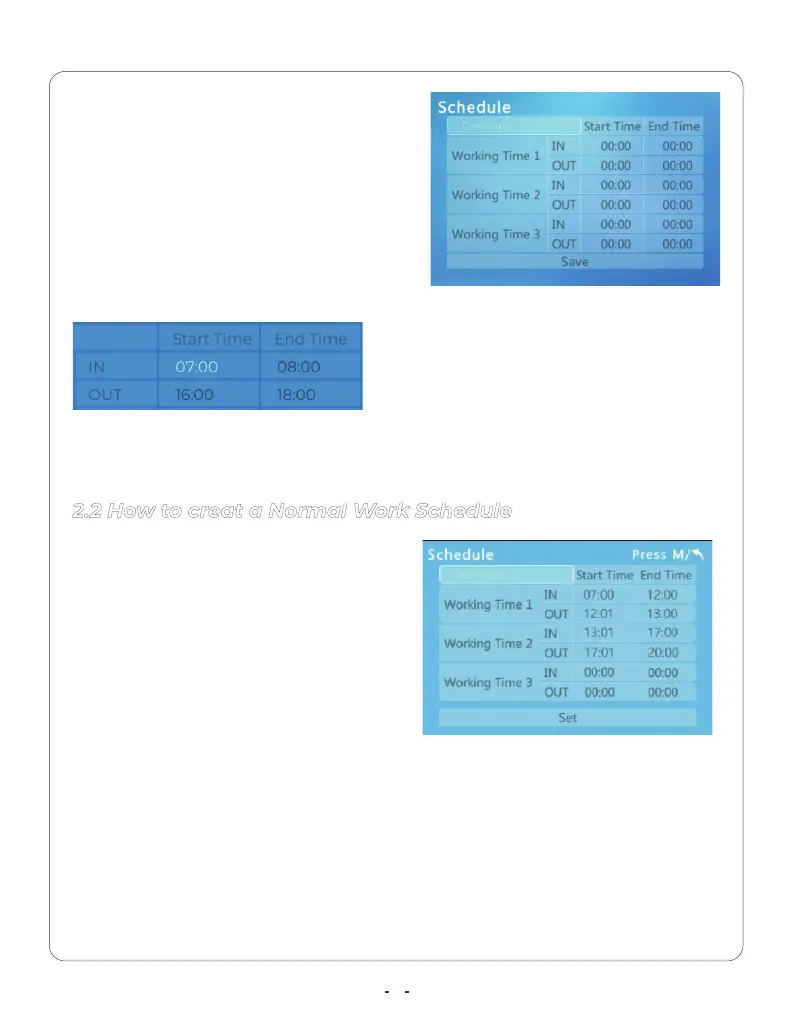
The Wotking Time 1:
IN :Start : 07:00 and End : 12:00.
(Beginning of the shift )
OUT : Start : 12:01 and End : 13:00. (For
lunch out)
The Wotking Time 2:
IN : Start:13:01 and End : 17:00. (For lunch back)
OUT :Start :17:01 and End: 20:00. (End of the shift )
The CX3 time clock allows you to set up
to 3 different work times at which to
punch the shift.
Each Work Time with IN and OUT status.
and the Start Time and End Time of the
IN or OUT are used to set up the valid
punch time range.
For example:
Notice:
Punch Time at 7:30
Punch Time at 17:00
Early than 16:00 or Later 18:00
Early than 7:00 or Later 8:00
Valid Punch No Valid Punch
The employee punch in during 07:00 - 08:00, and punch out during 16:00-18:00.
The employee will be with valid working time.
2.2 How to creat a Normal Work Schedule
 Loading...