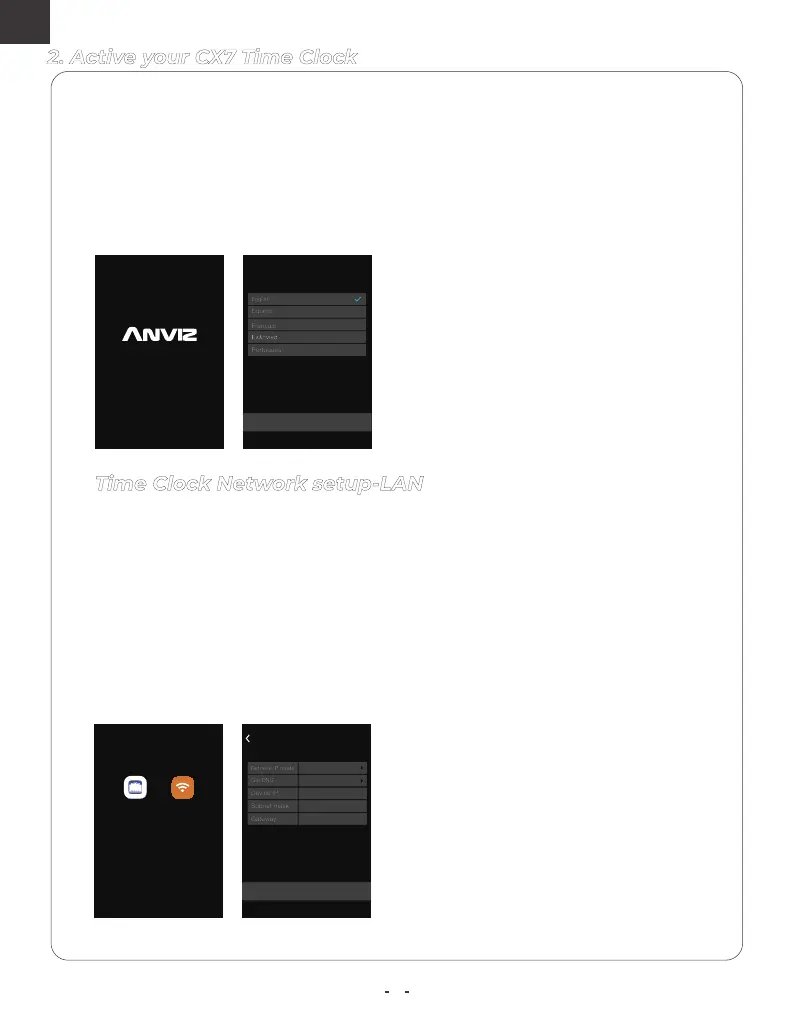
3. Select the network connection as you want.
4. Attach a LAN cable to your clock and router, before you select
the Ethernet.
5. Fill the correct network information in the terminal
ـX§ƊƮƮȲƵȺȺة²ɐƦȁƵɈǿƊȺDzƊȁƮJƊɈƵɩƊɯفȌȲȺƵǶƵƧɈɈǘƵDHCP in the
Retrieve IP Mode to automatic get the network information to connect
with internet. And click “Set” to next Cloud setup steps.
Time Clock Network setup-LAN
2. Active your CX7 Time Clock
ÀǘƵ!åׇƊǶǶȌɩɯȌɐɈȌƧȌȁȁƵƧɈɈȌɈǘƵXȁɈƵȲȁƵɈɨǞƊmwƊȁƮàǞIǞ
1. Plug your Time Clock into a power outlet to power on the terminal.
2. Select the time clock display language which you need.
And Click “Set” to save the setting and skip to next steps.
Powering Smarter World
Loading…
Languages
Set
Network Settings
Ethernet WIFI
55.55.55.0
92.68.0.1
92.68.0.31
Manual
Manual
Ethernet
Set
4
 Loading...