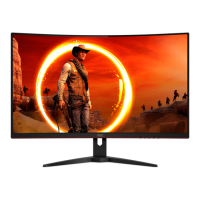
This document serves as a comprehensive user manual for the AOC LCD Monitor models CQ27G3SU and CQ27G3SU/BK, guiding users through setup, adjustment, and troubleshooting. It emphasizes safety precautions, proper installation, and maintenance to ensure optimal performance and longevity of the device.
Function Description
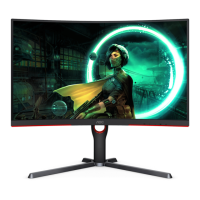
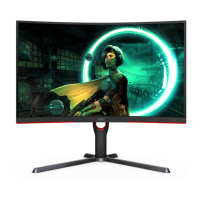
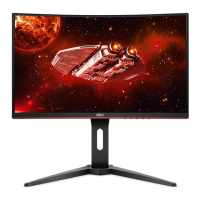
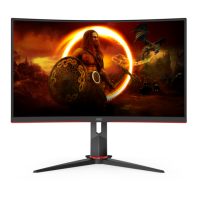
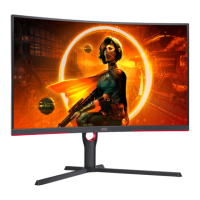
The AOC LCD Monitor is designed to provide a high-quality visual display for various computing tasks, including gaming, internet browsing, and multimedia consumption. It features a curved display, indicated by the "CQ" in its model name, which aims to enhance immersion and reduce eye strain by providing a more uniform viewing distance across the screen. The monitor supports Adaptive-Sync technology, which synchronizes the display's refresh rate with the graphics card's frame rate, eliminating screen tearing and stuttering for a smoother gaming experience. This function is compatible with DP (DisplayPort) and HDMI (High-Definition Multimedia Interface) connections and works with a range of AMD Radeon™ graphics cards, including RX Vega, RX 500, RX 400, R9/R7 300, Pro Duo (2016), R9 Nano, R9 Fury, and R9/R7 200 series (with specific exceptions).
The monitor offers a variety of display modes and settings accessible through its On-Screen Display (OSD) menu, allowing users to customize the visual output to their preferences. These settings include adjustments for luminance (contrast, brightness, Eco mode, Gamma, DCR, HDR), color (color temperature, DCB mode), and game-specific enhancements (Game Mode, Shadow Control, Low Input Lag, Game Color, LowBlue Mode, Overdrive, Adaptive-Sync, Frame Counter, MBR). The monitor also includes a "Dial Point" feature, which can be shown or hidden via a hotkey, likely providing an on-screen crosshair for improved aiming in games.
Connectivity options include Power, DP, HDMI-1, HDMI-2, USB-PC (USB upstream), multiple USB3.2 Gen1 ports (one with charging capability), and an Earphone output. This array of ports ensures compatibility with a wide range of devices and peripherals.
Usage Features
The AOC monitor is designed for user-friendly operation with intuitive controls and a flexible stand.
- Setup and Installation: The manual provides clear instructions for setting up the stand and base, as well as for wall mounting. For stand installation, users simply follow the illustrated steps to attach the base to the stand and then to the monitor. For wall mounting, users must first remove the base, then attach a VESA-compatible wall mounting arm (purchased separately) to the back of the monitor, and finally reconnect the cables. It's important to note that VESA mounting screw holes may not be available on all models, and users should confirm with their dealer.
- Adjusting Viewing Angle: The monitor offers ergonomic adjustments to optimize viewing comfort. Users can adjust the tilt angle from -5° to 23° and the height up to 130mm. When adjusting, users are advised to hold the stand to prevent the monitor from toppling and to avoid touching the LCD screen directly to prevent damage.
- Connecting to PC: Connecting the monitor to a PC involves securely attaching the power cord, turning off and unplugging the computer, connecting the display signal cable (DP or HDMI) to the computer's video connector, and then plugging in the power cords for both the computer and the display. The manual stresses the importance of turning off both the PC and the LCD monitor before connecting any cables to protect the equipment.
- Hotkeys: The monitor features dedicated hotkeys for quick access to common functions:
- Source/Exit: Switches input sources or exits the OSD menu. When the OSD is closed, pressing this button for about 2 seconds performs an auto-configure function (for D-Sub models only).
- Game Mode/<: Opens the game mode function, allowing users to select from various presets like FPS, RTS, Racing, Gamer 1, Gamer 2, or Gamer 3.
- Dial Point/>: Toggles the display of the Dial Point feature.
- Menu/Enter: Displays the OSD menu or confirms a selection. Pressing it for about 2 seconds when there is no OSD will turn off the monitor.
- Power: Turns the monitor on or off.
- OSD Setting: The OSD menu provides extensive customization options, organized into categories such as Color Setup, Picture Boost, OSD Setup, Game Setting, and Extra. Navigation is done using the hotkeys, allowing users to select functions, adjust settings, and exit the menu. The manual also describes an OSD Lock Function, which can prevent accidental changes to settings.
- Adaptive-Sync Function: This feature is crucial for gamers, as it dynamically adjusts the monitor's refresh rate to match the frame rate of the graphics card, preventing visual artifacts like screen tearing and stuttering. It is active when using DP or HDMI connections with compatible AMD Radeon™ graphics cards.
- Image Ratio: The "Extra" menu allows users to select various image ratios (Wide, 4:3, 1:1, and specific widescreen resolutions) to ensure content is displayed correctly.
- DDC/CI Support: The monitor supports VESA DDC2B capabilities, allowing it to communicate its identity and display capabilities to the host system. This "Plug and Play" feature simplifies setup by enabling the computer to automatically configure the display settings.
Maintenance Features
Proper maintenance is essential for the monitor's performance and lifespan. The manual outlines key cleaning and general care instructions.
- Cleaning:
- Cabinet: The monitor cabinet should be cleaned regularly with a soft cloth. A soft detergent can be used to remove stains, but strong detergents should be avoided as they can damage the cabinet material.
- Screen: When cleaning the screen, users must ensure that no detergent leaks into the product. The cleaning cloth should not be too rough to avoid scratching the screen surface.
- Power Disconnection: Crucially, the power cord must be disconnected before cleaning the product to prevent electric shock.
- General Care and Safety:
- Ventilation: Adequate space must be maintained around the monitor to ensure proper air circulation and prevent overheating, which could lead to fire or damage.
- Placement: The monitor should not be placed on unstable surfaces. It should only be used with carts, stands, tripods, brackets, or tables recommended by the manufacturer. The front of the product should never be placed on the floor.
- Liquid and Object Intrusion: Users should never push any objects into the monitor's slots or spill liquids on it, as this can cause electrical damage or fire.
- Power Surges: To protect the monitor from damage, it should be unplugged during lightning storms or when it will not be used for extended periods.
- Power Strips and Extension Cords: Overloading power strips and extension cords can result in fire or electric shock and should be avoided.
- Power Source: The monitor should only be operated from the type of power source indicated on its label. If unsure, users should consult their dealer or local power company. The monitor is equipped with a three-pronged grounded plug for safety, and if the outlet does not accommodate it, an electrician should install the correct outlet or an adapter should be used to safely ground the appliance without defeating the safety purpose of the grounded plug.
- Abnormal Conditions: If the product emits a strange smell, sound, or smoke, the power plug must be disconnected immediately, and a Service Center contacted.
- Physical Impact: The LCD monitor should not be subjected to severe vibration or high impact conditions during operation or transportation. It should also not be knocked or dropped.
- LED Indicator: The LED indicator provides a visual cue of the monitor's status:
- White: Indicates Full Power Mode.
- Orange: Indicates Active-off Mode.
By adhering to these guidelines, users can maximize the performance, safety, and lifespan of their AOC LCD Monitor.