10
OPERATINGGUIDELINES
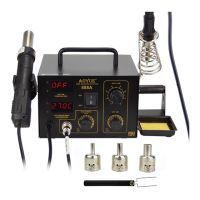
5. SetthedesiredairtemperatureusingbuttonsA6andA7.
6. You may start reworking as soon as the desired temperature is
reached.RefertodisplaypanelC3toverify.
7. When reworking is completed, turn off the “SMD Rework”
function switch. The autocooling functionality will commence if
thesystemdetectsatemperaturehigherthan95°C.Itwillblowat
fullspeedtoacceleratethecoolingdownofthehotairgun.The
autocooling functionality will stop when the temperature of the
hot air gun reaches about 95°C or below, as shown from the
actualtemperaturedisplaypanel,C3.Thesystemwillthenswitch
offanddisplayan“OFF”messagefromuserdefinedtemperature
displaypanel,C2.
NOTE:
MakesurethesmokeabsorptionfunctionalityisswitchedOFFwhen
usingtheequipmentforSMDRework.
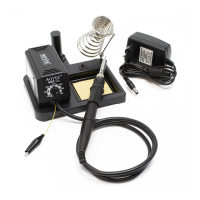
SOLDERINGIRON
1. Withtheunitpluggedtothemainpowersourceandmainpower
switch in the ON position, ensure that the soldering iron is
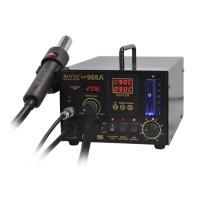
properlyconnectedtothereceptacle,D1.
2. ThesolderingirondisplayA3willshowtheword“OFF”indicating
thesolderingironfunctionisturnoff.
3. TousethesolderingironturnONthe“SolderingIron” function
switch,B1.
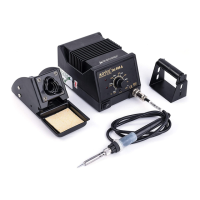
4. The soldering iron display A3 will briefly show the current set
temperaturethenswitchtodisplayingtheactualtemperature.
5. When we use the adjustment knob, A3, to set the desired
soldering temperature. The digital display A2 will show the
currentsettemperaturebasedontheknobposition.
11
OPERATINGGUIDELINES
5. Aftera fewseconds thedigitaldisplayA2willswitchto showing
theactualtemperature.Youmaystartsolderingwhenthedesired
temperaturehasbeenreached.Thesmalldotlocatedat theend
of the number displayed in A2 signifies the heater regulation.
When the small dot starts blinking on and off the system has
reachedthedesiredsettemperature.
6. Afterusageturnoffthesolderingironfunctionswitch.
7. If the soldering iron tip is still higher than 100 degrees, the
soldering iron display will show the word “Hot” indicating the
solderingironisstillhottocautionusers.
8. When the soldering iron tip’s temperature has fallen to
manageablelevelthedisplaywillshowthework“OFF”
9. SwitchONthe“SmokeAbsorber”powerswitch,B2,toactivate
thesmokeabsorptionfunctionality.
NOTE:
Turnthe“SmokeAbsorber”ONonlyafterthesolderingironreached
the desired (set) temperature. This is to avoid affecting the temperature
increaseofthesolderingironintermsofheatingtime.
SOLDERINGIRONSLEEPTIMER
1. The soldering iron has a sleep feature that allows the soldering
iron to go into sleep mode depending on user programmed
duration.
2. Toaccessandenablethesleepfeatureofthesolderingiron:
● TurnSolderingiron,SMDandSmokeabsorberfunctionswitchoff.
● PressandholdthehotairtemperatureincreasebuttonA6.
● The soldering iron display A2 will turn to “t##” , indicating it is
nowonsleeptimeradjustmentmode.
● Turnthesolderingironadjustmentknobtoselectdesiredsleep
timeinminutes.
 Loading...