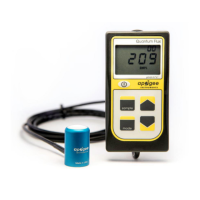
Battery life is approximately 6 months. However, this can be reduced
by usage and ambient conditions. When batteries need to be changed,
the screen will display “bAtt Lo” upon waking up.
IMPORTANT: Removing the bottom cover will result in the loss of all
current-day data.
FOR INITIAL SETUP – SKIP TO STEP 3
1. Using a small Phillips-head screwdriver, turn the two screws at the
bottom until they turn freely (this should take roughly 5 turns).
Note: The screws do not need to be fully removed.
2. Remove the bottom cover. With the screws loosened, the batteries
should begin to push off the cover. If needed, you can use the ¼-20 threaded mount with a matching bolt or screw
to pull off the cover. If the cover seems stuck, verify the screws completely unthreaded.
3. Install 2 AAA batteries into the bottom, making note of the proper polarity
marked next to each hole.
4. Replace the bottom cap and press firmly into place. The LCD screen should
turn on. If it does not, check the battery orientation and try again.
5.Using a small Phillips-screwdriver, tighten the two screws on the bottom
cap by turning them until snug.
Note: Do NOT over-tighten the screws.
6. The meter is now ready to use and will begin making measurements as soon as the batteries are installed.
1. Turn on the display by pressing the button one time. The number displayed on the screen is a running average of
PPFD or ePPFD (depending on the model) from the last 2.5 seconds.
2. Press and hold the button for about 2 seconds to manually turn off the display.
Note: The display will automatically turn off after 3 minutes of inactivity. However, the meter is still on
taking measurements in the background.