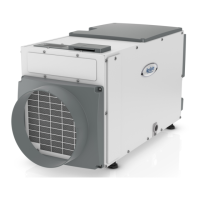
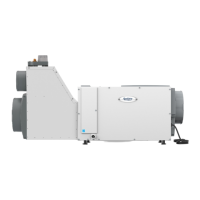
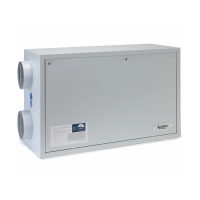
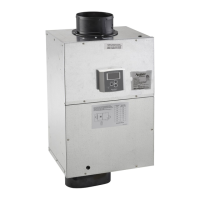
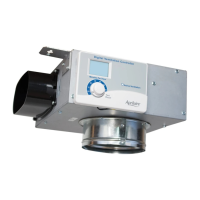
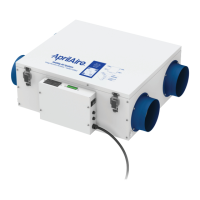
The Aprilaire Model 8191 and 8192 Ventilator with Dehumidification is designed to introduce outdoor air into energy-efficient homes while simultaneously removing excess moisture. This system integrates with a home's HVAC system to ensure proper ventilation and humidity control.
Function Description
The primary function of the Aprilaire Ventilator with Dehumidification is to provide controlled fresh air ventilation and dehumidification. It ducts outdoor air into the home's HVAC return side, where it is conditioned before distribution. The unit's built-in control allows for precise management of ventilation time and humidity levels. It can operate based on a set ventilation schedule, automatically compensating for missed ventilation during periods of high outdoor temperature by increasing ventilation during cooler times. This ensures compliance with various indoor air quality and energy efficiency standards, such as Energy Star Certified Homes, EPA Indoor airPLUS, 2012 International Residential Code (IRC), and 2012 International Energy Conservation Code (IECC).
The dehumidification aspect of the ventilator is crucial for maintaining comfortable indoor humidity levels, especially in humid climates or during specific seasons. The unit measures the dew point of incoming air and activates its compressor to dehumidify the air if the dew point exceeds the set limit. This process helps prevent issues associated with high humidity, such as mold growth, musty odors, and discomfort. The control also features an option to disable dehumidification when the air conditioning system is actively running, preventing redundant operation and optimizing energy use.
Usage Features
The ventilator is equipped with an on-board control panel that allows users to manage its operation. Key features include:
- ON/OFF Control: A dedicated button to power the ventilator on or off.
- Ventilation Time Setting: Users can adjust the amount of ventilation time per hour, typically ranging from 0 to 60 minutes, to meet specific indoor air quality requirements. This setting is accessed via the MODE button and adjusted with UP/DOWN arrows.
- Humidity Control Setting: The control allows for adjusting the desired humidity level, represented by a numerical setting (1 to 7). A higher setting indicates a drier environment. This setting correlates to specific dew point values, providing a more accurate measure for dehumidification control than relative humidity alone.
- Outdoor Temperature Restrictions (Vent-Auto Modes): The ventilator can be configured to prevent ventilation when outdoor temperatures exceed certain limits (e.g., 105°F, 100°F, or 95°F) to avoid bringing in excessively hot air. The control automatically compensates for missed ventilation by adding time during cooler periods.
- RH Offset: An offset can be applied to the on-board humidity reading to synchronize it with other humidity measuring devices in the home, ensuring consistent humidity control.
- Installer Test Mode: This mode allows qualified service technicians to verify proper wiring and operation of all components, including the blower, vent damper, and compressor, for a duration of four minutes.
- External Control Option: The ventilator can be integrated with external ventilation controls, such as Aprilaire thermostats (e.g., 8840M, 8920W), to manage ventilation from a central living space. An outdoor temperature sensor is recommended for full utilization of all ventilation features with external controls.
- HVAC Fan Integration: The system can be wired to turn on the HVAC system fan, ensuring that fresh air brought in by the ventilator is distributed throughout the entire home, even when the HVAC system is not actively heating or cooling.
- Diagnostic Codes: The control displays diagnostic codes (E1-E8) to indicate system faults, such as sensor failures, high refrigeration pressure, loss of capacity, or float switch issues, aiding in troubleshooting.
Maintenance Features
Regular maintenance is essential to ensure the ventilator operates efficiently and effectively. Key maintenance features and procedures include:
- Air Filter Cleaning/Replacement: The ventilator is equipped with a MERV 8 washable air filter. A "CLEAN FILTER" service reminder will appear on the control screen every six months. To clear this message and maintain optimal airflow, the filter should be checked and cleaned or replaced. The cleaning process involves turning off the unit, removing the filter access door, sliding out the filter, flushing it with warm water and mild detergent, shaking off excess water, and then reinserting it.
- Drain Check: The drain system should be checked annually to ensure there are no blockages or air locks. Proper drainage is critical for the dehumidification function. If the unit is not draining correctly, a qualified service professional should inspect it.
- Condensate Pan and Float Switch: For installations in or above finished spaces, the ventilator should always be placed in a condensate pan. If a condensate pump is used, it should also be installed in the pan. A condensate overflow safety switch (float switch) can be wired to the ventilator's control board to prevent water damage in case of a drain blockage. The control board has terminals for a float switch, and a factory-installed jumper wire must be removed if a float switch is connected.
- Cabinet Cleaning: The exterior cabinet of the ventilator can be cleaned with a cloth dampened with a mild cleaner. It is important to avoid using spray solvents or cleaners near the inlet side of the ventilator to prevent damage to circuit board components.
- Shipping Bracket Removal: During initial installation, a shipping support bracket securing the compressor must be removed to ensure proper operation.
The Aprilaire Ventilator with Dehumidification is designed for user-friendly operation and straightforward maintenance, ensuring a continuous supply of fresh, conditioned air for a healthier and more comfortable indoor environment.