APT-1 – User’s Manual (EU) Rev. 2019-01 en for il 13
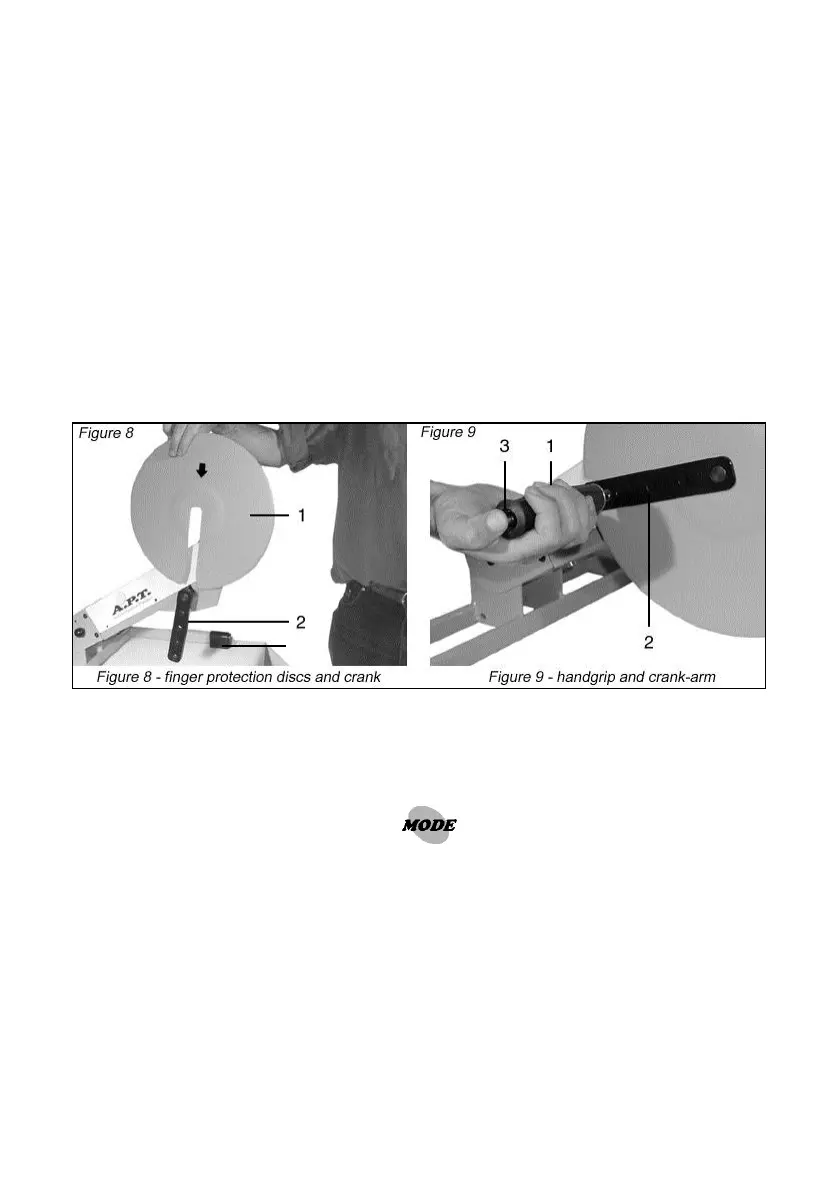
Step 4: Install the finger protection discs (Fig. 8-1) by sliding them into the
grooves on the outside edges of the crank arms (Figure 8-2) in the
direction shown.
NOTE: The finger protection discs are important for safe operation
of the unit during hands exercise.
Step 5: Insert handgrip (Figure 9-1) in one of the four mounting holes (Fig-
ure 9-2) in each of the APT-1 crank arms. Installation or removal
requires only a straight push or pull while simultaneously pressing
on the release pin (Figure 9-3) at the end of the handle.
NOTE: The choice of mounting hole provides variable resistance
levels and ranges of motion. See operation instructions.
Step 6: Plug the power supply mains power plug into the electrical socket
outlet (Figure 5-3). The APT-1 will enter a stand by position. To
start operating, press the button. The green ACTIVE mode
indicator will light up. You may start exercising in the ACTIVE
mode. For operation instructions, see 5.1 & 5.2.
NOTE: If the APT-1 moves across the table during arm exercises,
anti-slip pads (Figure 8-3) may require cleaning.