APT-1 – User’s Manual (EU) Rev. 2019-01 en for il 12
7. INSTALLATION FOR USE – ARMS EXERCISE
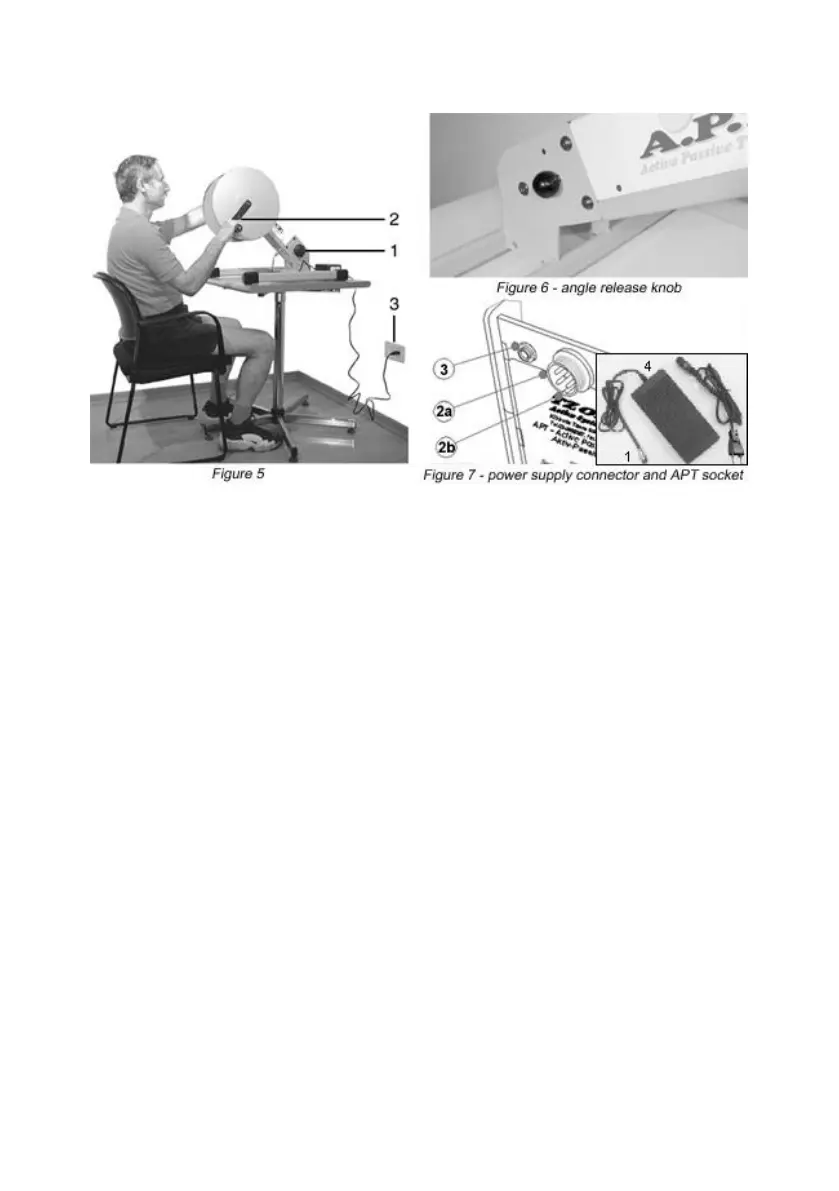
Step 1: Position the APT-1 on a level table top close to an electrical socket
outlet (Figure 5).
For the APT-1 Hi-Lo: loosen the height securing knob (Figure 1A-
7, pull the grey ring of the height release knob (Figure 1A-6) and
adjust the unit to the required height. Release the grey ring and
tighten the height securing knob (Figure 1A-7).
Step 2: Loosen the angle-securing knob (Figure 5-1) and adjust the APT-
1 to the required angle. To increase the angle, lift the body of the
APT-1, allow it to “click” into one of the operating positions and
retighten the securing knob. To decrease the angle, pull the angle
release knob (Figure 6), lower the body of the APT-1, allow it to
“click” into another operating position and tighten the securing
knob.
CAUTION: Make sure that the minimum distance between
crank arm and the table surface is approximately 5 cm. / 2”
(Figure 5-2).
Step 3: Connect the output connector (Figure 7-1) of the power supply
(Figure 7-4) to the APT-1 power input socket (Figure 7-2) while
ensuring correct position of connector groove opposite the guide
key of socket (Figure 7-3).
NOTE: The APT-1 must be used only with an original APT-1
Power Supply unit.