Pre-launch instructions
Setting up the transmitter
Fit eight fully charged AA batteries into the remote control and switch on the unit . The
LED on the remote should light-up with a solid green glow.
Yellow LED indicates the batteries are running low.
Red LED indicates batteries are completely flat. Batteries should be changed or charged
before using the boat again.
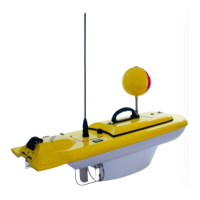
Connecting the antenna
Step 1: Place the boat in the fibreglass stand on a level surface.
Step 2: Remove the rubber protector off the antenna base.
Step 3: Hold the whip near the open end. Use your thumb and forefinger to apply a small
amount of pressure to seat the antenna onto the base. Be careful not to hold the antenna
higher up on the boot when tightening it onto the base. This will damage the antenna.
Step 4: Store the rubber stub protector for re-use.
IMPORTANT: NEVER PLACE THE BOAT ANTENNA IN THE SAND. There is a micro
connector on the inside of the antenna base and antenna stud on the boat itself, which
MUST be protected against water and sand.
Installing the batteries
Step 1: Move the external toggle switch located on the boat to the OFF position (facing
forwards). If the batteries are connected with the boat switch in the ON position , you may
see a large spark.
Step 2: Switch the remote controller ON. If the boat batteries are installed and the boat is
powered up before the transmitter is turned on, you may not be able to operate the boat.
Step 3: Check that the rudder trim control is in the center and the sail mode switch (top
left corner) is in manual mode - center position.
Step 4(a) - Lead acid batteries: (see step 4(b) below for Lipo pack installation.)
Install two fully charged 12 Volt batteries into the boat as follows:
 Loading...