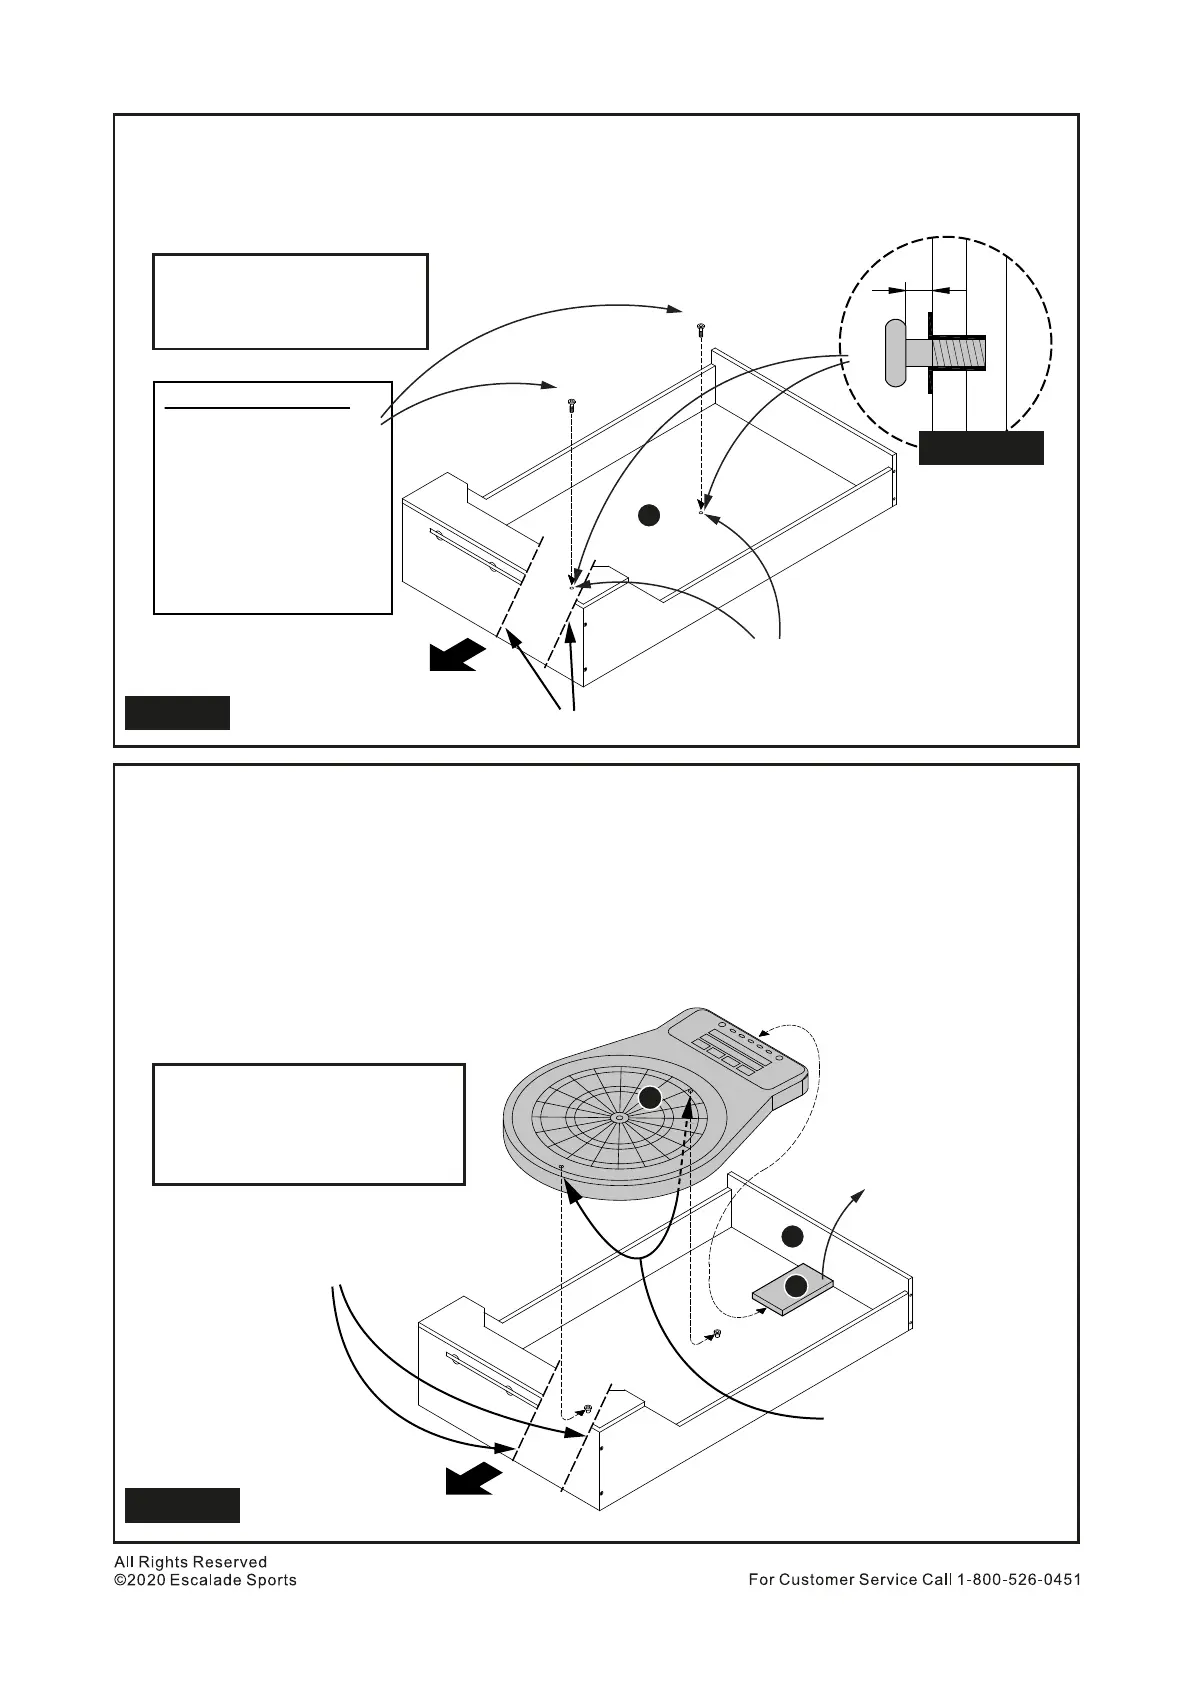
Install 2 pcs H4 Dartboard Hanger Bolts to T- Nuts inside Part N Upper Back Panel. See Figure 11.
IMPORTANT NOTE: Screw the bolts till they feel snug and Do NOT overtighten them because they
will break the back panel block. Recommended install these bolts using fingers only. Do not use
Allen Wrench. With this, it will leave the gap approximately 3/16” used to hang the dartboard in the
next step. See Figure 11A.
20.
H4
Figure 12
Place 1 pc Part R Assistant Block with one side touching Part J. Make sure Part R is located as center
as possible.
Place 1 pc Part O Electronic Dartboard with both key-shape holes onto into Parts H4 perfectly. Tips:
You can adjust by slighly moving the dartboard to left or right till both holes set on the Parts H4 bolts.
Make sure Dartboard bottom side is touching Part R.
Remove Part R from the inside of the upper cabinet.
Slide down (direction to Part J) dartboard and make sure it hooks correctly on both H4 Hanger Bolts.
Gently try to pull the top and bottom of the dartboard to ensure the dartboard is installed correctly.
You can dispose this Part R as you wish.
For Steps 21 to 24, please see Figure 12.
21.
22.
23.
24.
25.
N
R
O
Dartboard Installation
Assistant Block - 1 pc
Electronic Dartboard - 1 pc
PARTS REQUIRED
12
H4 Dartboard Hanger Bolt
- 2 pcs
PARTS REQUIRED
H4
Figure 11
Top
IMPORTANT NOTE:
Screw the bolts till they
feels snug.
Do NOT overtighten
because it will break
the back panel block.
Recommended install
these bolts using fingers
only. Do not use Allen
Wrench.
T- Nut inside backboard
*Note: These dashed lines are only for clarity of the view inside.
3/16"
Figure 11A
O
R
H4
H4
J
Note: Part R Assistant
Block is simply a
measurement block
to help with correct
placement of the
dartboard.
Locate 2 keyhole shaped
holes on back side of the
dartboard that will placed
onto the H4 Hanger Bolts.
Top
*Note: These dashed lines are
only for clarity of the view inside.
 Loading...