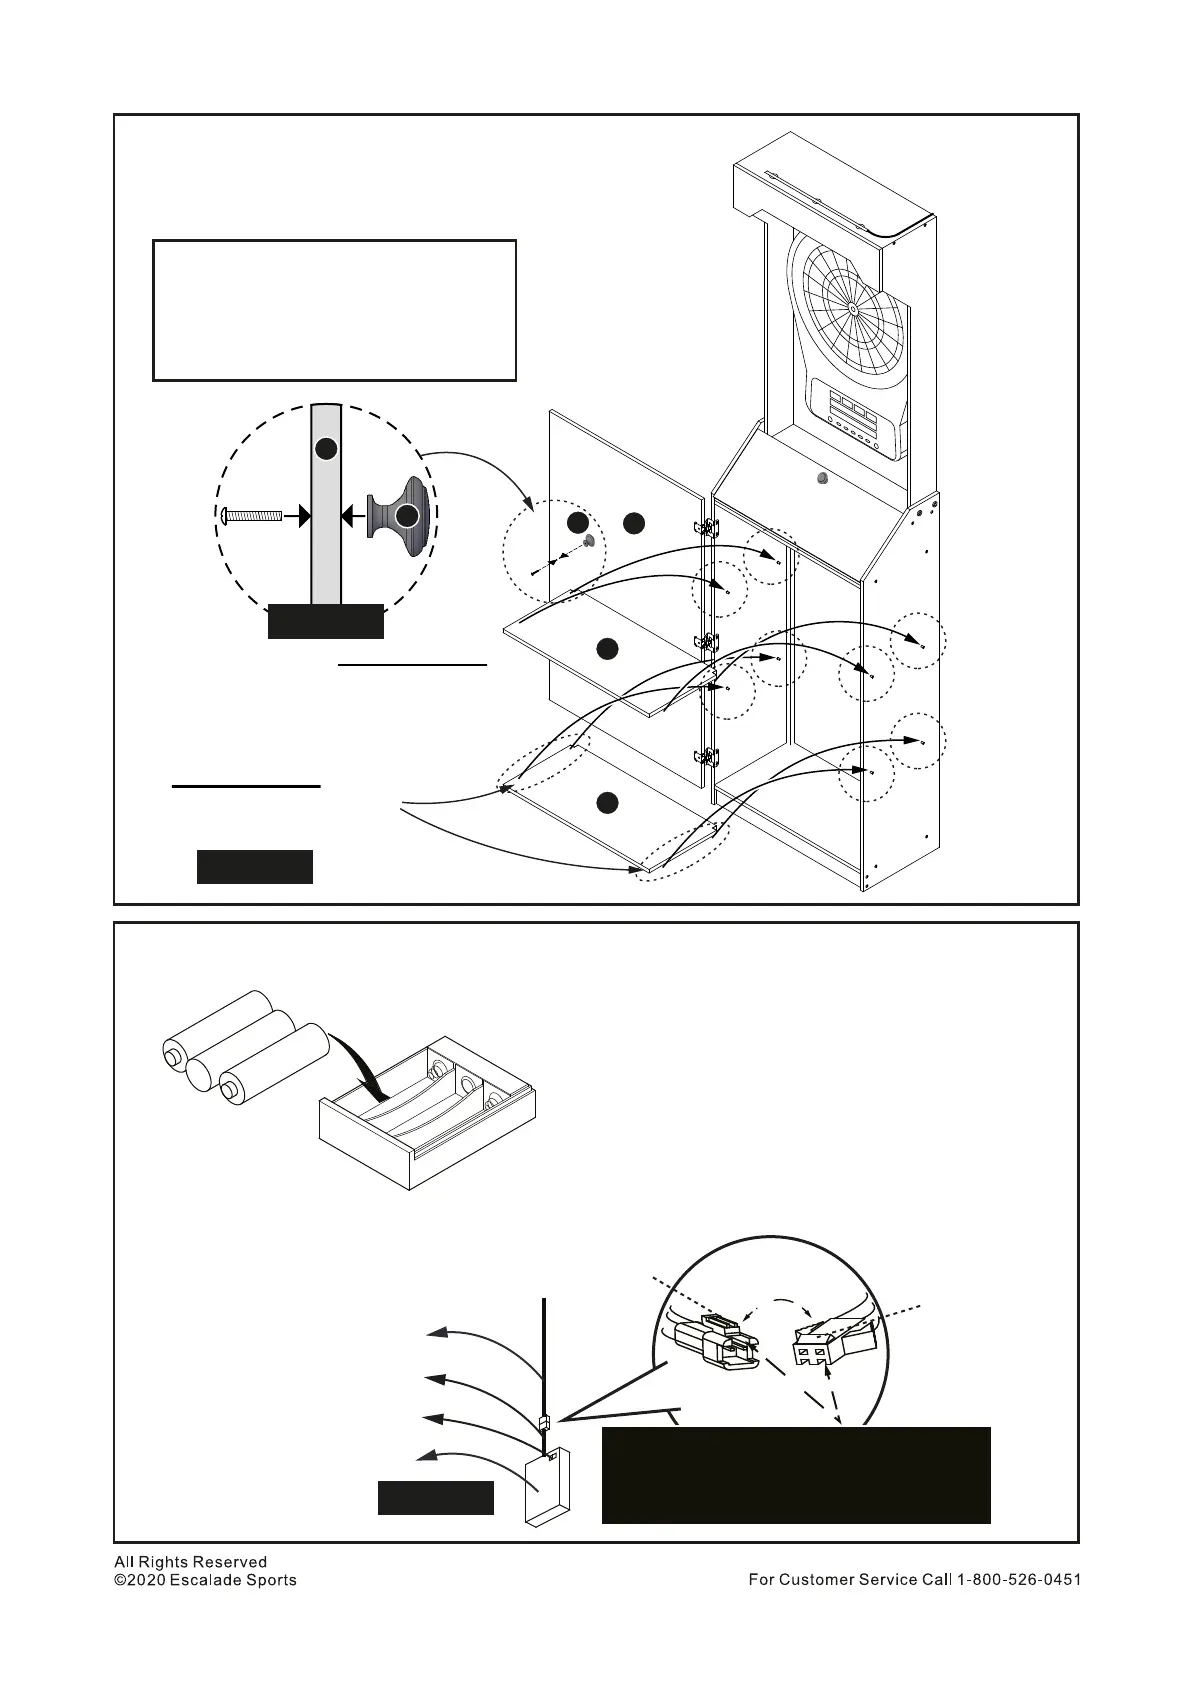
Install Part Q Door Knob to the Part G using 1 pc H11 Screw.
See Figure 14A.
Install 2 pcs Part D onto 4 pcs H7 Pins for both shelves.
See Figure 14.
28.
29.
H11
Q
D
Phillips Screw Driver
Phillips Round Head Bolt - 1 pc
Door Knob - 1 pc
Middle Shelf - 2 pcs
PARTS REQUIRED
Install or replace the batteries (3 pcs AA batteries NOT included)
Note: Recommended to use Alkaline batteries for brighter lighting and longer battery life.
Connect LED light cable (female) to battery
box cable (male).
See Figure 15.
30.
31.
D
D
G
Q
Important Note:
Must make sure both
edges of Part D sit
squarely on the H7 pins
Figure 14
+
+
+
-
-
-
AA Battery
AA Battery
AA Battery
WARNING: Do not mix old and new batteries and do not mix alkaline,
standard (carbon-zinc), or rechargeable (ni-cad, ni-mh, etc.) batteries.
• Remove the battery cover from battery box using the
the slide down battery cover.
• Place 3 pcs AA battery in the battery box.
• Replace battery box cover.
• Make sure the power switch on the battery box is in
“ON” position.
NOTE:Make sure slots on plugs are turned correctly
for correct installation. DO NOT FORCE THIS
CONNECTION and a flashlight will be very helpful to
study both the male plug and female Plug to insure
a correct connection.
Snap Lock
Tab for
Snap Lock
Female to Male
Figure 15
Battery Box
Battery Box Wire
LED Light Wire
14
H11
H11
Q
G
Figure 14
On/Off Power Switch
Important:
Install batteries in direction
of correct polarity.
Important Note:
Slots on bottom of Parts D
Set onto the H7 pins