•
Speedometer Kit No. 0134-953
(Revised 3-3-77)
INSTALLATION INSTRUCTIONS
Form No. 0153-072
~----------------
0725·087
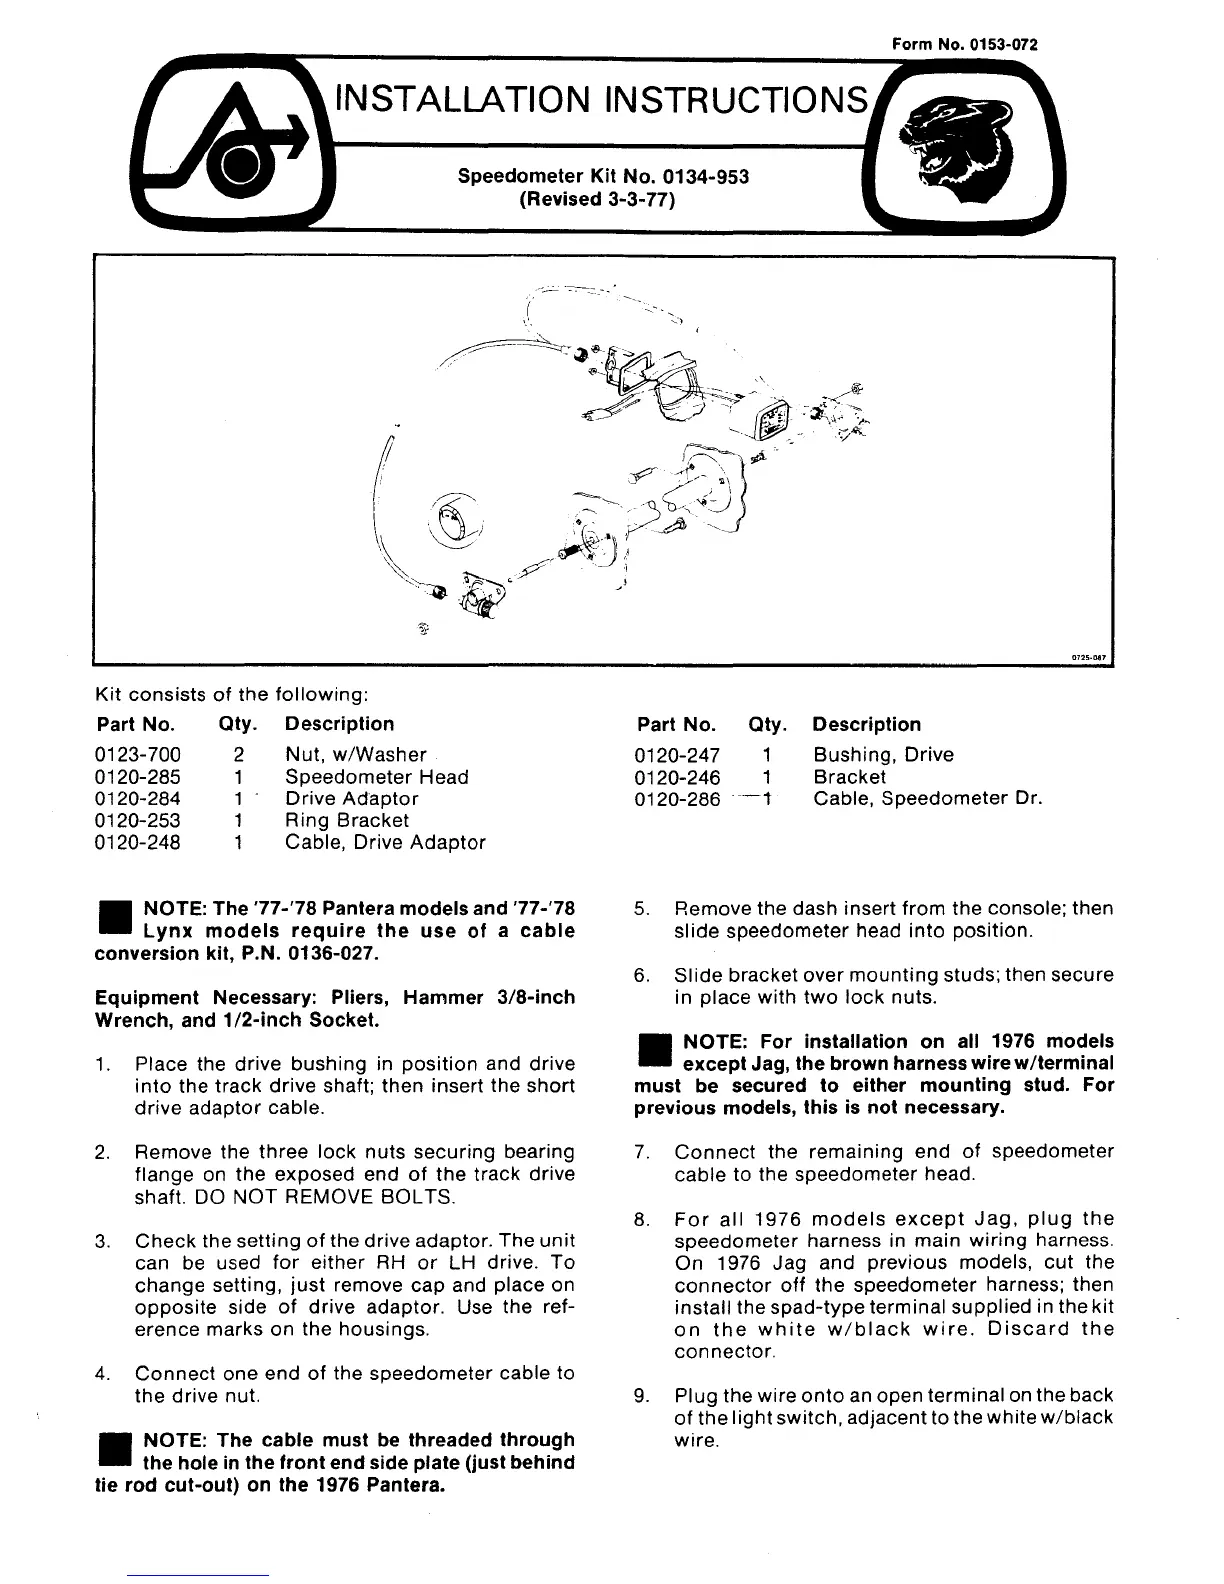
Kit
consists
of
the
following:
Part No. Oty. Description
0123-700 2 Nut,
w/Washer
0120-285 1
Speedometer
Head
0120-284 1
Drive
Adaptor
0120-253 1 Ring Bracket
0120-248 1 Cable, Drive
Adaptor
Part No.
0120-247
0120-246
0120-286
Oty.
1
1
--t
Description
Bushing, Drive
Bracket
Cable,
Speedometer
Dr.
II
NOTE: The
77-78
Pantera models and
77-78
Lynx models
require
the use of a
cable
conversion kit, P.N. 0136-027.
Equipment Necessary: Pliers, Hammer
3/8-inch
Wrench, and 1/2-inch Socket.
1. Place the drive
bushing
in
position
and drive
into
the
track
drive
shaft; then insert the
short
drive
adaptor
cable.
5. Remove the dash insert
from
the
console; then
slide
speedometer head
into
position.
6.
Slide
bracket over
mounting
studs; then secure
in place
with
two
lock
nuts.
II
NOTE: For installation on all 1976 models
except Jag, the brown harnesswire w/terminal
must be secured to either mounting stud. For
previous models, this is not necessary.
2. Remove the
three
lock
nuts
securing
bearing
flange on the exposed end
of
the
track drive
shaft. DO
NOT
REMOVE BOLTS.
3.
Check
the
setting
of
the drive adaptor. The
unit
can be used
for
either
RH or
LH
drive. To
change
setting,
just
remove
cap
and place on
opposite
side
of
drive adaptor. Use the ref-
erence marks on the housings.
7.
Connect
the
remaining
end
of
speedometer
cable to the speedometer head.
8.
For
all
1976
models
except
Jag,
plug
the
speedometer
harness in main
wiring
harness.
On 1976 Jag and previous models,
cut
the
connector
off
the speedometer harness; then
install
the
spad-type
terminal supplied in the
kit
on
the
white
w/black
wire.
Discard
the
connector.
4.
Connect
one end of the speedometer cable to
the
drive nut.
II
NOTE: The cable must be threaded through
the hole in the front end side plate (justbehind
tie rod cut-out) on the 1976 Pantera.
9. Plug the wire
onto
an open
terminal
on the back
of the
light
switch, adjacent to the white
w/black
wire.