TIG TORCH K1782-7 INSTALLATION
F-1 F-1
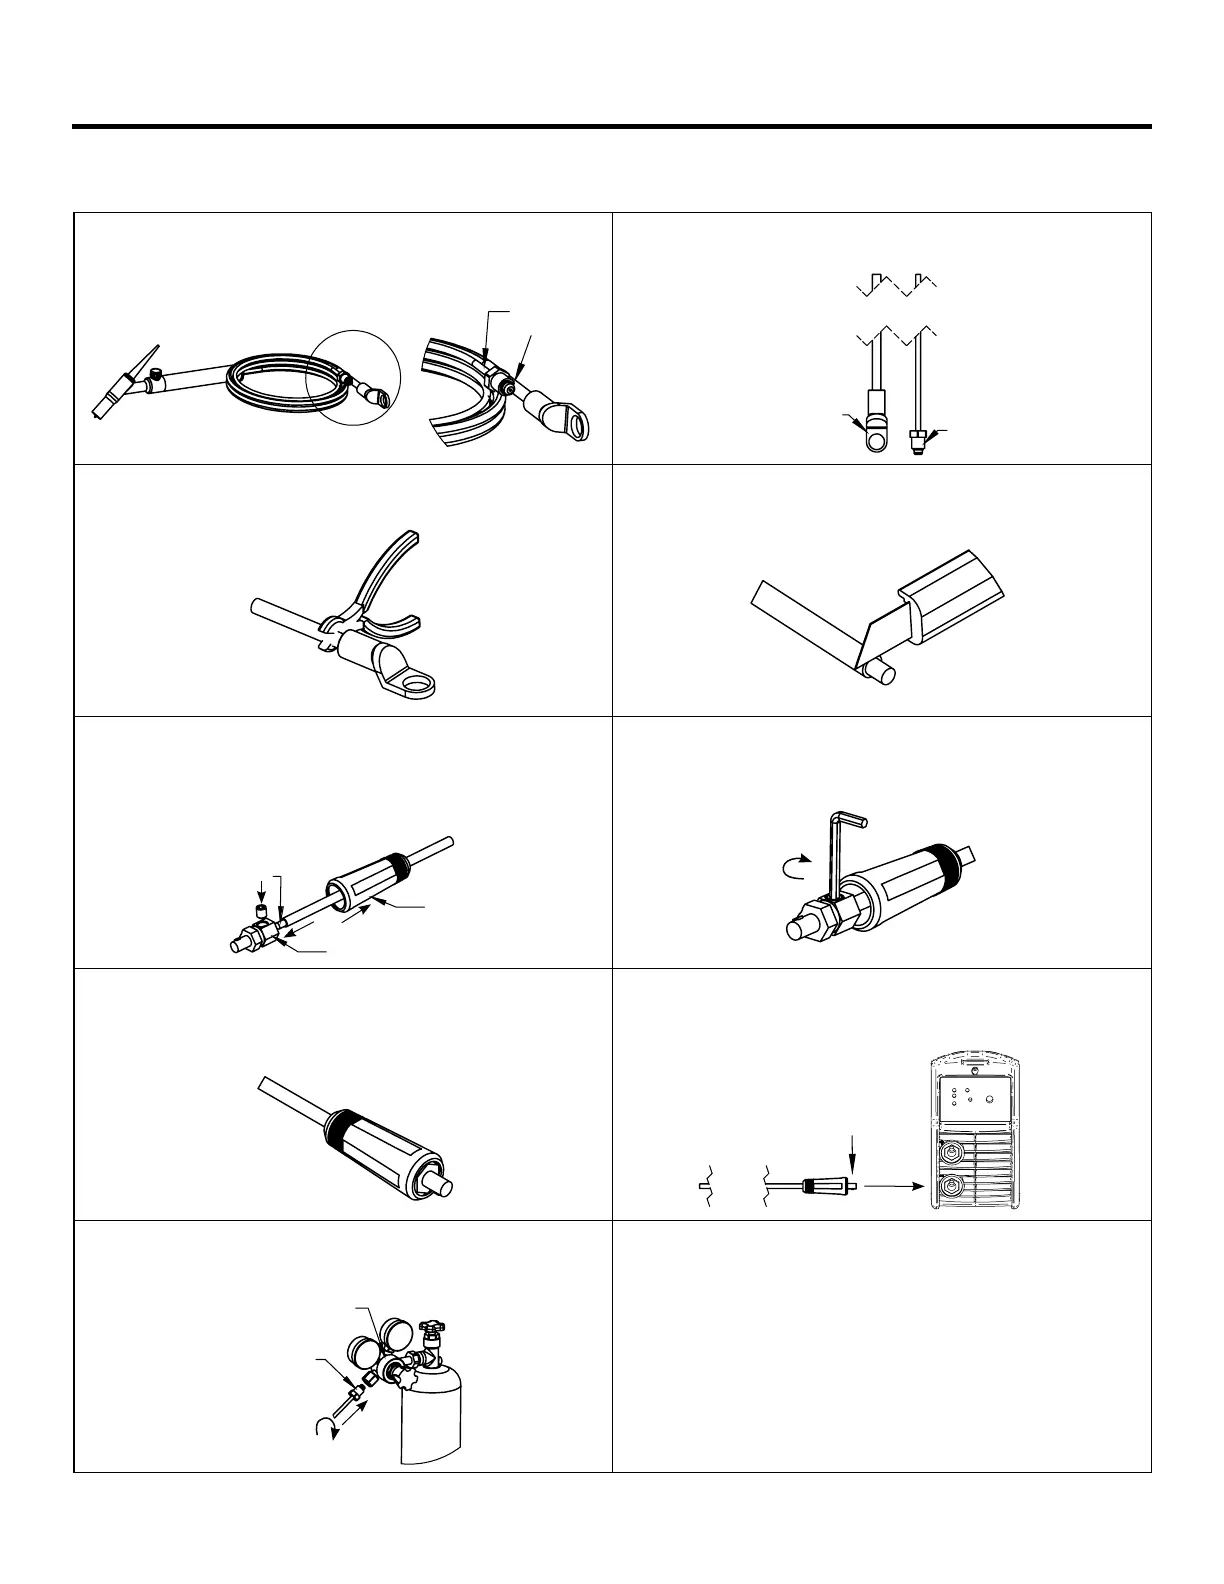
STEP 1:
Identify that the torch K1782-7 have two lines, gas line
and work wire.
STEP 2:
Identify torch tips, lug and pigtel.
STEP 3:
Cut the lug of the power cable.
STEP 4:
Cut the insulation aprox 1/2 inch.
STEP 5:
Place the plastic body of the quick connector into the
power cable, then place the brass quick connector to
the uncovered cable part ( copper), make sure it ts
securely with copper.
STEP 6:
With the Allen wrench rmly tighten the set screw bronze
connector.
STEP 7:
Place the plastic body brass connector, be careful to
align well plastic entries to the brass connector.
STEP 8:
When the cover is fully seated, connect it to the negative
input of the machine.
STEP 9:
Connect the torch pigtel to the regulator with ow meter
and tighten it securely.
STEP 10:
Place the work wire, energize the machine,
open and bleed the gas, put in TIG position,
adjust parameters and welding.
A
Gas line
Work wire
Lug
Pigtel
Plastic body
Quick connector
Uncovered cable
Tight
Connect to the negative input (-)
Flow meter
Pigtel
Tight