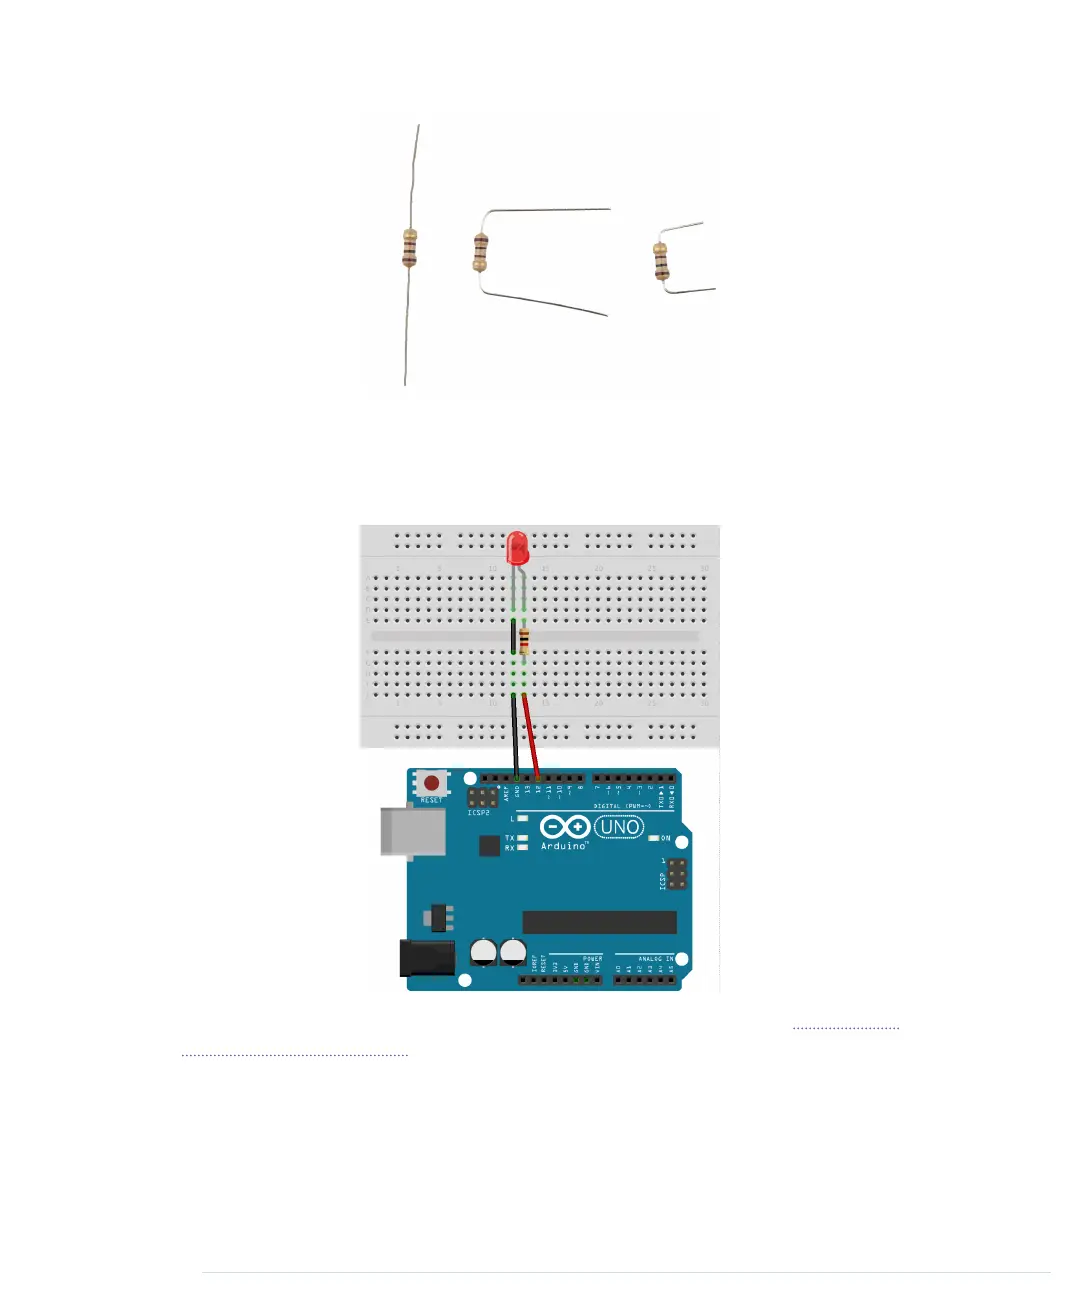
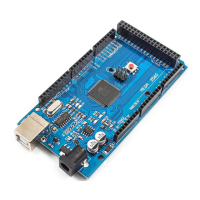
We don’t want to fiddle around too much with the connectors, so we build
the circuit as shown in the following figure. That is, we use both sides of the
breadboard by connecting them with a short wire. Note that the resistor
bridges the sides, too.
To make the LED blink, we can use the same sketch we used in Meeting the
Arduino IDE, on page 14. We only have to set
LED_PIN
to 12 instead of 13:
Chapter 3. Building Binary Dice • 44
report erratum • discuss
www.it-ebooks.info