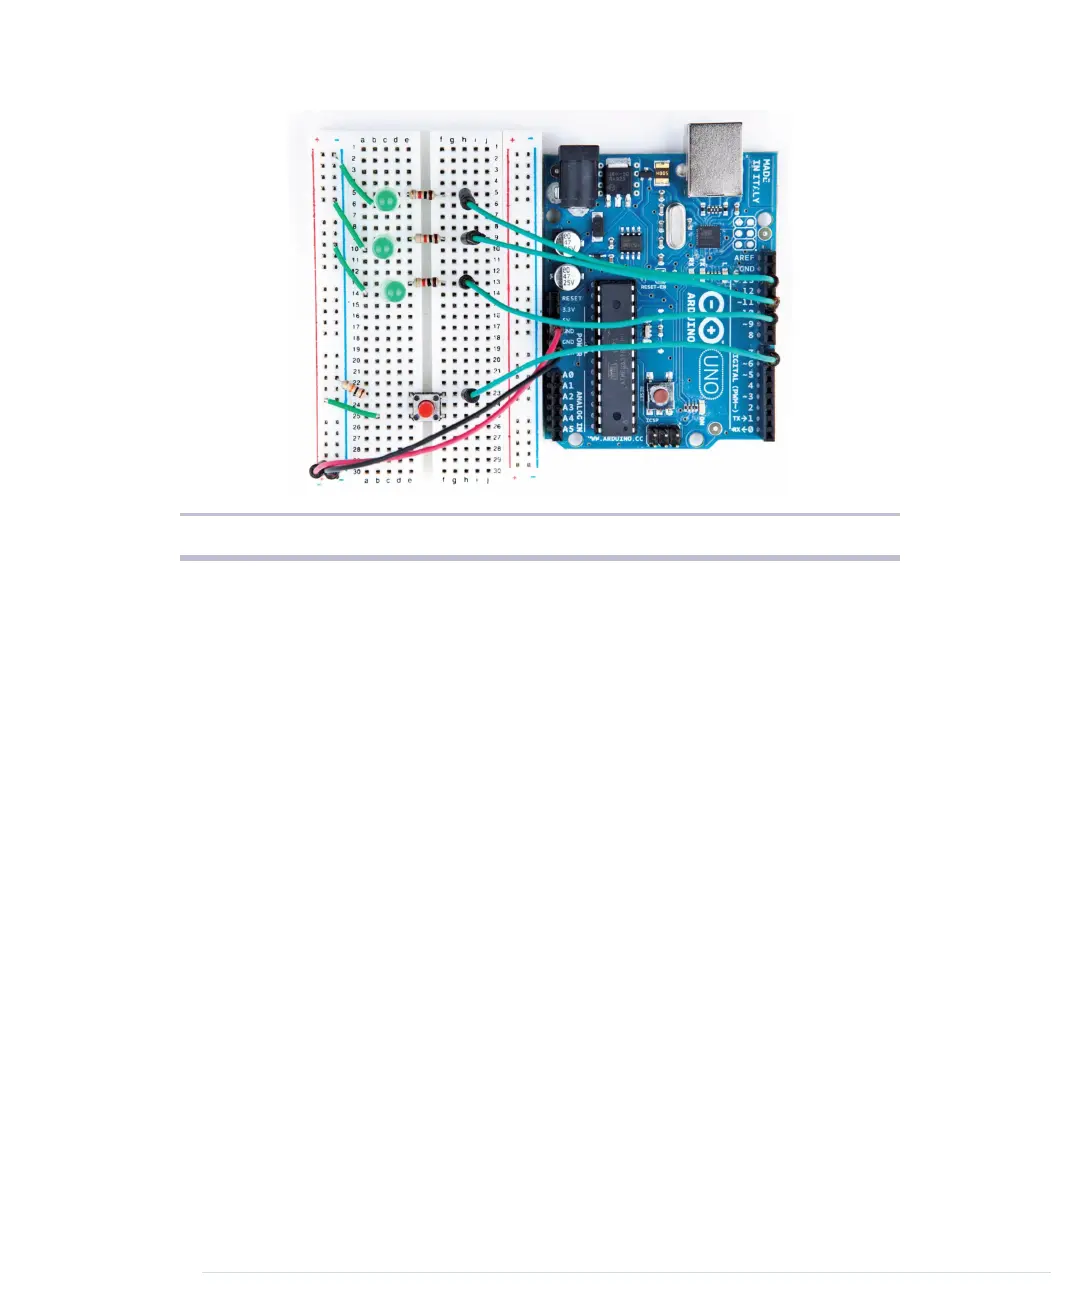
Figure 12—Our binary die with its own start button
int current_value = 0;
int old_value = 0;
void loop() {
current_value = digitalRead(BUTTON_PIN);
if (current_value != old_value && current_value == HIGH) {
output_result(random(1, 7));
delay(50);
}
old_value = current_value;
}
void output_result(const long result) {
digitalWrite(LED_BIT0, result & B001);
digitalWrite(LED_BIT1, result & B010);
digitalWrite(LED_BIT2, result & B100);
}
That’s a perfect merge of the original code and the code needed to control a
debounced button. As usual, we initialize all pins we use: three output pins
for the LEDs and one input pin for the button. We also initialize the random
seed, and in the
loop
function we wait for new button presses. Whenever the
button gets pressed, we roll the die and output the result using the LEDs.
We’ve replaced the reset button with our own!
Now that you know how easy it is to add a pushbutton, we’ll add another one
in the next section to turn our simple die into a game.
Chapter 3. Building Binary Dice • 54
report erratum • discuss
www.it-ebooks.info
 Loading...