EasyManuals Logo

Arduino uno User Guide

Arduino uno
27 pages
To Next Page IconTo Next Page
To Previous Page IconTo Previous Page
Page #11 background imageLoading...
Page #11 background image
11
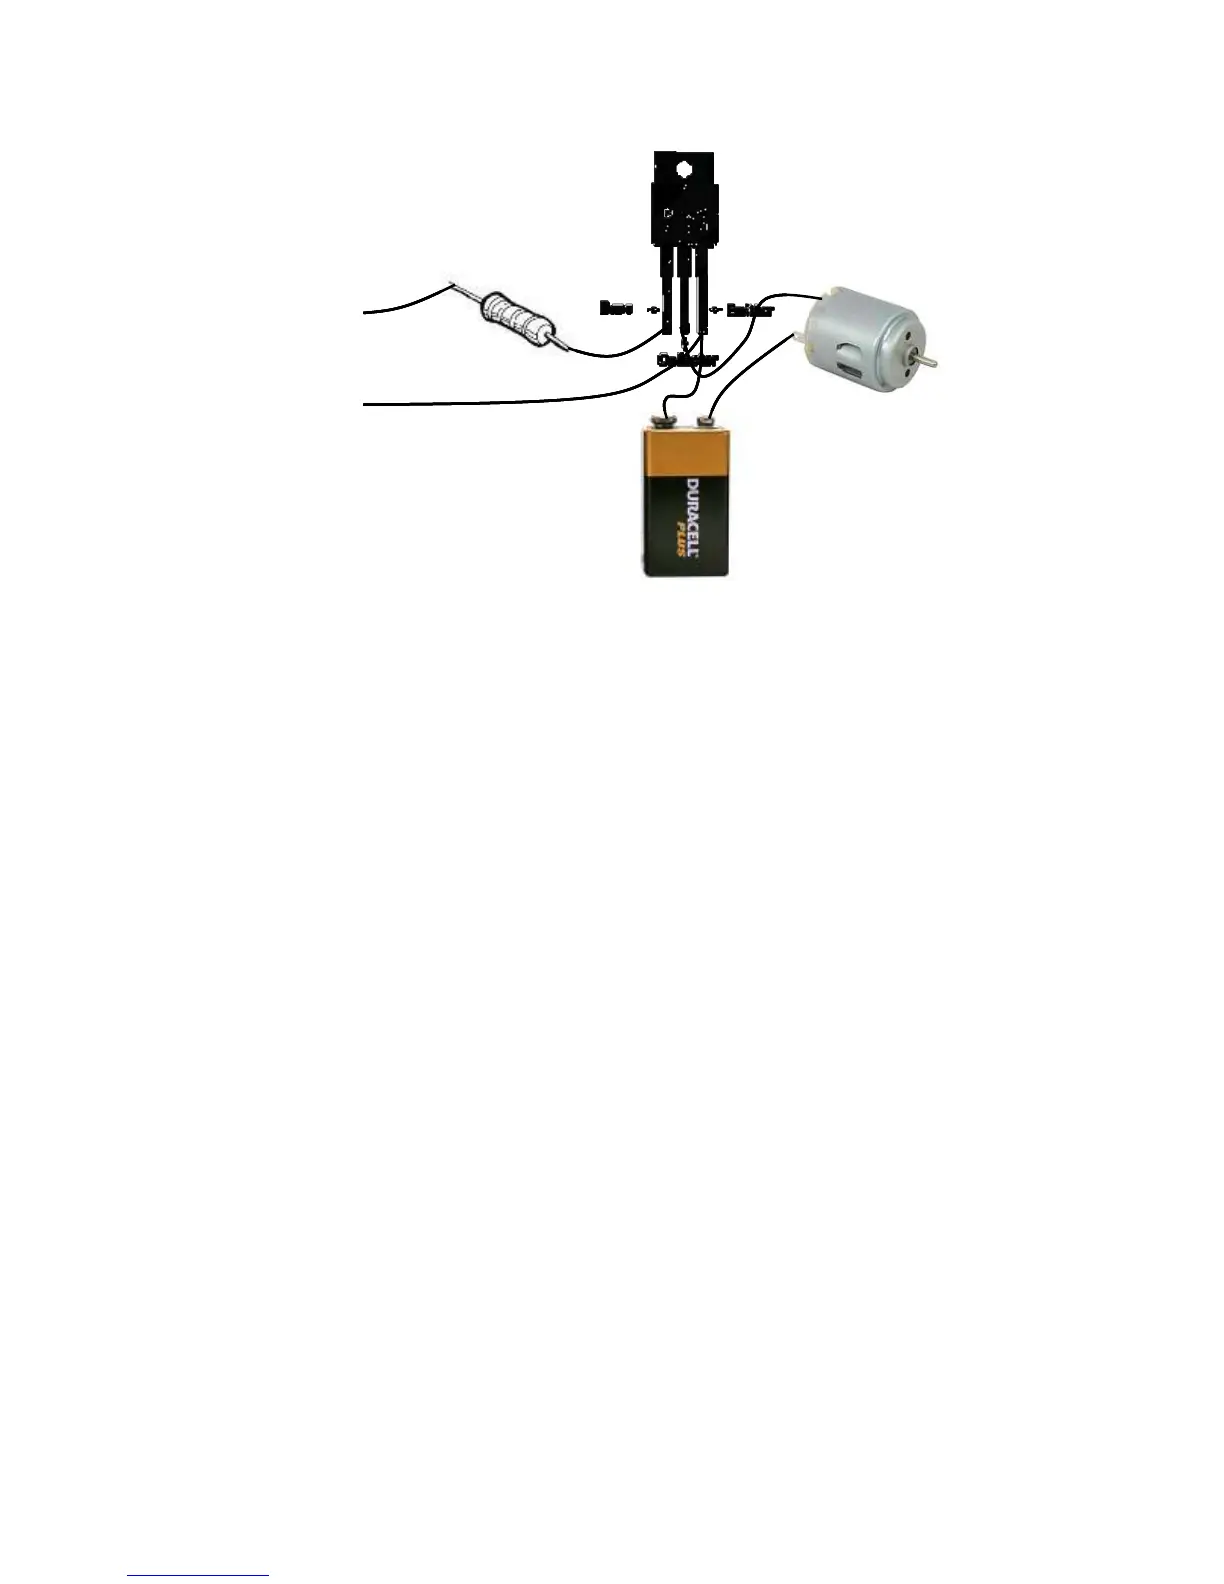
Pin 2 can be any digital I/O pin on your Arduino. Connect the minus of the battery to the emitter
of the transistor (E pin) and also connect the emitter of the transistor to Gnd on the Arduino
board.
To check if things are working, take a jumper wire and short the collector to the emitter pins of
the transistor. The motor should turn on. Next, disconnect the 1K resistor from pin 2 and jumper
it to +5V. The motor should turn on. Put the resistor back into pin 2 and run the following test
program:
void setup()
{
pinMode(2,OUTPUT);
digitalWrite(2,HIGH);
delay(1000);
digitalWrite(2,LOW);
}
void loop()
{}
The motor should turn on for 1 second.
Pin 2
Gnd
Pin 2Pin 2
Gnd
Pin 2

Other manuals for Arduino uno

Questions and Answers:

Question and Answer IconNeed help?

Do you have a question about the Arduino uno and is the answer not in the manual?

Arduino uno Specifications

General IconGeneral
Form factorArduino
CertificationRoHS, FC, CE
Processor model-
Processor frequency- MHz
Microcontroller modelATmega328
Microcontroller frequency16 MHz
DC input voltage7-12 V
Operating voltage5 V
DC current per I/O pin40 mA
Flash memory0.032 MB
Maximum internal memory- GB
SRAM (Static Random Access Memory)2 KB
EEPROM (Electrically Erasable Programmable Read-Only Memory)1 KB
Wi-FiNo
Number of analog I/O pins6
Number of digital I/O pins14
Weight and Dimensions IconWeight and Dimensions
Board dimensions53.4 x 68.6 mm

Related product manuals