Do you have a question about the Argos 1926925 and is the answer not in the manual?
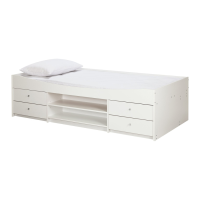
Identifies the product as a white high sleeper, 190x90cm, with its physical dimensions.
Instruction to read assembly instructions fully before starting and contact details.
Lists all hardware and small parts required for assembly, identified by letters.
Details the necessary tools for the assembly process, such as screwdrivers and hammer.
Attach dowels to endrails, bedside, and safety rails using specified parts.
Attach legs to endrails using assembly screws and Allen key. Repeat for both sides.
Repeat the leg attachment process to the endrails for structural integrity.
Connect bedside and safety rails to end boards using dowels and barrel nuts.
Attach remaining bedside and safety rails, ensuring correct orientation of parts.
Attach treads to ladder sides with screws and secure bracket to ladder side.
Connect ladder sides to legs, safety rails, and bedside using specified hardware.
Place the first slat centrally and then additional slats with a specific distance.
Position and fasten the remaining slats with a uniform spacing between them.
Attach safety lists and wall bracket to legs for stability and safety compliance.
| Brand | Argos |
|---|---|
| Model | 1926925 |
| Category | Indoor Furnishing |
| Language | English |