Fig.G
6. USING THE SIGHT LIGHT
The sight light(8) allows you to keep a clear view
under less illuminated circumstances. To turn on
the light simply press the on/off switch. When you
release the on/off switch, the light will go out.
7. DRILLING
When drilling into a hard smooth surface, use a
center punch to mark the desired hole location.
This will prevent the drill bit from slipping off
center as the hole is started. Hold the tool rmly
and place the tip of the bit at the point to be
drilled. Depress the switch trigger to start the tool.
Move the drill bit into the workpiece, applying only
enough pressure to keep the bit cutting. Do not
force or apply side pressure to elongate a hole.
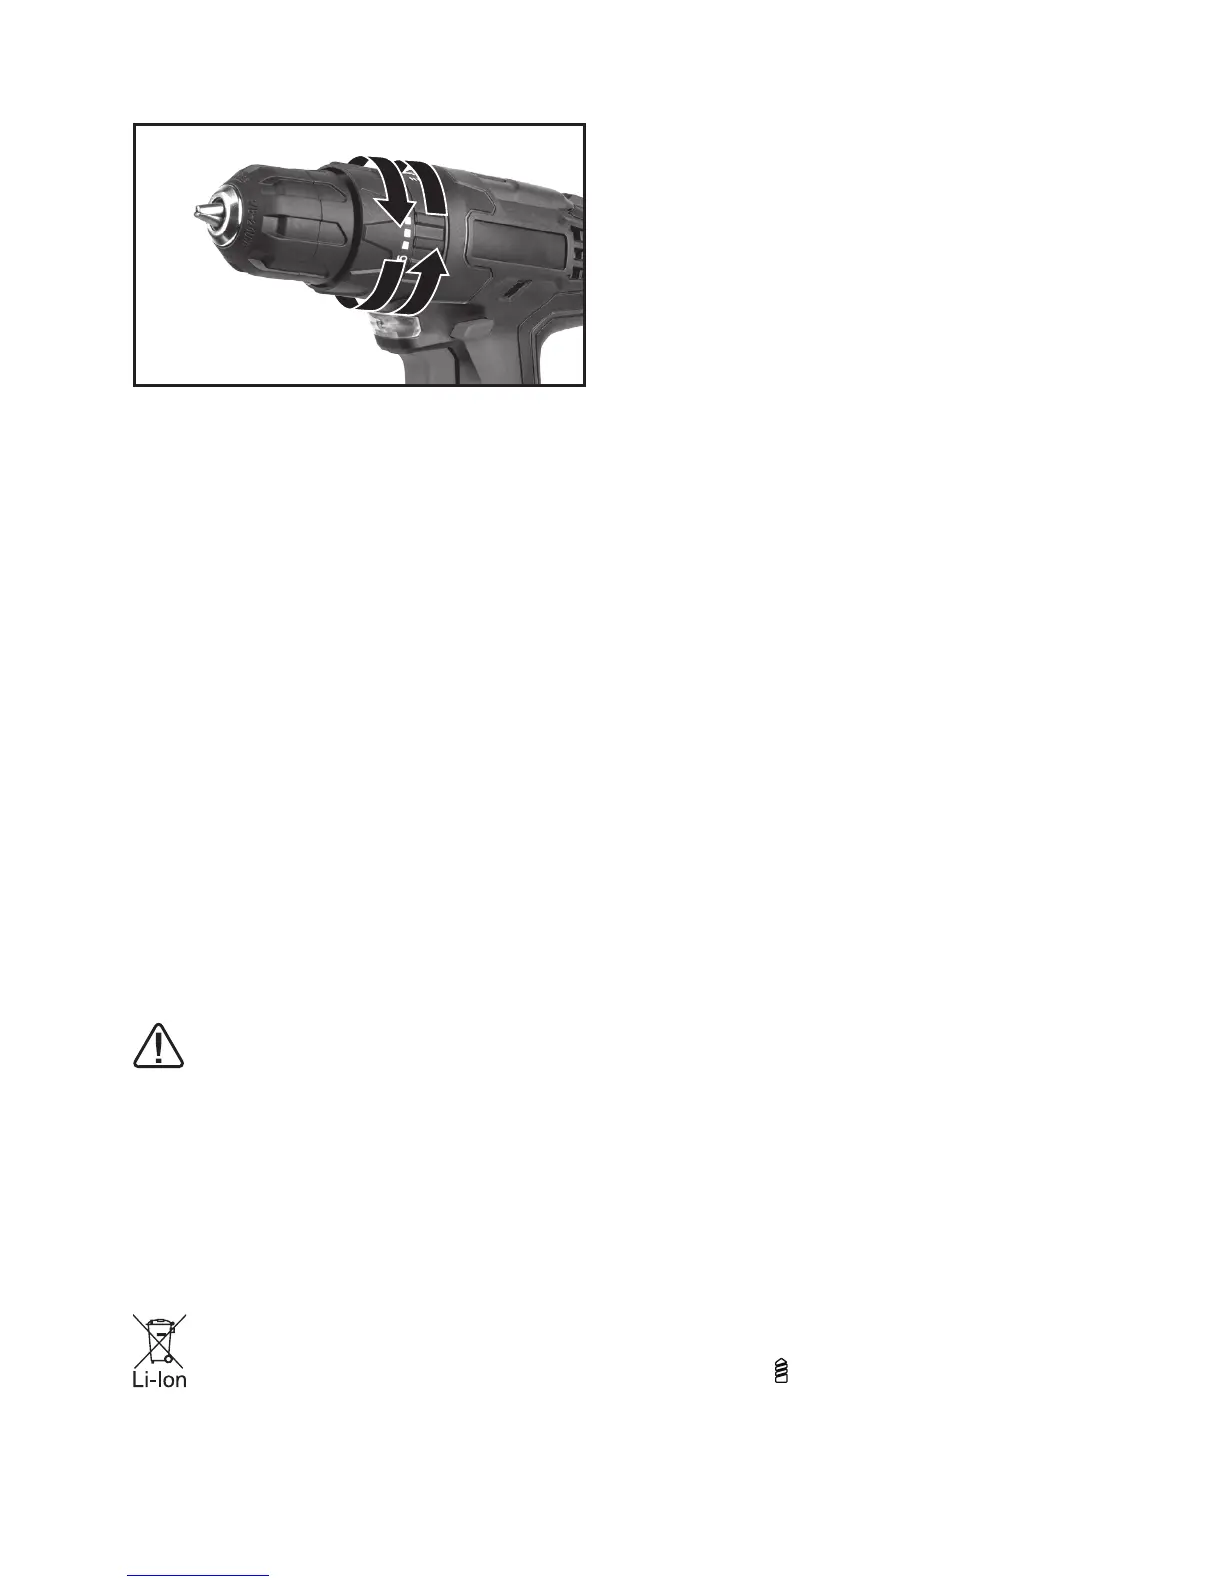
If you want to activate the drill function (For
drilling metal wood or plastic), turn the torque
adjustment ring on the drill position. If you want
to activate the impact function(For masonry or
concrete), turn the torque adjustment ring on the
hammer position.
Tungsten carbide drill bits should
always be used for concrete and
masonry. When drilling in metal, only use
HSS drill bits in good condition. Always use a
magnetic bit holder (not included) when using
short screwdriver bits. When screw-driving,
apply a small quantity of liquid soap or similar
to the screw threads to ease insertion.
8. DISPOSAL OF AN EXHAUSTED BATTERY
PACK
To preserve natural resources, please
recycle or dispose of the battery pack
properly. This battery pack contains
Lithium batteries. Consult your local waste
authority for information regarding available
recycling and/or disposal options. Discharge your
battery pack by operating your drill, then remove
the battery pack from the drill housing and cover
the battery pack connections with heavy-duty
adhesive tape to prevent short circuit and energy
discharge. Do not attempt to open or remove any
of the components.
9. OVERLOAD PROTECTION
When overloaded, the motor comes to a stop.
Relieve the load on the machine immediately
and allow cooling for approx. 30 seconds at the
highest no-load speed.
10. TEMPERATURE DEPENDENT OVERLOAD
PROTECTION
When using as intended for the power tool cannot
be subject to overload. When the load is too high
or the allowable battery temperature of 75°C is
exceeded, the electronic control switches off the
power tool until the temperature is in the optimum
temperature range again.
11. PROTECTION AG AINST DEEP
DISCHARGING
The Li-ion battery is protected against deep
discharging by the “Discharging Protection
System”. When the battery is empty, the machine
is switched off by means of a protective circuit:
The inserted tool no longer rotates.
PROBLEM SOLUTION
1. WHY DOES THE DRILL NOT TURN ON
WHEN YOU PRESS THE SWITCH?
The forward/reverse rotation control, which is on
top of the trigger, is positioned in the lock function.
Unlock the forward/reverse rotation control by
putting it into the required rotation position. Push
the trigger and the drill will start to rotate.
2. THE DRILL STOPS BEFORE THE SCREW IS
COMPLETELY TIGHTENED. WHY?
Verify the torque position of the torque adjusting
ring, you can nd the torque-adjusting ring
between the chuck and the drill body. Position
1 is the lowest torque (screw driving force) and
position 21 is the highest torque (screw driving
force). Position is for drill operation. Regulate
the torque adjusting ring to a higher position to
reach the best result.