e2v technologies (uk) limited 2014 118707 P7030UM version 6, page 5
1.2 Getting Started
• In the case with a standard camera are the following:
o Camera with handle and side straps.
o Two rechargeable battery packs.
o Battery charger with mains leads.
o Battery charging shoe.
o Neck strap.
o This manual
o Remote control.
o CD with customer software and datasheets.
o USB Data lead.
Customer configured cameras will only be accompanied by the items specified
with the order.
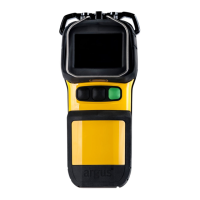
• The rechargeable batteries should be fully charged before use (see section 3).
Fit the battery into the compartment on the top of the camera and push down
until a click is heard. To remove the battery, press the battery release button
and the battery will eject and can be removed.
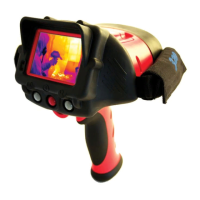
• Turn on the camera using the middle red button on the rear. A RED light will be
illuminated to show the camera is powered. A long (3 second) press is required
to switch the camera off. This is 6 seconds if the button menu is in use.
• After switch-on and for approximately 5 seconds, a start-up screen will be
displayed on the camera screen while the system performs a self-test routine.
This start-up screen is end-user configurable.
• The thermal image, with battery status display, training bar, time and date and
ambient and spot temperature and spot target markings, will appear.
• While the Argus
®
4 is in operation, the camera has to recalibrate to maintain its
performance and image quality. This is achieved by an internal shutter that
“freezes” the image; this in turn allows the electronics to recalibrate and
redisplay the image. This recalibration will only occur when necessary due to a
change in scene or internal temperatures. The freezing of the image will last for
less than 0.2 seconds.
• The Argus
®
4 camera can be used with or without the handle. To remove the
handle, spin the large thumbwheel anti-clockwise until the handle detaches from
the camera body. Refitting is the reverse of this, making sure that the locating
pip is positioned correctly.