New Valves for Replacement of Existing Equipment
New valves are tested, sealed and packaged at the time of manufacture. A new valve can be applied
provided it is still in its original packaging and tested within 6 months of the installation date. A valve
with a test date older than 6 months must have the O-rings replaced and retested.
Safety relief valves are spring-loaded devices that can store a significant amount of energy.
Assembly and disassembly must be performed by trained, qualified personnel.
Disassembly Procedure
Disassembly of the Top Guide and O-ring Retainer
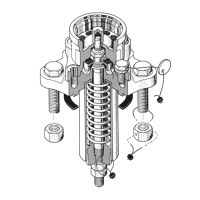
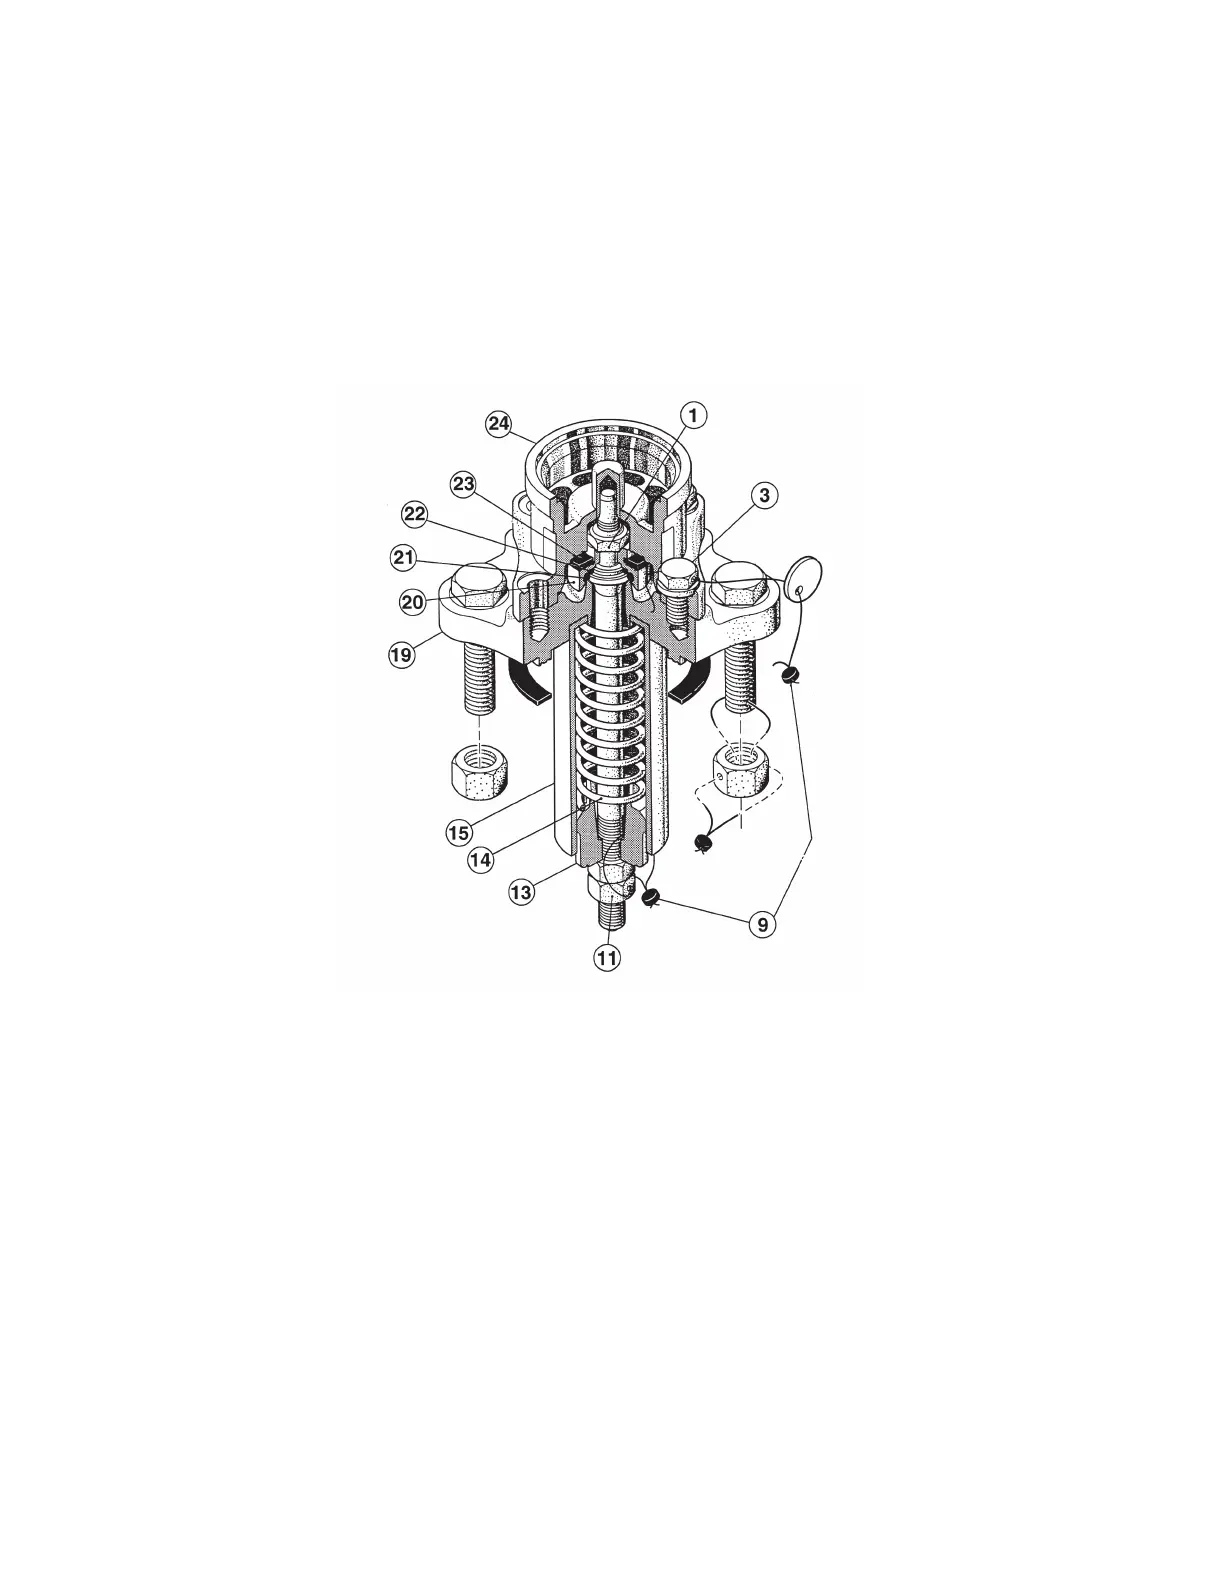
1. Remove the 2 seal wires, items #9.
2. Remove the four bolts, item #3, securing the top guide, item #24 to the valve body, item #19.
3. Lift off the top guide, item #24. It may be necessary to loosen the guide by tapping with
a soft-faced hammer.
4. Peel off the bumper washer, item #23.
5. Using two wrenches, one applied to the hex on the retainer, item #20, and the other to the
locknut, item #1, loosen and remove the locknut.
6. Remove the O-ring retainer with the use of a wheel puller or gently prying under and around the
lip with a screwdriver.
7. Using a packing removal pick, remove the O-rings, items #21 & 22, from the retainer taking
care not to mar the O-ring grooves.
8. Lay the valve on its side. Using a packing removal pick or a thin blade screwdriver, pry the
gasket, if attached, from the gasket face. Take care not to mar the sealing surface.
American Railcar Industries, Inc.