FOR MODELS: JGI, JGM, JGN, JGP AND JGQ SECTION 5 - MAINTENANCE
9/08 PAGE 5-5
b. Pry connecting rod up, use an appropriate bar to pry against the frame and
on an eye bolt installed in the rod, until needle on the face of the dial indica-
tor stops moving. repeat to be sure the reading is accurate.
6. Check thrust clearance as follows:
a. As shown in Figure 5-4 on page 5-6, install a magnetic stand on the side of
crankshaft web, with a button type dial indicator placed against the side of
the connecting rod.
b. Use an appropriate pry bar to pry against the crankshaft web and thrust con-
necting rod (do not pry on rod cap) tight toward dial indicator. Release pres-
sure on pry bar. Hold rod in place with minimum pressure to keep it from
moving. Set dial indicator to zero. Then pry on the connecting rod to thrust it
tight in the opposite direction and release pressure. Hold rod in place with
minimum pressure to keep it from moving to determine thrust clearance.
Repeat to be sure reading is accurate.
7. Be sure to remove eye bolts, magnetic stands, dial indicators and pry bars after
taking readings.
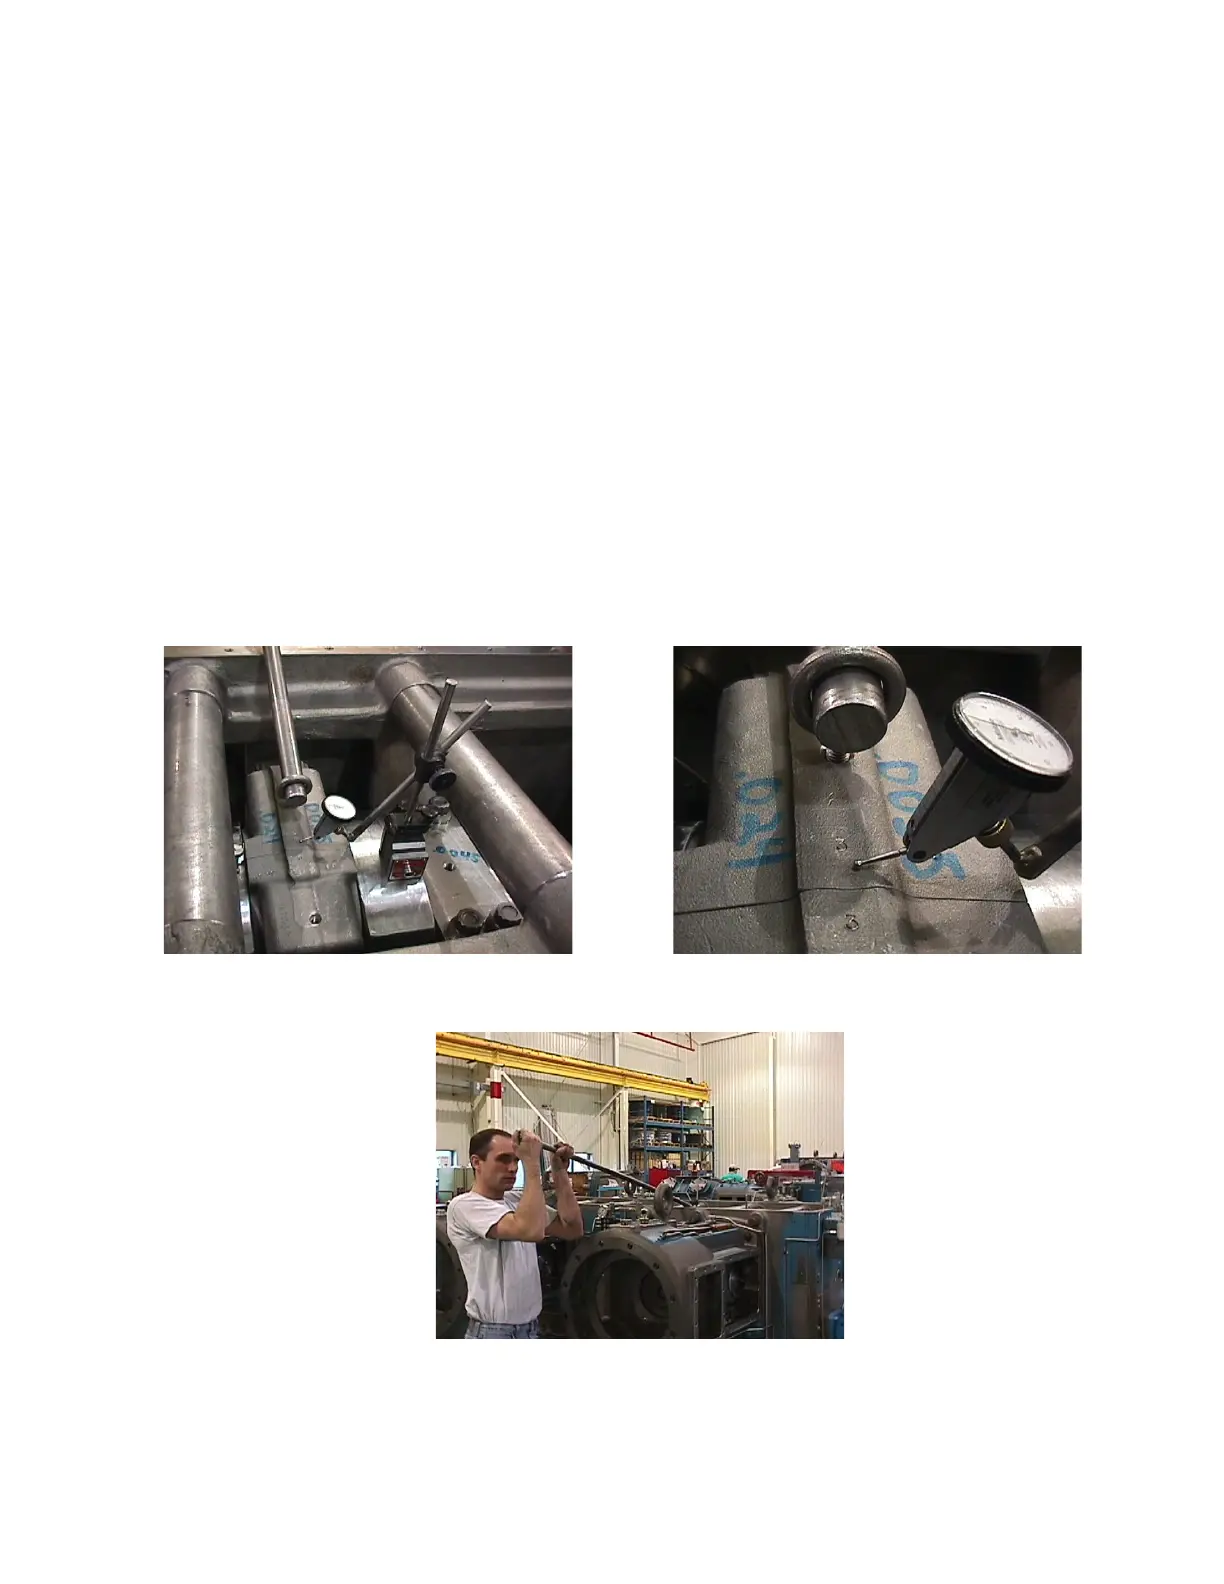
FIGURE 5-3 MEASURING CONNECTING ROD BEARING VERTICAL JACK
C
LEARANCE - TYPICAL
Dial Indicator Magnetic Stand Placement on Top of
Crankshaft Web, & Showing Eye Bolt and Pry Bar
Using Pry Bar to Check Jack Clearance
Needle Type Dial Indicator Placement
on Top of Connecting Rod
 Loading...