Do you have a question about the Ariens 920010 and is the answer not in the manual?
Manuals in languages other than English can be obtained from your dealer or www.ariens.com.
Read manuals carefully and completely before operation for safety instructions.
Manual specific to the engine, included with unit for service recommendations.
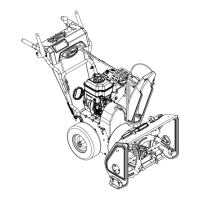
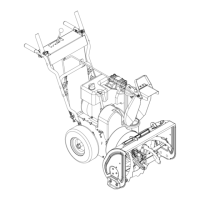
Location of Model and Serial numbers for ordering parts or service inquiries.
Practice safe working precautions, follow safety messages, and be alert to unsafe conditions.
Provide manual and training to anyone using the unit other than the original purchaser.
Replace missing or damaged safety decals. Refer to figure for locations.
Understand and obey safety alert symbols and signal words for immediate attention.
Read, understand, and follow all safety practices. Remove key before service.
List of items included in the package for assembly.
List of tools needed for assembly.
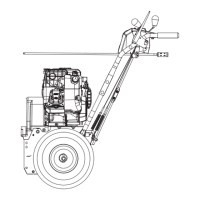
Instructions for unfolding and positioning the handlebars.
Steps for greasing, removing hardware, and installing the discharge chute.
Instructions for installing the chute crank into the control panel.
Procedure to check if both clutch levers function correctly together.
Check and adjust tire pressure to the recommended level on the sidewall.
Check engine oil level as per manual for safe operation.
Refer to Engine Manual for proper fuel type and tank capacity.
Procedure to run in the attachment belt for 15 minutes to adjust it.
Explains how the attachment and traction clutches engage and disengage together.
How to engage and disengage the traction drive clutch for propelling the unit.
How to engage and disengage the attachment clutch for the auger/impeller.
How to position the speed selector for forward and reverse travel.
Explains choke positions for starting and normal operation.
Importance of the fuel shut-off valve for transporting and storing the unit.
How the throttle controls engine speed for different operating conditions.
How to use the snow clean-out tool to clear blockages safely.
How to use the axle lock pin to lock or unlock wheels for traction or turning.
Positioning the deflector for safe snow discharge.
How to use the electric starter to start the engine.
How the scraper blade maintains contact with the surface and prevents housing damage.
How to adjust skid shoes to control scraper blade distance from the ground.
Use fuel stabilizer for extended storage to prevent fuel system deterioration.
Perform checks for frozen impeller, clutch function, interlock, and fluid levels.
How to stop the unit and engine quickly in an emergency situation.
Step-by-step instructions for starting the engine using the recoil starter.
Instructions for starting the engine using the electric starter.
Procedure to safely stop the engine and unit after operation.
Recommended schedule for performing maintenance tasks on the unit.
Verify the dual handle interlock mechanism functions correctly.
Ensure all hardware is tightened properly for safe operation.
Verify auger/impeller and wheels stop within specified time after levers are released.
Check engine crankcase oil level every 5 hours for safe operation.
Change oil after 2 hours, then every 25 hours of operation.
Check auger gearcase oil level each season or every 25 hours.
Adjust scraper blade to compensate for wear to prevent housing damage.
Adjust skid shoes for proper ground clearance based on surface conditions.
Use only Ariens shear bolts for replacement to prevent damage and voiding warranty.
Adjust deflector tension using the wing knob for desired snow throw direction.
Tighten nut on carriage bolt to increase tension if chute does not stay in position.
Adjust speed selector pivot pin for proper forward and reverse speeds.
Steps to remove the attachment drive belt from the engine sheave.
Steps to replace the attachment drive belt, including finger clearance checks.
Remove slack from the attachment clutch cable by adjusting the barrel.
Check clearance of the idler arm roller for proper belt tension.
Measure and adjust spring extension for proper clutch operation.
Check brake pad contact with belt for proper stopping function.
Ensure belt finger is positioned correctly relative to the belt.
Steps to remove and replace the friction disc assembly.
Store unit in a cool, dry protected area. Close fuel shut-off valve.
Clean unit thoroughly, lubricate, and touch up paint before long-term storage.
Treat fuel system with stabilizer for extended storage.
Common causes and corrections for engine starting issues.
Common causes and corrections for engine stopping unexpectedly.
Troubleshooting for issues preventing forward or reverse movement.
Common causes and corrections for poor snow throwing performance.
Warranty terms for battery packs and subassemblies.
Warranty for genuine Ariens/Gravely service parts and accessories.
Customer responsibilities, limitations, and exclusions related to the warranty.
| Brand | Ariens |
|---|---|
| Model | 920010 |
| Category | Snow Blower |
| Language | English |