Do you have a question about the Arkray GLUCOCARD Shine Connex and is the answer not in the manual?
Explains how the meter uses Bluetooth to connect to a smartphone.
Information about Bluetooth and other trademarks.
Compliance with FCC radiation exposure limits.
Defines the purpose and intended use of the blood glucose monitoring system.
Details technical specifications of the meter and its components.
Lists the environmental operating conditions for the meter.
Describes the contact bars on the test strip.
Explains the function of the confirmation window.
Indicates the area for applying the blood sample.
Explains the function of the data port for transferring data.
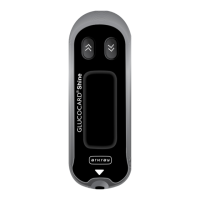
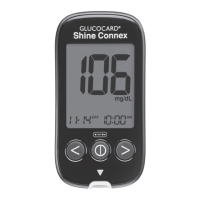
Describes what the meter's display shows.
Explains the function of the navigation and control buttons.
Explains indicators for memory, PP2 alarm, Bluetooth, mute, and control solution.
Covers main test results, alarms, battery, insertion readiness, and date/time.
Details flags indicating test context like pre-meal or fasting.
Describes how to enter the settings mode on the meter.
Guides through pairing the meter with a smartphone via Bluetooth.
Instructions for setting the year on the meter.
Instructions for setting the month on the meter.
Instructions for setting the date on the meter.
How to select 12-hour or 24-hour time format.
Instructions for setting the hour on the meter.
Instructions for setting the minute on the meter.
How to enable or disable the test strip expiration indicator.
How to enable the hypoglycemia indicator and set a threshold.
How to enter the expiration date setting mode.
Instructions to set the expiration year for test strips.
Instructions to set the expiration month for test strips.
Instructions for inserting a test strip for control solution testing.
How to flag a control solution test result.
What happens after applying the control solution.
How to compare test results with the control range.
Safety precautions for using lancets.
Tips on sample site selection and skin depth.
Instructions for washing hands and sample site.
How to remove the lancing device tip.
Instructions for inserting a new lancet.
How to set the puncture depth on the lancing device.
How to cock the lancing device.
How to insert a test strip into the meter.
How to obtain a blood sample using the lancing device.
How to apply the blood sample to the test strip.
Describes the test result display and data transmission.
How to attach flags to indicate test situations.
How to unscrew the lancing device cap.
How to place the protective cover on the lancet.
How to turn on the meter to view averages.
How to navigate through different average periods.
How to view pre-meal average blood glucose results.
How to view post-meal average blood glucose results.
How to view fasting average blood glucose results.
How to turn on the meter to view test results.
How to scroll through past test results.
How to set the post-meal alarm (PP2 Alarm).
How to turn off the PP2 alarm.
How to set time-based alarms.
How to adjust the hour and minute for time alarms.
How to set multiple alarms and finish the setup.
Procedures for cleaning and disinfecting the meter and device.
Performing a control solution test after cleaning the meter.
Identifying signs of meter or lancing device deterioration.
Safety advice on cleaners and preventing fluid ingress.
Guidelines for meter storage and handling.
Lists error messages and their meanings.
Provides actions to resolve error messages.
Lists more error messages and their meanings.
Provides actions for resolving persistent error messages.
Lists common problems encountered with the meter.
Provides solutions for common meter problems.
Details the accuracy of the blood glucose monitoring system.
Precision results within a single testing run.
Precision results between different testing runs.
Details the warranty period and terms for the meter.
Steps to obtain warranty service for the meter.
| Brand | Arkray |
|---|---|
| Model | GLUCOCARD Shine Connex |
| Category | Blood Glucose Meter |
| Language | English |