English
- 17 -
4. Start-up procedure
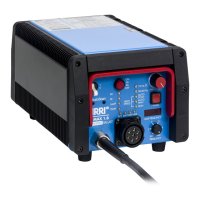
The operating controls and cable connections are arranged on the front panel
(see fig. 2, page 25), the DMX controls and connectors at the rear panel of the
ballast (see fig. 3, page 25).
4.1 Energizing System
Check ON/OFF Switch to be in "OFF"-position.
Connect the properly checked daylight lamphead with head to ballast cable
to the electronic ballast
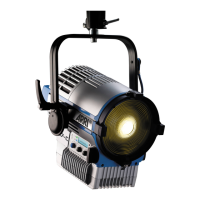
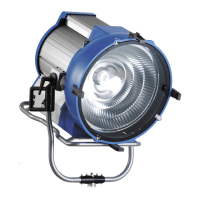
In 575 W lampheads (see fig. 1a, page 23) only 575 W lamps must be used.
In 800 W lampheads (see fig. 1b, page 23) only 800 W lamps must be used.
In 1200 W lampheads (see fig. 1c, page 24) only 1200 W lamps must be
used.
In suitable 1800 W lampheads (see fig. 1d, page 24) both 1200 W and 1800
W lamps may be used. The inserted lamp is detected electronically after
starting the EB.
Connect the electronic ballast to the power supply source.
Ensure main circuit breaker is in "ON" position.
Check earth protection: If correct, the green LED "PE" on front plate
illuminates. If not, disconnect EB from mains (pull out line plug) and check
power supply and socket (Ref. 2.2. on page 14).
Set ON/OFF Switch to "ON"-position as well on the EB as on the head.
Lamp will ignite after about 5 sec.
If the "RC" LED is lit, the ballast is switched on by remote control. In this
case the ballast can not be switched off by use of the ON/OFF switch and
the dimming potentiometer is disabled.
The yellow LED "LAMP" on front plate is lit after successful ignition.
The correct lamp power is always detected automatically
Above to the lamp connector four LEDs show the current power mode. The
power mode depends on the connected lamphead and with 1800 W
lampheads additionally on the inserted lamp..
With 575 W , 800 W and 1200 W lampheads the power mode is determined
by the detected lamphead. The according LED flashes during the warm-up
period to indicate that the dimming function is disabled.
In case of a suitable 1800 W luminaire, the inserted lamp type (1200 W or
1800 W) is detected electronically. The ballast always starts in 1200 W
mode. The electronic lamp detection is active for the first 3 minutes after
ignition. During this period, the corresponding Power LED is flashing and the
dimming function is disabled. If a 1800 W lamp is detected, the ballasts
switches to 1800 W mode. After warming up the recognized nominal lamp
power is fixed, the corresponding Power LED lights up permanently and the
dimming function is enabled again.
4.2 Control of light intensity
After warming up, the light intensity of the metal halide daylight-lamp may be
controlled by the dimming potentiometer (stepless). The nominal lamp power
can be adjusted between 50 - 100% (left stop = min., right stop = max. of
power).
If the ballast is controlled by remote control ("RC" LED is lit) the dimming
potentiometer at the front plate is disabled.
During the first three minutes after ignition of the lamp the dimming function is
disabled! The power mode indication LED is flashing in this period.
In the High Speed operating modes (see 4.3, page 18) the desired dimming
value should always be set before searching for a non-resonant frequency.
During an automatic scan for the beginning frequency in High Speed mode
"AUTOSCAN", a change of the dimming value will restart the scan process!
 Loading...