6
BACK TO
INDEX
ASSEMBLY
1 MAKE SURE YOU HAVE READ ALL SAFETY INSTRUCTIONS.
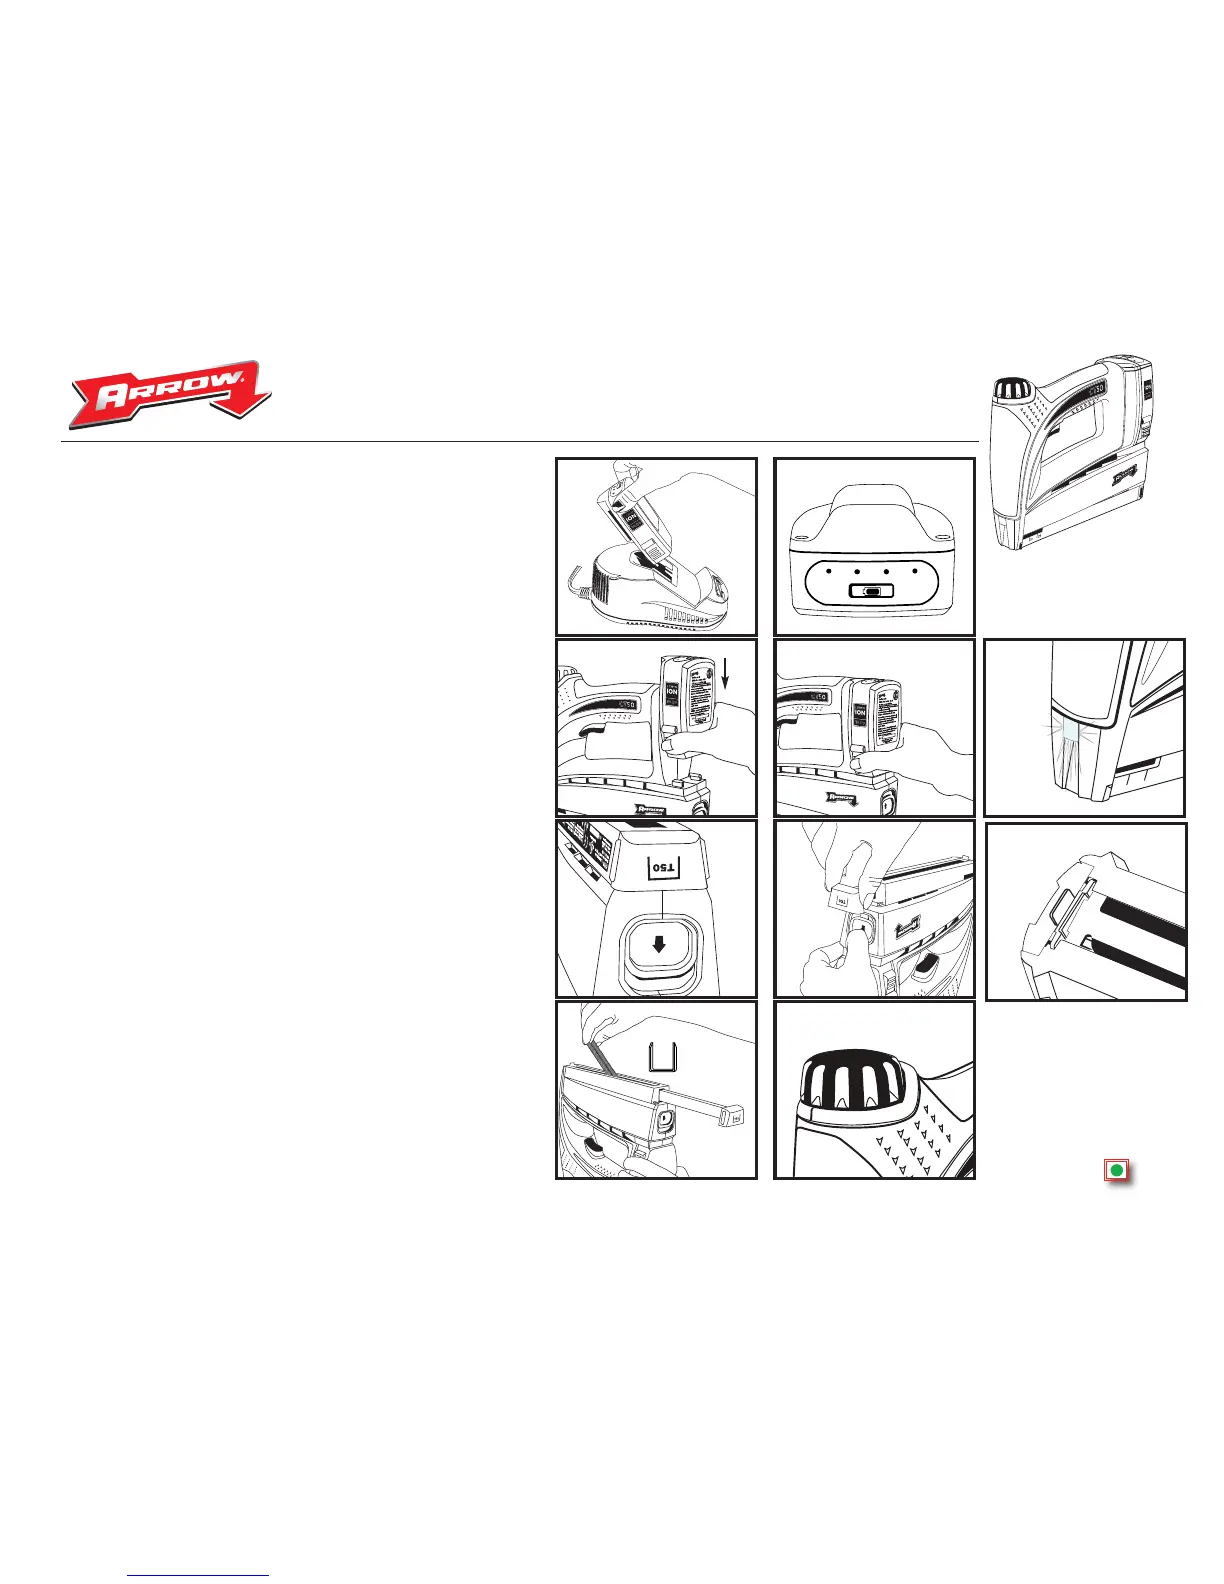
2 Before you use your new tool, you will need to fully charge the battery. Plug
battery Charger into 120V outlet. Slide battery onto charger as shown in figure 1.
until red charging light on charger comes on. Charging times may vary, depending
on remaining charge in battery. When battery is fully charged, the green light on the
charger will come on.
3 Battery Meter. The battery supplied with your CT50™ cordless staple gun has a
convenient battery meter located at the top as shown in figure 2. There are 4 lights
each of which indicate approximately a 25% charge. When the red button on top of
the battery is pushed in, the green lights will come on indicating an approximate
amount of charge remaining in the battery.
4 Install battery on tool. Slide the battery onto the tool as shown in figure 3. Make
sure battery locks into position and is fully seated on tool figure 4. Your tool is now
fully assembled and ready for use.
Fig.1
Fig.2
Fig.3
Fig.4
OPERATION
1 Loading your tool. When loading tool, battery should be removed to avoid risk of
accidental firing. The CT50™ accepts 2 full strips of Arrow T50
®
staples in all 6 sizes.
a. Press Staple Pusher Release in direction of arrow as shown in figure 5. This will
release the staple pusher assembly figure 6. which will easily slide outward until it
reaches it’s stop point. Do not try to force the pusher assembly out completely.
b. Insert up to 2 full strips of staples into drop-in staple chamber with staple points
facing up as shown in figure 7.
c. Slide staple pusher assembly inward until it locks in place.
d. Re-install battery. Your CT50™ staple gun is now ready to fire.
2 Shooting staples. The CT50™ cordless staple gun has a depth of drive adjustment
dial figure 8. making it easy to switch between hard & soft materials. Turn clockwise
for more force(IE: for use with harder woods), and turn counter clockwise for less
driving force. (IE: for use with softer woods).
3 Guide light. On the front of the CT50™ is a LED guide light figure 9. that will be
activated upon pressing the trigger. Your CT50™ has a safety switch at the staple exit
point figure 10. that will prevent your tool from firing when not in contact with a work
surface. To properly use your LED guide light, press trigger before tool makes contact
with your work surface. After making contact with the work surface, release trigger,
then press trigger again to fire a staple. You will find this helpful when firing staples
into tighter corners and poorly lit areas.
Fig.6
Fig.7
Staples go
in point up
Fig.8
Fig.5