2 AP25 Flush Mount Sleeve | Installation Guide
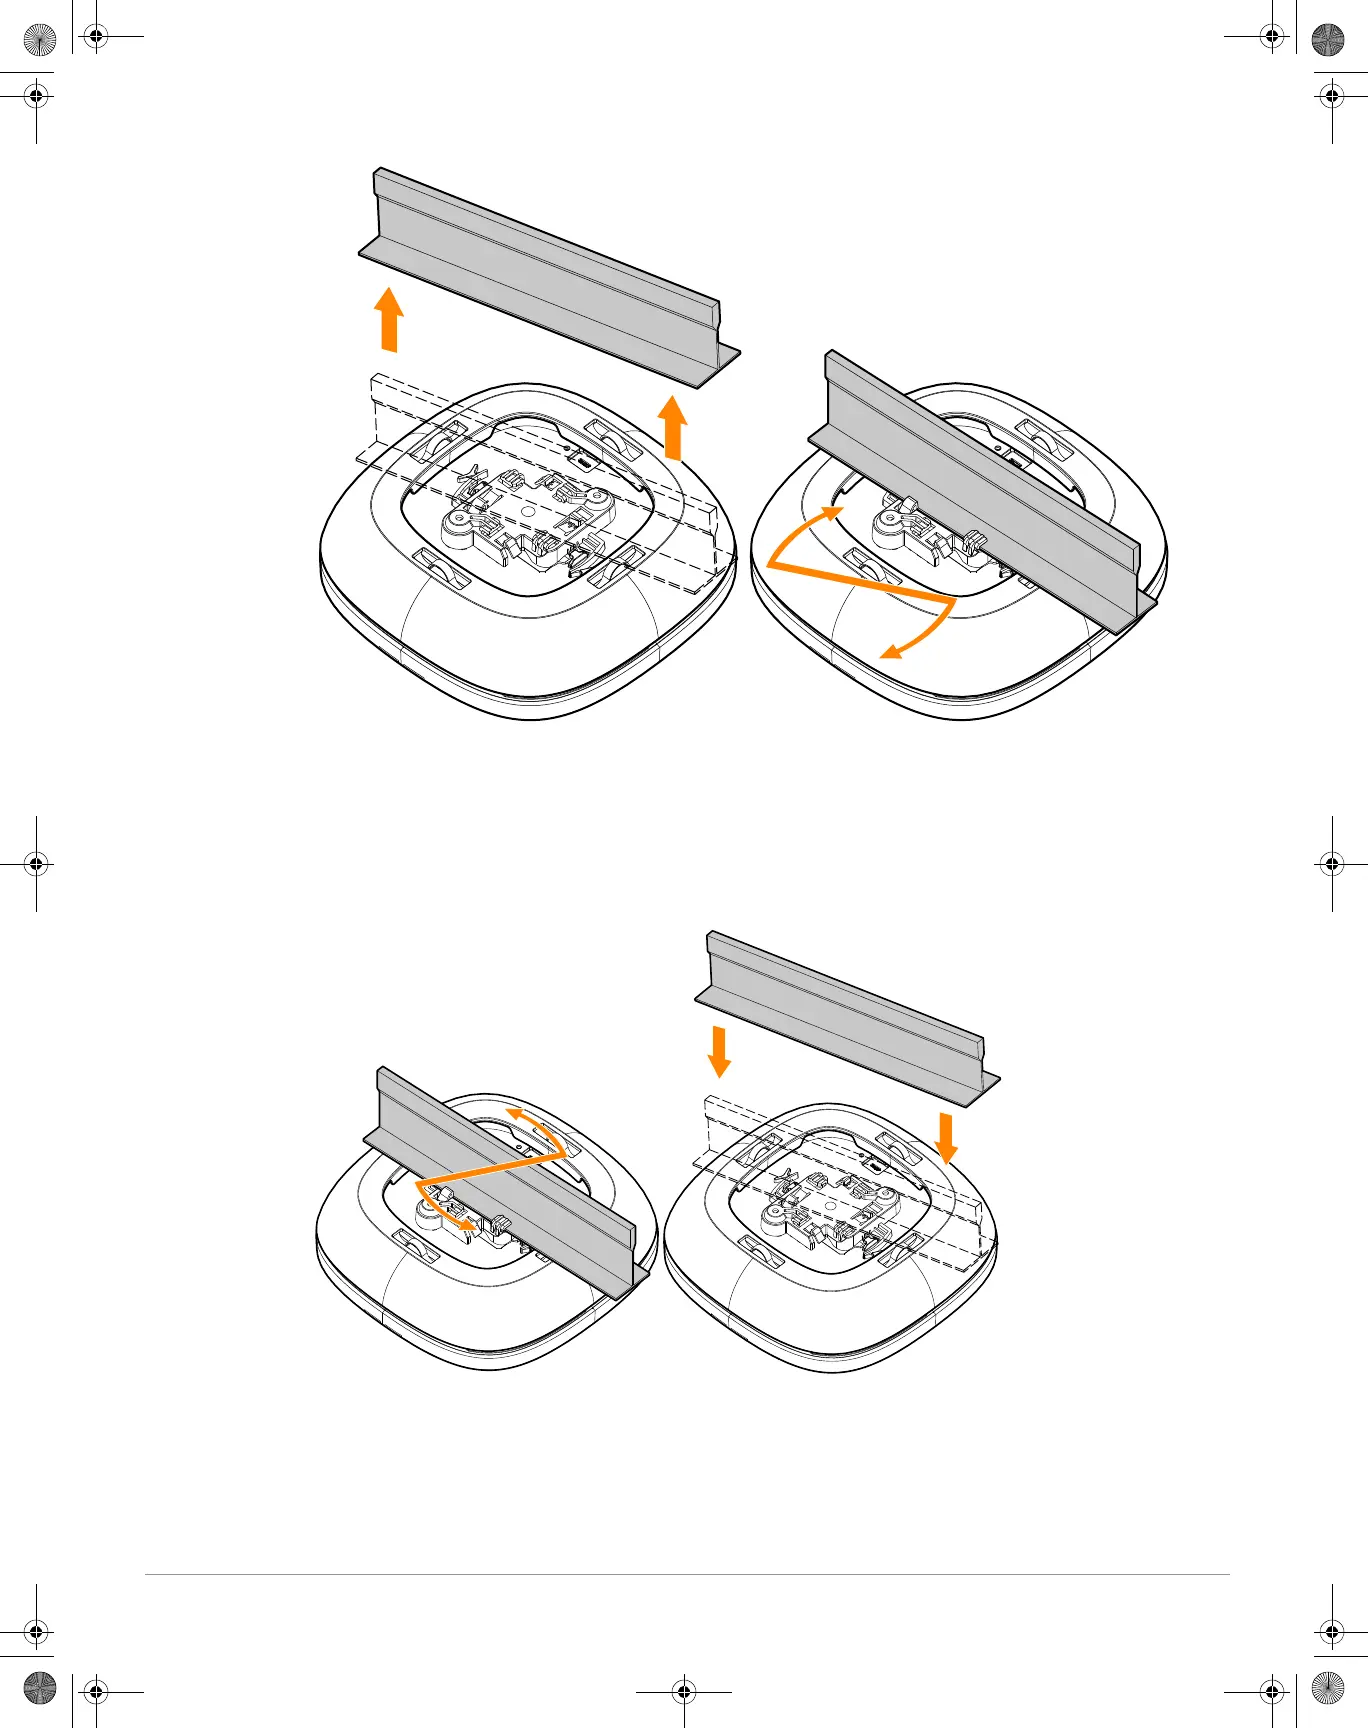
Figure 2 Installing the Access Point (with Sleeve) to a Ceiling Rail
Removing the Access Point (with Sleeve) from a Ceiling Rail
1. Turn the access point (with sleeve) by hand counter-clockwise until the mounting tabs of the mount kit
disengage from the ceiling rail. See Figure 3.
2. After the access point (with sleeve) is removed from the ceiling rail, pull the sleeve off from the access point
by hand.
Figure 3 Removing the Access Point (with Sleeve) from a Ceiling Rail
Installing the Access Point (with Sleeve) to a Wall
1. Install the mount bracket to the wall as per the installation instructions provided with the wall anchors.
2. Align the access point (with sleeve) with the mount bracket, placing the access point so that it’s mounting tabs
are at an angle of approximately 30 degrees to the mount bracket.
3. Pushing towards the wall, rotate the access point (with sleeve) clockwise until it clicks into place. See Figure 4.
AP25 Flush Mount Sleeve IG.fm Page 2 Wednesday, January 5, 2022 5:13 PM