3
LEDs
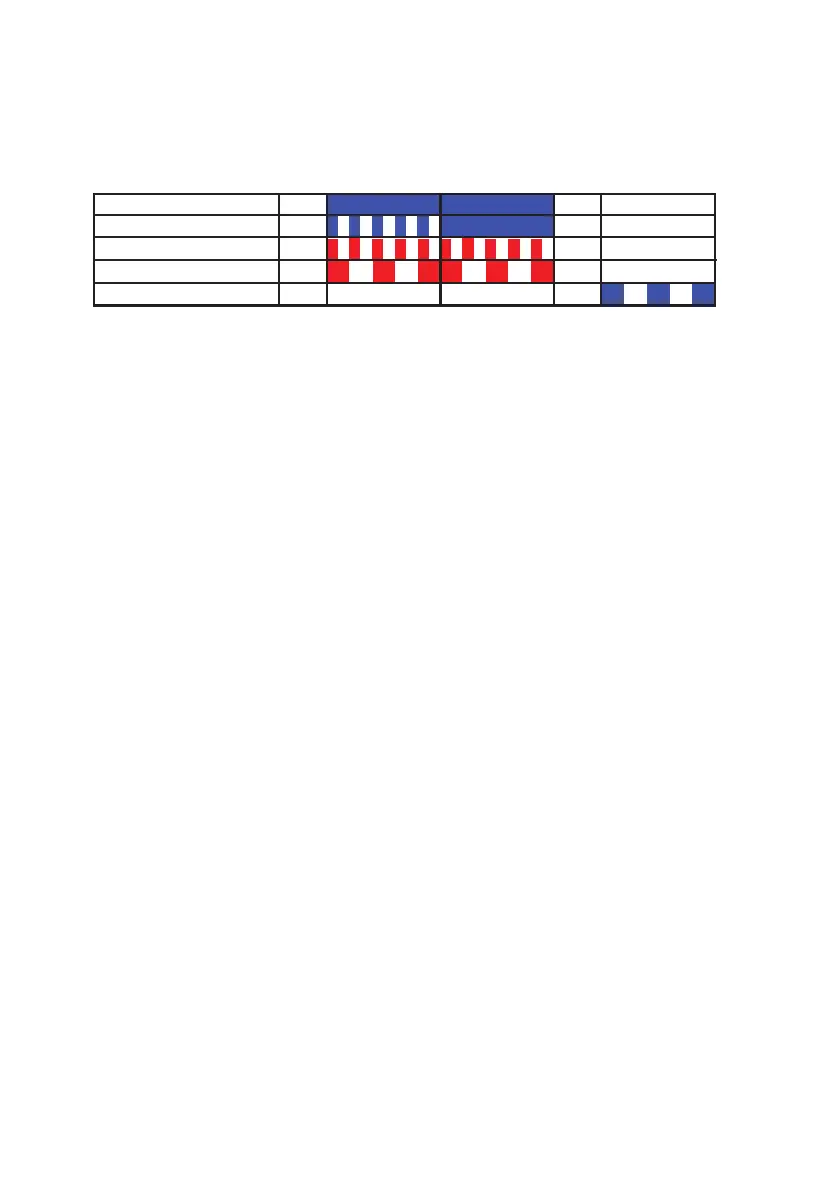
Figure 2. Different status of the LED indicators
Accessing the Product
This product can be accessed either via an IP network or directly via the
management port (mini-USB). The web browser Internet Explorer 8.0™ or later is
recommended for accessing the product´s web interface.
Access via a Network with a DHCP Server
It is recommended that this product always gets the same IP address if it
communicates with other equipment, in order to prevent it from losing contact
with the equipment after a restart. Inform the network administrator about the
MAC address (found on a label on the products rear side) and ask to reserve a
fixed IP address in the DHCP server.
1 Connect the module to the LAN.
2 Connect the power supply. Starting up is indicated on the status LED with fast
flashing blue light.
3 When the starting up indication has stopped, open a web browser on your
computer and enter the address elise-XXXXXXXX, where XXXXXXXX is the
module key number (starting zeros can be excluded).
The module key number can be found on a label on the products rear side, and
also in the separately ordered license certificate.
Power LED
Red
Red
Blue
Blue
Fixed light indicates normal state
Slow flashing light indicates medium attention
Quick flashing light indicates high attention
Status LED
Error/fault
Starting up/ shutting down
Status and power OK
Mode LED
Blue
Mass storage mode
Warning