4
Access via the Management port
Note: A port driver needs to be installed on your computer the first time it is
used for accessing the product via the management port. The port driver is
located on the product.
The installation of the port driver differs depending on the computer’s
operating system, see either Install the Port Driver on Windows XP/Vista on
page 4 or Install the Port Driver on Windows 7 on page 5.
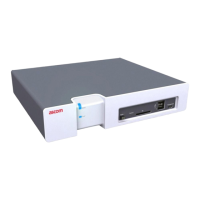
1 Connect the power supply. Starting up is indicated on the status LED with fast
flashing blue light.
2 Connect a mini-USB type B cable between the USB port on your computer and
the management port on the module.
3 If the required port driver is not installed on the computer, install it now. See
below for port driver installation.
4 When the starting up indication has stopped, open a web browser on your
computer and enter the IP address “192.5.36.229” in the address field to
access the products web interface.
5 Continue the Configuration on page 7.
Install the Port Driver on Windows XP/Vista
Note: When switching between mass storage mode and network mode, it
takes about 30 seconds before the module can be accessed with the
192.5.36.229 address.
1 Connect a mini-USB type B cable between the USB port on your computer and
the management port on the module.
The Found new hardward wizard opens but at this stage a valid USB port driver
is not available, so close the wizard and continue to install the driver.
2 Press the Mode button twice to change the mode to mass storage.
The module will now turn up as a mass storage device on your computer. This
is indicated by slow flashing blue light on the Mode button LED.
3 Locate the required “elise3.inf” driver and save it on your computer.
4 Press the Mode button twice again to change the USB mode to network
access. The Found new hardware.... dialogue box opens.
5 Select No, not this time and click “Next”.
6 Select Install from a list or specific location (Advanced) and click “Next”.