© 2019 Ascom. All rights reserved. TD93301EN / March 2019 / Ver. A
ascom
© 2019 Ascom. All rights reserved. TD93301EN / March 2019 / Ver. A
ascom
Remove the battery pack from the handset and place it in the charging slot
for batteries. Push the battery in until it clicks into the locked position. If the
battery has been correctly inserted, the LED turns orange to show that the
battery is charging.
When the LED turns green, the battery is fully charged.
Charging
Slide the battery cover lock to the right to release the battery.
Remove the battery pack from the handset and place it in the charging slot.
If the battery has been correctly inserted, the LED turns red to show that the
battery is charging.
When the LED turns green, the battery is fully charged.
The handset has a rechargeable battery that can be charged separately from the
handset. To charge it, use the Battery Charging Rack or the Desktop Charger.
If you want to charge the handset, do it either with a Handset Charging Rack,
Desktop Charger or a Micro USB cable.
Battery Charging Rack
2
1
3
9
Charging Methods
Charging
10
NOTE:
With the Desktop Charger you can charge the handset together with one
extra battery.
Desktop Charger
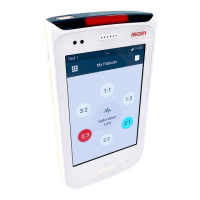
Place the handset in the charging slot for handsets. If the handset is correctly
inserted, the charging screen appears showing the battery charge level and
the owner name.
When the green check mark icon appears on the screen and the LED turns
green, the battery is fully charged.
1
2
Use the Desktop Charger to charge only the handset or the handset together with one
extra battery.
3
4

 Loading...