Ascon Tecnologic - K Series - ENGINEERING MANUAL - Vr. 9.0 PAG. 5
5. CONFIGURATION PROCEDURE
5.1 Introduction
When the instrument is powered, it starts immediately to work
according to the parameters values loaded in its memory.
The instrument behaviour and its performances are
governed by the value of the stored parameters.
At the first start up the instrument uses a “default” parameters
set (factory parameter set); this set is a generic one (e.g. a
TC J input is programmed).
We recommend to modify the parameter set to suit your
application (e.g. set the right input type, Control strategy,
define an alarm, etc.).
To change these parameters you will need to enter the
“Configuration procedure”.
WARNING! [6] Unit (Engineering Unit) parameter allows to
set the temperature units in accordance with
the user needs (°C/°F).
Be careful! Do not change the Engineering Unit
during process control as the temperature values
inserted by the user (thresholds, limits etc.) are
not automatically rescaled by the instrument.
5.1.1 Access levels to the parameter
modifications and their password
The instrument have one complete parameter set. We call
this set “Configuration parameter set” (or “Configuration
parameters”).
The access to the configuration parameters is protected by a
programmable password (password level 3).
The configuration parameters are collected in various
groups. Every group defines all parameters related with a
specific function (e.g. control, alarms, output functions).
Note: The instrument will show only the parameters consistent
with the specific hardware and in accordance with the
value assigned to the previous parameters (e.g. if you
set an output as “not used” the instrument will mask all
other parameters related with this output).
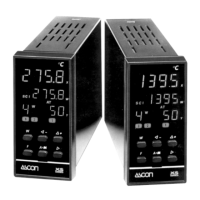
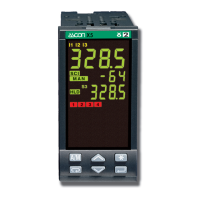
5.2 Instrument behaviour at Power ON
At Power ON the instrument can start in one of the following
mode depending on its configuration:
Auto mode without program functions:
– The upper display shows the measured value;
– The lower display shows the Set point value;
– The decimal figure of the less significant digit of the lower
display is OFF;
– The instrument is performing the standard closed loop control.
Manual mode (oPLo):
– The upper display shows the measured value;
– The lower display shows alternately the power output and
the message
oPLo;
– The instrument does not perform Automatic control;
– The control output is equal to 0% and can be manually
modified by
and buttons.
Stand by mode (St.bY):
– The upper display shows the measured value;
– The lower display shows alternately the set point value and
the message
St.bY or od;
– The instrument performs no control (the control outputs
are OFF);
– The instrument is working as an indicator.
Auto mode with automatic program start up:
– The upper display shows the measured value;
– The lower display
shows
one of the following information:
• The operative set point (when it is performing a ramp);
• The time of the segment in progress (when it is perfor-
ming a soak);
• The set point value alternate with the message St.bY.
– In all cases, the decimal figure of the less significant digit
of the lower display is lit.
We define all the above described conditions as “Standard
Display”.
5.3 Entering the configuration mode
1. Push the button for more than 3 seconds.
The upper display shows
PASS while the lower display
shows 0.
2. Using
and buttons set the programmed password.
Notes: 1. The factory default password for configuration
parameters is equal to 30.
2. All parameter modifications are protected by a time
out. If no button is pressed for more than 10 seconds
the instrument returns automatically back to the
Standard display, the new value of the last selected
parameter is lost and the parameter modification
procedure is closed. Sometimes can be useful to
enter the parameter configuration procedure with
no timeout (e.g.: the first time an instrument is
configured). In this case, use a password equal to
the previously set password + 1000 digits
(e.g.: 1000 + 30 [default] = 1030).
It is always possible to manually end the parameter
configuration procedure (see the next paragraph).
3. During parameter modification the instrument
continues to control the process. In certain
conditions, when a configuration change can
produce a heavy bump to the process, it is
advisable to temporarily stop the control during the
programming operations (the control output will be
Off). In this case, use a password equal to 2000 +
the programmed value (e.g. 2000 + 30 = 2030).
The control will restart automatically when the
configuration procedure will be manually closed.
3. Push the
button.
If the password is correct the display shows the acronym
of the first parameter group preceded by the symbol “]”.
In other words the upper display shows:
]inP.
The instrument is in configuration mode.
5.4 Exiting the configuration mode
Push the button for more than 5 seconds, the instrument
will return to the “Standard display”.