© 2021 United States Stove Company
9
package, restops (when needed), insulation shield,
roof ashing, chimney cap, etc. Maintain the proper
clearance to the structure as recommended by the
manufacturer. This clearance is usually a minimum
of 2”, although it may vary by manufacturer or for
certain components. A listed chimney cap should
be installed to prevent entrance of rain and help
eliminate down drafts. An unapproved chimney
cap, protector or spark arrester can become
clogged when leaves or other matter. This blocks
the chimney and causes smoke, and the dangerous
carbon monoxide in smoke, to spill back into your
home where it can kill you.
There are basically two methods of metal
prefabricated chimney installation. One method is
to install the chimney inside the residence through
the ceiling and the roof. The other method is to
install an exterior chimney that runs up the outside
of the residence. Single wall pipe is not legal
for outside installation. REMEMBER: Follow the
chimney manufacturer’s installation instructions
and maintain the manufacturer’s specied
clearance distance.
Additional chimney information is presented
throughout this manual. READ IT THOROUGHLY
TO BE MORE THOROUGHLY INFORMED.
PART E
In addition to the methods shown by A, B, C, and
D, a listed factory-built wall pass-through system
may be purchased and installed according to the
instructions packaged with it to provide a safe
method of passing chimney connector through
a combustible wall for a connection to a masonry
chimney.
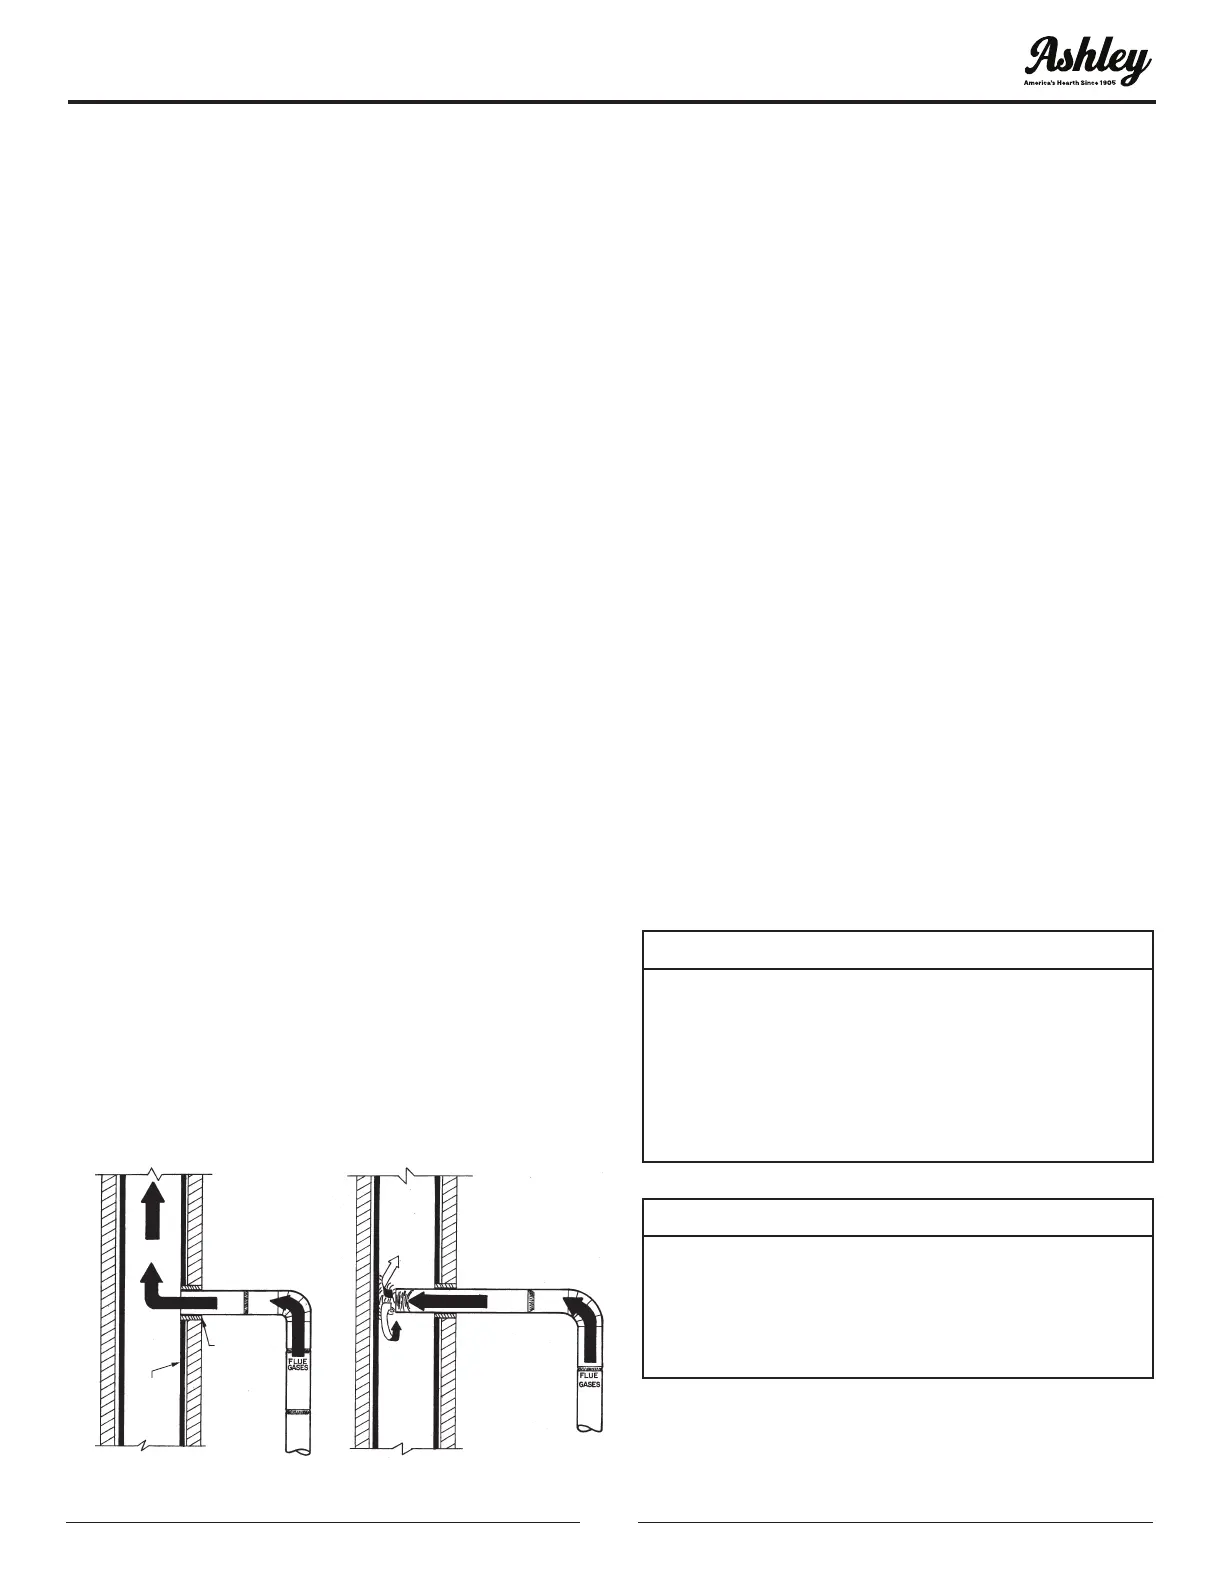
Connecting Heater’s Chimney Connector to
Masonry Chimney When Chimney Connector Does
Not Have to Pass Through a Combustible Wall
CORRECT CONNECTION
OF CHIMNEY
CONNECTOR TO
MASONRY CHIMNEY:
INSERT CHIMNEY
CONNECTOR TO INSIDE
FACE OF MASONRY
CHIMNEY’S FLUE LINER.
CHIMNEY
THIMBLE
INSIDE
FACE OF
FLUE
LINER
INCORRECT
CONNECTION: CHIMNEY
CONNECTOR INSERTED
TOO FAR INTO
MASONRY CHIMNEY,
CAUSING RESTRICTIONS
HEATER INSPECTION
Before installing the heater, inspect the heater for
external damage and missing parts. Check the
gaskets around the doors to assure that they are still
in place. Also check inside the heater. Report any
deciencies found to your heater dealer and make
sure all problems are resolved before installing the
heater.
TOOLS AND SUPPLIES NEEDED FOR
INSTALLATION
• Electric drill 1/4 or 3/8 inch drive
• 1/8 inch drill bit
• Screw driver (blade type and size to t screws
listed below)
• No. 8 sheet metal screws (for chimney connector
joints)
• Gloves and Safety Glasses
• Ruler or tape measure
• Can or Tube of furnace cement
• Floor Protector
• Rag or several paper towels
• Chimney connector pipes (and elbows, if required)
• Pencil
HEATER INSTALLATION
CAUTION:
IF THIS HEATER IS NOT PROPERLY INSTALLED,
A HOUSE FIRE MAY RESULT. FOR YOUR
SAFETY, FOLLOW THE INSTALLATION
DIRECTIONS. CONTACT LOCAL BUILDING OR
FIRE OFFICIALS ABOUT RESTRICTIONS AND
INSTALLATION INSPECTION REQUIREMENTS
IN YOUR AREA.
CAUTION:
DO NOT CONNECT THIS HEATER TO A CHIMNEY
FLUE SERVING ANOTHER APPLIANCE. THERE IS
A SERIOUS SAFETY RISK IF TWO APPLIANCES
OR HEATERS ARE CONNECTED TO THE SAME
FLUE.
INSTALLATION