CHANGING THE STANDARD FRONT PANELS
The front panels on Models D1706, D1716, D1776 and D1976
(except the stainless steel models) can be replaced with wood
panels.
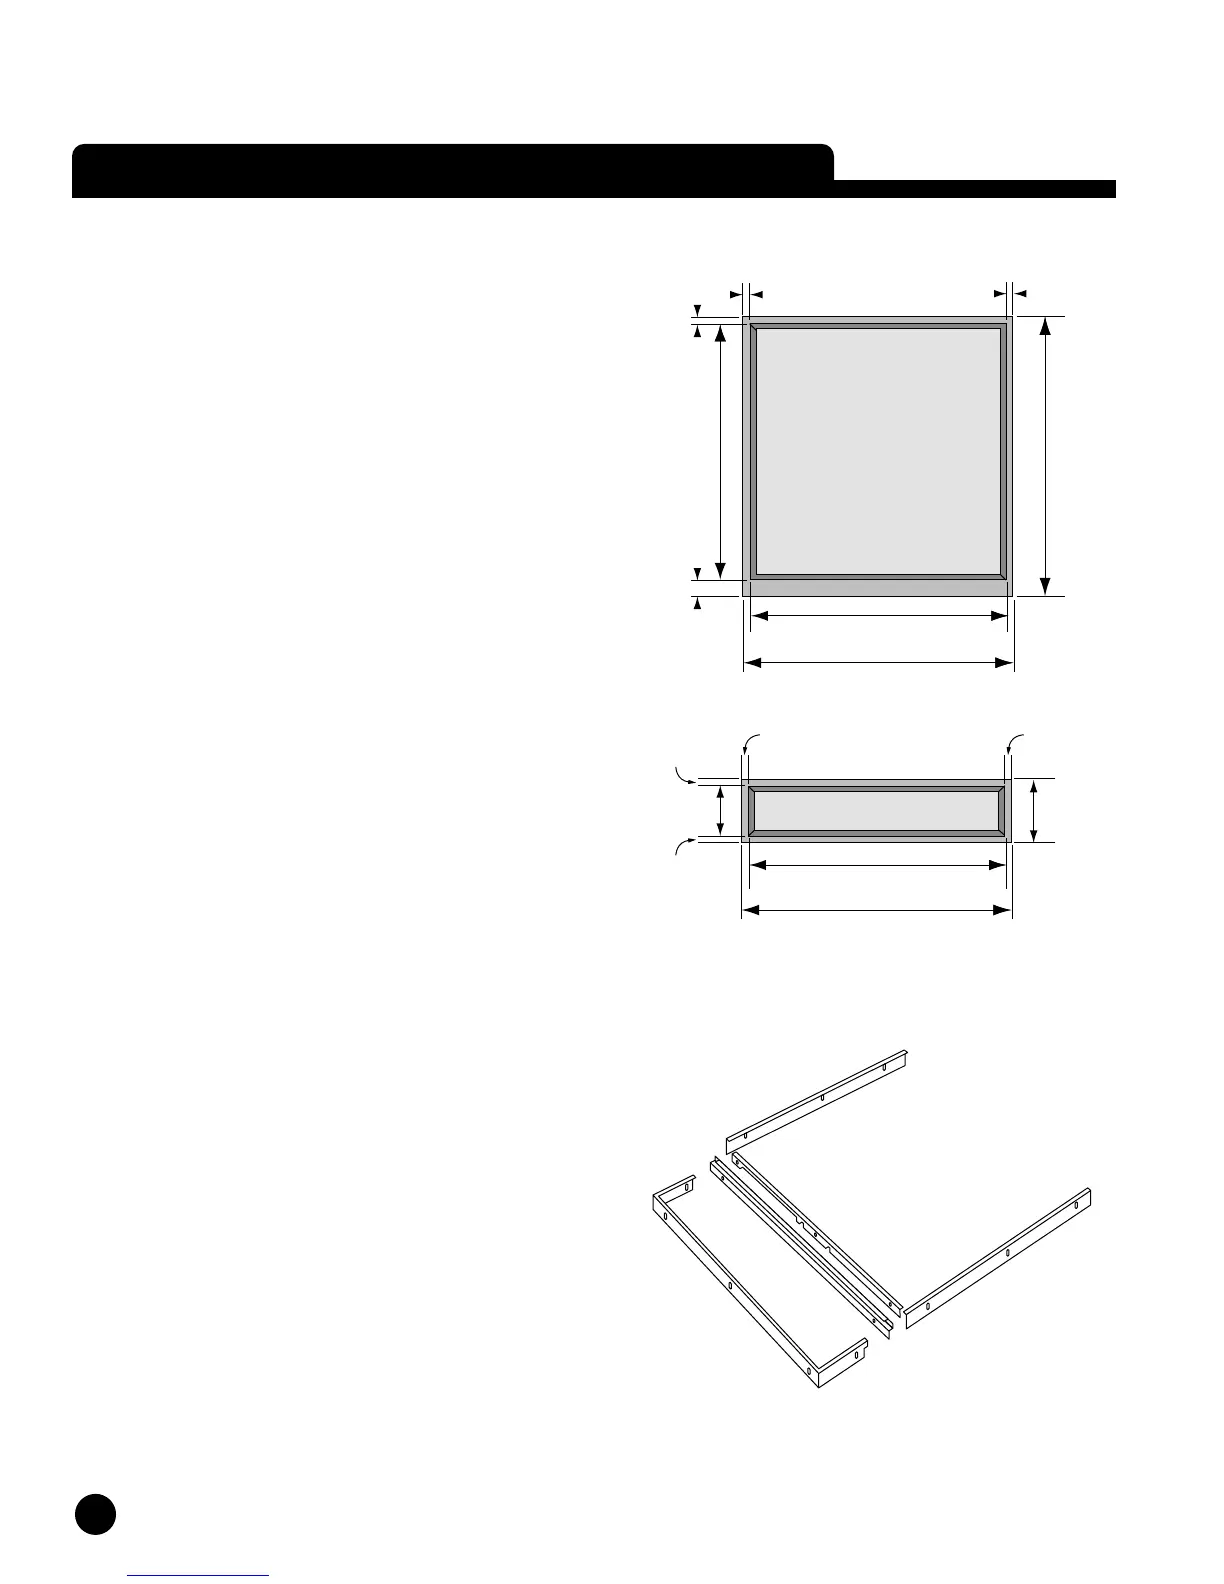
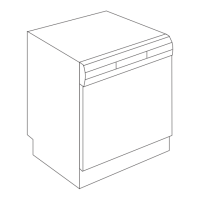
PANEL DIMENSIONS
For standard, non-raised panels, use 1/16" to 1/4" material. For
custom raised panels, the decor trim will accept up to 1/4" flange.
The raised panel can be mounted on a backing sheet cut to fit as
shown on the right.
NOTE: The stainless steel panels do not have holes for custom
trim. You have to drill the holes.
INSTALLING THE PANEL
WARNING! Before working on any electrical appliance,
be sure the electrical power has been turned off at the
breaker/fuse box.
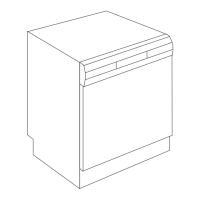
Refer to the illustration at bottom right for instruction references.
1. Remove the lower access panel with standard or 20 torx
screwdriver.
2. Carefully remove the plastic plugs around the edges of the
access panel and upper door panel. You may discard the
plugs.
3. Using the screws provided with the trim kit, loosely secure
parts A and C to the upper door panel.
4. Slide the upper panel into the trim kit grooves.
5. Tighten the screws holding parts A and C.
6. Secure part B and tighten screws.
7. Loosely screw part E to the lower access panel.
8. Slide the custom panel into trim kit channels and tighten the
screw to part E.
9. Secure part D of the trim kit and tighten the screws.
10. Secure the lower access panel to the dishwasher.
11. Drop the lower access panel to line up with the lower holes
on the guard plate and secure the screws. (Make sure the
exhaust vent is below the panel. Otherwise, steam from the
vent could eventually damage the panel.)
12. Before you push the dishwasher into the cabinet opening,
test the door to make sure it opens properly, (The door is
counter-balanced, so it should remain in any position.) If it
doesn’t, you may need to adjust the door springs (see page 8).
13. Fasten the dishwasher to the cabinet.
Trim kit part numbers:
White: 8070850-0
Black: 8070850-29
ASKO DISHWASHER