EasyManuals Logo

ASROCK Fatal1ty X99 Professional Series User Manual

ASROCK Fatal1ty X99 Professional Series
127 pages
To Next Page IconTo Next Page
To Previous Page IconTo Previous Page
Page #44 background imageLoading...
Page #44 background image
English
36
37
Fatal1ty X99 Professional Series
2.10.2 Installing Three SLI
TM
-Ready Graphics Cards
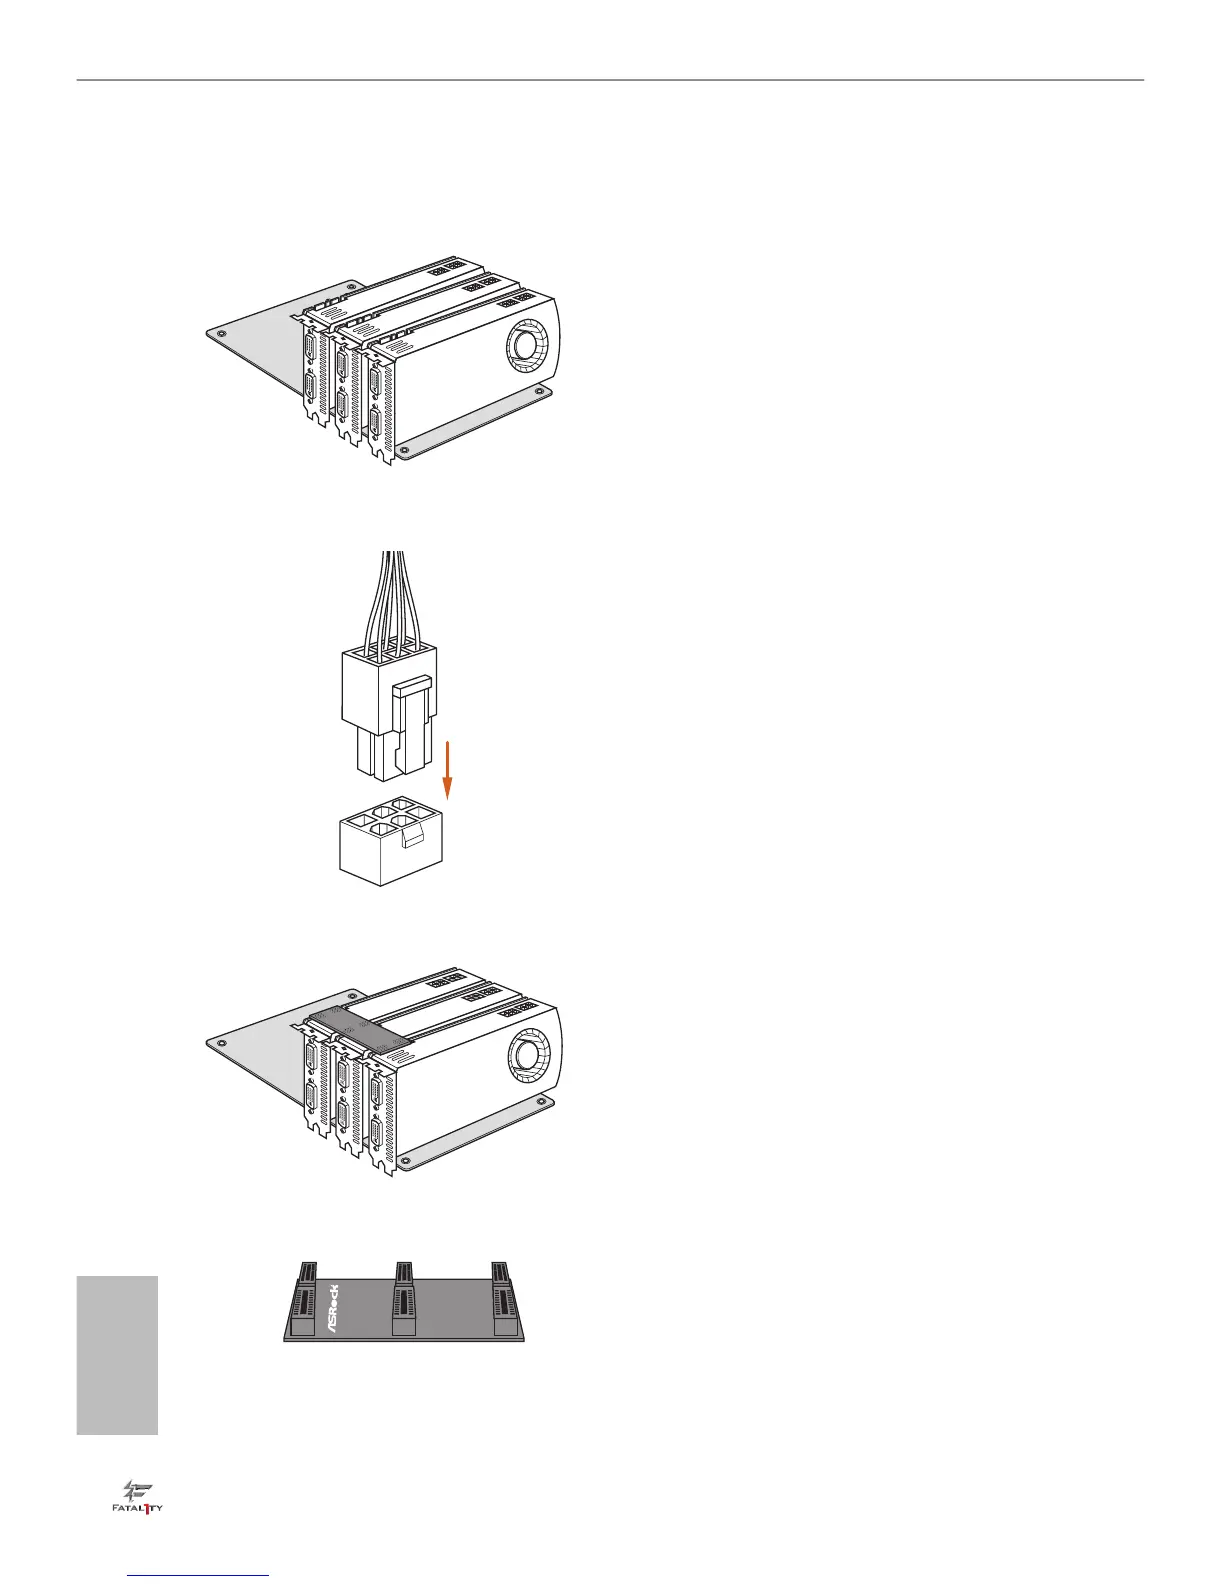
Step 1
Insert one graphics card into PCIE1 slot,
another graphics card to PCIE2 slot, and
the other graphics card to PCIE4 slot.
Make sure that the cards are properly
seated on the slots.
Step 2
Connect the auxiliary power source to the
PCI Express graphics card. Please make
sure that both power connectors on the
PCI Express graphics card are connected.
Repeat this step on the three graphics
cards.
Step 3
Align and insert the ASRock 3-Way SLI
Bridge Card to the goldngers on each
graphics card. Make sure the ASRock
3-Way SLI Bridge Card is rmly in place.
ASRock 3-Way SLI Bridge Card
3
-
Wa
y
S
L
I
B
r
i
d
g
e

Table of Contents

Questions and Answers:

Question and Answer IconNeed help?

Do you have a question about the ASROCK Fatal1ty X99 Professional Series and is the answer not in the manual?

ASROCK Fatal1ty X99 Professional Series Specifications

General IconGeneral
ChipsetIntel X99
CPU SocketLGA 2011-v3
Memory Slots8 x DIMM
Maximum Memory128GB
Memory TypeDDR4
SATA 6Gb/s Ports10
M.2 Slots1
Form FactorATX
RAID SupportRAID 0, 1, 5, 10
PCI Express x1 Slots1 x PCIe 2.0 x1
Storage InterfaceSATA 6Gb/s
LANDual Gigabit LAN
AudioRealtek ALC1150
Multi-GPU SupportAMD 3-Way CrossFireX
USB Ports10 (6 rear, 4 via headers)
EthernetDual Gigabit LAN

Related product manuals