27
English
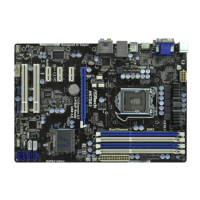
H670M-IT X/ax
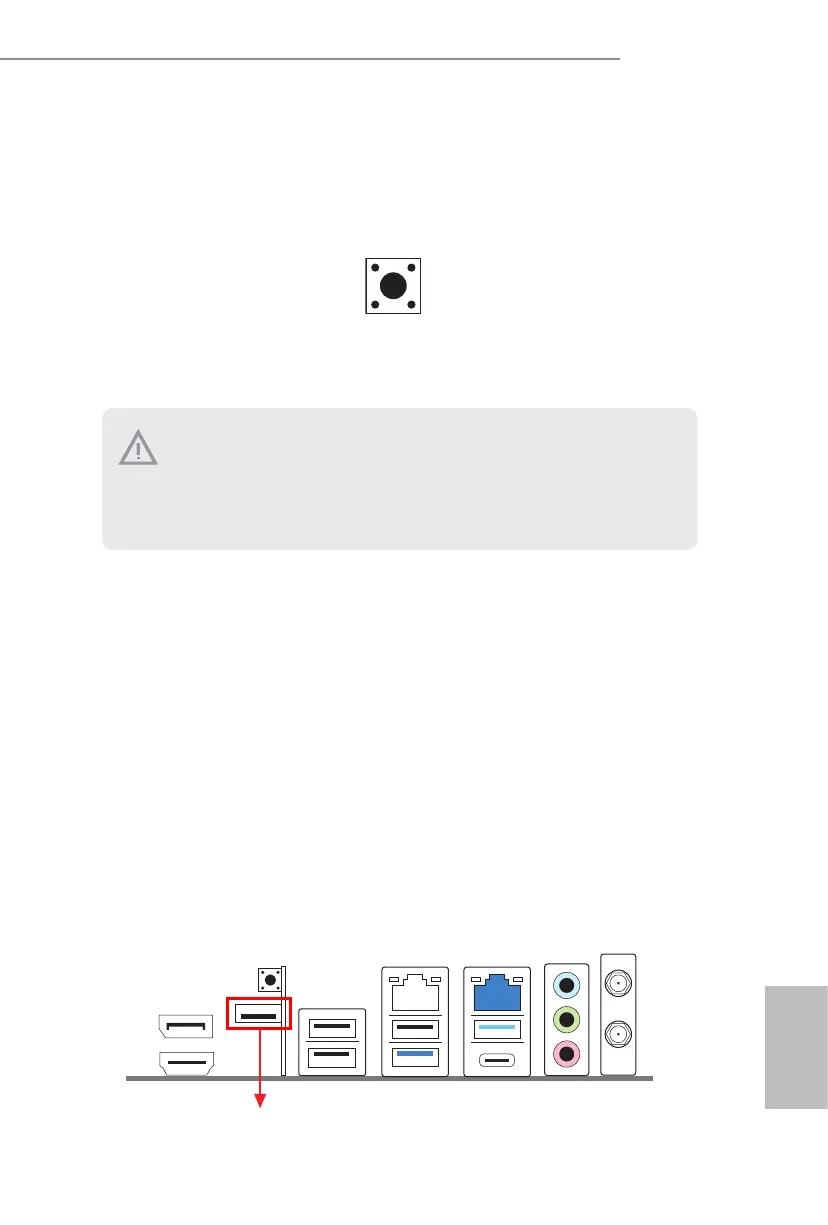
BIOS Flashback Button
(BIOS_FB1_PH1)
(see p.3, No. 2)
BIOS Flashback Switch allows users
to ash the BIOS.
2.7 Smart Button
e motherboard has a smart button: BIOS Flashback Button, allowing users to
ash the BIOS.
USB BIOS Flashback port
ASRock BIOS Flashback feature allows you to update BIOS without powering on the system, even
without CPU.
1. Download the latest BIOS le from ASRock's website : http://www.asrock.com.
2. Copy the BIOS le to your USB ash drive. Please make sure the le system of
your USB ash drive must be FAT32.
3. Extract BIOS le from the zip le.
4. Rename the le to “creative.rom” and save it to the root directory of X: USB ash drive.
5. Plug the 24 pin power connector to the motherboard. en turn on the power supply's AC
switch.
*ere is no need to power on the system.
6. en plug your USB drive to the USB BIOS Flashback port.
7. Press the BIOS Flashback Switch for about three seconds. en the LED starts to ash green
and yellow alternately.
8. Wait until the LED stops blinking and turns to solid green, indicating that BIOS ashing has
been completed.
*If the LED light turns solid yellow, this means that the BIOS Flashback is not operating
properly. Please make sure that you plug the USB drive to the USB BIOS Flashback port.
**If the LED does not light up at all then please disconnect power from the system and remove/
disconnect the CMOS battery from the motherboard for several minutes. Reconnect power
and battery and try again.
Before using the BIOS Flashback function, please suspend BitLocker and any encryp-
tion or security relying on the TPM. Make sure that you have already stored and
backup-ed the recovery key. If the recovery key is missing while encryption is active,
the data will stay encrypted and the system will not boot into the operating system. It
is recommended to disable fTPM before updating the BIOS. Otherwise an unpredict-
able failure may occur.

 Loading...