3737
3737
37
1. If you just plan to install one eSATAII device to this motherboard, it is recom-
mended to enable the bottom eSATAII port of the I/O shield. In order to enable
the bottom eSATAII port of the I/O shield, you need to connect one of the orage
SATAII connectors (SATAII_6 (Port 5); see p.11 No.19 or p.12 No.18) and one of
the orange eSATAII connectors (eSATAII_BOTTOM (Port 5); see p.11/12 No.1)
with a SATA data cable first. Then the bottom eSATAII port of the I/O shield is
enabled.
Connect the SATA data cable
to one of the orange SATAII
connector (SATAII_6 (Port 5))
Connect the SATA data
cable to one of the
orange eSATAII connector
(eSATAII_BOTTOM (Port 5))
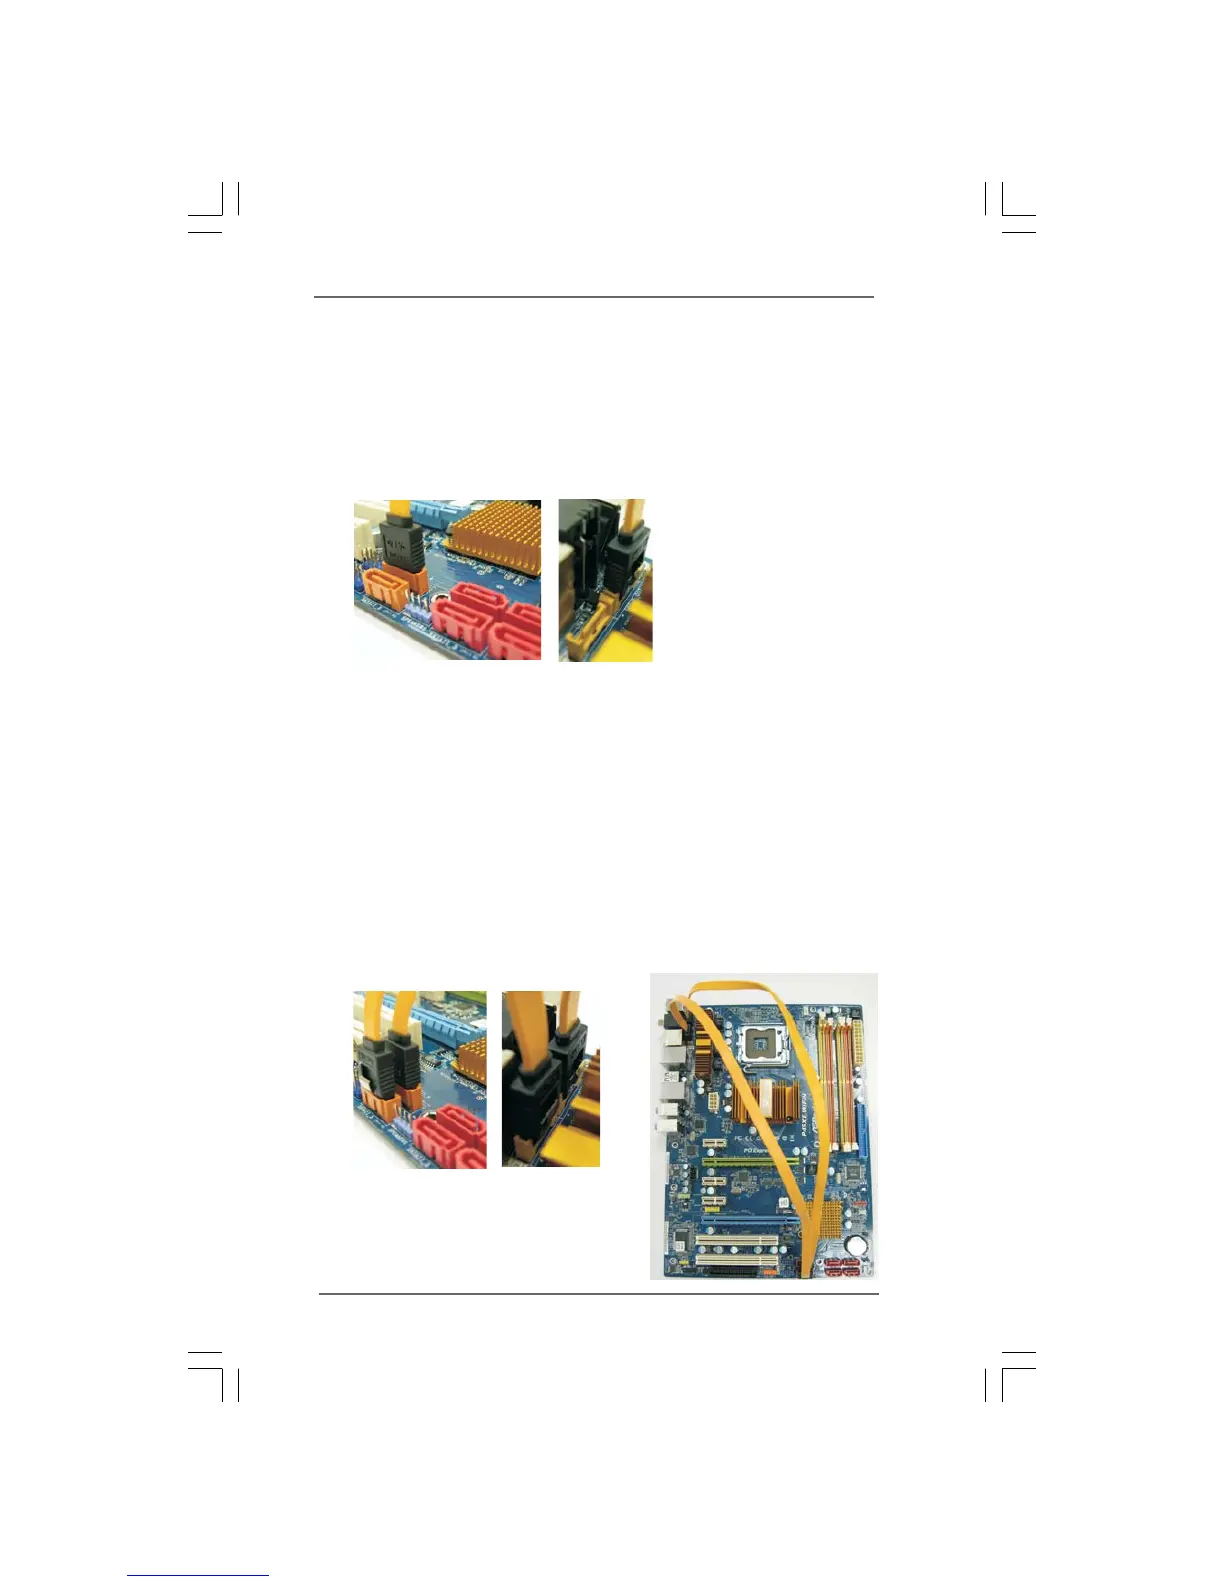
2. If you plan to install two eSATAII devices to this motherboard, you need to enable
both the top and the bottom eSATAII ports of the I/O shield. In order to enable the
top and the bottom eSATAII ports of the I/O shield, you have to connect one of
the orange SATAII connector (SATAII_6 (Port 5); see p.11 No.19 or p.12 No.18)
and one of the orange eSATAII connector (eSATAII_BOTTOM (Port 5); see p.11/
12 No.1) with a SATA data cable first, and then connect the other orange SATAII
connector (SATAII_5 (Port 4); see p.11 No.21 or p.12 No.20) and the other orange
eSATAII connector (eSATAII_TOP (Port 4); see p.11 No.39 or p.12 No.38) with
the other SATA data cable. After that, both the top and the bottom eSATAII ports
of the I/O shield are enabled.
Connect the SATA data
cables to both orange
SATAII connectors
(SATAII_6 (Port 5) and
SATAII_5 (Port 4))
Connect the SATA
data cables to both
orange eSATAII
connectors (eSATAII_
BOTTOM (Port 5) and
eSATAII_TOP (Port 4))
 Loading...