17
viron xt pumps Installation Manual
16
viron xt pumps Installation Manual
• However, should your pool water develop cloudiness
or your pool surface exhibit algae growth you may
need to increase the low speed of your pump to ensure
adequate circulation of water and chlorine to all parts
of your pool.
• It is important to check your chlorine levels, pH and
other parameters to ensure your water quality is
correct before adjusting the speed of your pump.
We recommend these checks are carried out by your
professional pool shop or service technician.
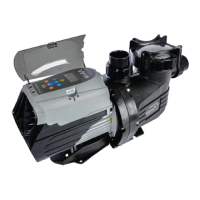
Examples of Speed Selection during operation and
use of your Viron P320 and P520 XT Pumps:
Function Speed
Vacuuming Pool or Spa High Speed or Overdrive
Operating Spa Jets High Speed or Overdrive
Operating Waterfall or Water
Features
Medium Speed or High Speed,
Depending on Effect Required
Cleaning Up Pool with Cloudy
Water
Up to 24 hours on High Speed
or Overdrive Mode
General Filtration Low Speed (8 hours in Winter, 8
to 12 hours in Summer)
6.3 Programming
6.3.1 Factory Default Setting
1. The inbuilt timers are activated and will control the
time the pump operates
2. Connectivity to AstralPool compliant Salt Chlorinators,
EQ Chemical dosing controllers or Viron Connect
remote Controls is turned “o”
3. Use the “auto” button to turn the pump on or o.
When in on position, the pump will remain o until the
next timer period unless pressed again to manually
on. If pump is turned to manually on, it will continue
to operate indenitely. If in the “O” position (visible
on the LCD), the pump will remain indenitely o. For
timer operation, ensure the “auto” button is pressed so
that the LCD screen displays “auto”.
6.3.2 Setting the Current Time
1. If connected to a compliant AstralPool Salt Chlorinator
or EQ dosing controller connect data cable between
rear of pump and the chlorinator in EQ dosing unit.
2. Connect and turn power on to the pump and
Chlorinator (or dosing unit)
3. Have pump set in “MANUAL OFF”
4. Press “MENU BUTTON” to toggle through the
selections until “CLK” appears and press “ENTER” to set
time. Use up and down arrows to set the hour, press
“enter” again to set minutes and then press “enter”
again to set AM or PM.
5. Press Auto/Power button to accept.
6. The LCD screen will quickly ash 3 times to indicate
the new setting has been accepted.
6.3.3 Setting Independent Pump Operation
1. Toggle Menu until “CONF” is displayed on the LCD
screen
2. Press and HOLD “enter” for 3 seconds. “TMRS” will
appear.
3. Press “enter”
4. Press UP or Down buttons to turn “TMRS ON”
5. Press “enter” to accept
6. Press “auto” to return to main menu.
6.3.4 Changing Speed Settings
1. Select the Speed Button to be adjusted, Low, Medium
or High. Respective LED will light up.
2. Alter the speed in increments of 25 RPM using the up
and down arrows until the desired speed is displayed
on the screen. Respective “Speed 1”, Speed 2” or
“Speed 3”, will ash while editing.
3. The new speed will automatically save after 2 seconds.
Flashing will stop to signal save.
6.3.5 Setting Filtration Timer Periods
1. Press Menu to go to PRIM setting.
2. Prime period is defaulted to 5 minutes and high speed.
We recommend if your pump is installed at or below
water level, you change the PRIM to 2 minutes. Press
“enter” and then Up or Down arrows to change the
prime speed. Press “enter” to accept. Priming period
will now be displayed.
3. Use the Up or Down arrow to change the Priming
period. Press “enter” to accept.
4. Press Menu to go to TMR “timer settings” and press
“enter” to change.
5. Timer 1 is factory set to start at 8 am. Use up or down
arrows to change. Press High, Medium, or Low to
select the speed of the pump during Timer 1. On the
LCD Screen, Low is represented by speed “1”, Medium
by speed “2”, and High by speed “3”.
6. Press Enter to move to the stop or end time of Timer
1. Use the up and down arrows to change the end of
Timer 1.
7. Timer 2 will now appear on the LCD Screen. Repeat
instructions 4. to 6. Above.
8. Timer 3 will now appear but is factory pre-set to OFF.
The OFF time menu selection shows prior to 12:00 a.m.
and must be selected to turn that Timer period o.
Use the up and down arrows to activate the time and
repeat process 4 and 5 above.
9. Timer 4 is also factory pre-set to “o” but can be
activated by using the up and down arrows.
10. Remember to select the speed you wish to operate
during each timer period by pressing the High,
Medium or Low buttons while still in the Timer Start
program.