EasyManua.ls Logo

Asus VS278H - User Manual

Asus VS278H
25 pages
Print Icon
To Next Page IconTo Next Page
Loading...
VS278 series
LCD Monitor
User Guide
Question and Answer IconNeed help?

Do you have a question about the Asus VS278H and is the answer not in the manual?

Summary

Safety Information

General Safety Precautions

Essential safety measures for setup, operation, and handling the monitor to prevent hazards.

Proper Product Disposal

Guidance on disposing of the monitor according to local regulations to protect the environment.

Care and Cleaning

Lifting and Moving the Monitor

Instructions on how to safely lift and reposition the monitor, including proper grip and handling.

Cleaning the Monitor Surface

Guidelines for cleaning the monitor screen and casing using appropriate materials and methods.

Normal Monitor Symptoms

Description of common visual phenomena like flickering or afterimages that are normal during monitor operation.

Additional Resources

ASUS Websites and Documentation

Information on accessing updated product details and optional documentation from ASUS online resources.

Takeback Services

Environmental Recycling Programs

Details on ASUS's commitment to responsible recycling of products, batteries, and packaging materials.

Package Contents

Included Items Checklist

A list of all items expected to be found in the monitor package for user verification.

Monitor Introduction

Front Panel Controls Overview

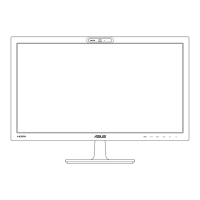
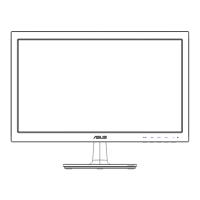
Identification and function of buttons and indicators on the front of the monitor for operation and adjustments.

Rear Panel Connectors Identification

Detailed explanation of the various ports and connectors located on the back of the monitor for input and output.

QuickFit Layout Preview Feature

Explanation of the QuickFit function for previewing document or photo layouts on-screen without printing.

Monitor Setup and Connection

Assembling the Monitor Base

Step-by-step instructions for attaching the monitor base to the arm for stable positioning.

Adjusting the Monitor Angle

Guidance on tilting the monitor for optimal viewing comfort and stability.

Detaching the Base for VESA Mounting

Procedure for removing the monitor's arm and base to prepare for VESA wall mounting.

Connecting Cables for Signal and Power

Instructions on how to connect power, video (VGA, HDMI, DP), and audio cables to the monitor and computer.

Powering On the Monitor

Steps to turn on the monitor and identify the power indicator status.

OSD Menu Operations

Navigating and Adjusting OSD Settings

Guide on how to access, navigate, and modify settings within the On-Screen Display menu.

Splendid Modes Description

Details on different Splendid modes (Scenery, Standard, Theater, Game, Night View, sRGB) and their optimal uses.

Color Adjustment Options

Explanation of how to adjust Brightness, Contrast, Saturation, Color Temp., Skin Tone, and Smart View.

Image Adjustment Options

Guide to adjusting Sharpness, Trace Free, Aspect Control, ASCR, Position, and Focus for optimal image quality.

Input Source Selection

How to choose the active video input source for the monitor from available options.

System Setup and OSD Configuration

Settings for Splendid Demo, Volume, ECO Mode, OSD layout, language, and factory reset.

Specifications Summary

Troubleshooting and FAQ

Supported Operating Modes

Overview

This document is a user guide for the ASUS VS278 series LCD Monitor, providing comprehensive instructions for setup, operation, and maintenance.

Function Description

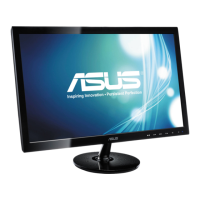
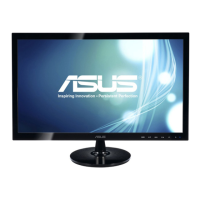
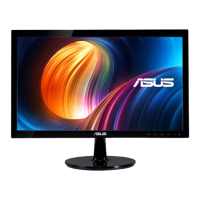
The ASUS VS278 series LCD Monitor is a widescreen display designed to provide a crisp, broad, and bright visual experience. It serves as an output device for computers and other compatible video sources, displaying images and video content. The monitor is equipped with various input ports, allowing connection to multiple devices such as PCs, game consoles, DVD players, and other consumer video devices. It supports full HD video content, ensuring high-quality visuals. The monitor also features built-in speakers for audio output and an earphone jack for private listening.

Usage Features

The monitor offers a range of features to enhance the user experience:

  • QuickFit Function: This unique feature allows users to preview document and photo layouts directly on the screen without needing to print test copies. By pressing the QuickFit hotkey, users can cycle through different pattern sizes, including alignment grids and various photo sizes (e.g., 4x6, 3x5, 2x2, 8x10, 5x7). The QuickFit OSD (On-Screen Display) appears in the lower right corner of the screen, guiding users through selections using the front panel control buttons.

  • OSD Menu (On-Screen Display): The OSD menu provides extensive control over the monitor's settings. It is accessed by pressing the MENU button and navigated using the directional buttons.

    • Splendid: This function offers six preset video modes optimized for different content types:
      • Scenery Mode: Best for displaying scenery photos with SPLENDID™ Video Enhancement.
      • Standard Mode: Ideal for document editing with SPLENDID™ Video Enhancement. In this mode, ASCR, Saturation, and Sharpness functions are not user-configurable.
      • Theater Mode: Optimized for movies with SPLENDID™ Video Enhancement.
      • Game Mode: Designed for games with SPLENDID™ Video Enhancement.
      • Night View Mode: Best for dark-scene games or movies with SPLENDID™ Video Enhancement.
      • sRGB: Best for viewing photos and graphics from PCs. Each mode includes a Reset option to revert to preset settings.
    • Color: This section allows adjustment of various color parameters:
      • Brightness: Adjusts the overall brightness of the display (range 0-100). This function also has a dedicated hotkey.
      • Contrast: Controls the difference between the lightest and darkest areas of the image (range 0-100).
      • Saturation: Adjusts the intensity of colors (range 0-100).
      • Color Temp.: Offers four color temperature modes: Cool, Normal, Warm, and User Mode. In User Mode, individual Red, Green, and Blue color values can be configured (range 0-100).
      • Skin Tone: Provides three skin tone options: Reddish, Natural, and Yellowish.
      • Smart View: Enhances display quality for wider viewing angles.
    • Image: This menu allows fine-tuning of image characteristics:
      • Sharpness: Adjusts the clarity of the image (range 0-100).
      • Trace Free: Controls the response time of the monitor, affecting motion blur.
      • Aspect Control: Allows selection of the aspect ratio, including "Full," "4:3," or "OverScan" (available only for HDMI input).
      • ASCR: Toggles the ASUS Smart Contrast Ratio function on or off.
      • Position (VGA only): Adjusts the horizontal (H-Position) and vertical (V-Position) placement of the image (range 0-100).
      • Focus (VGA only): Reduces horizontal and vertical line noise by adjusting Phase and Clock settings separately (range 0-100). Phase adjusts the pixel clock signal to prevent horizontal disturbances, while Clock controls the number of pixels scanned per horizontal sweep to avoid vertical stripes and disproportional images.
    • Input Select: Enables users to choose the desired input source from available options like VGA, HDMI 1, HDMI 2, and DisplayPort. A dedicated input select button on the front panel also allows switching between sources.
    • System Setup: Provides general system adjustments:
      • Splendid Demo Mode: Splits the screen into two for a side-by-side comparison of Splendid modes.
      • Volume: Adjusts the audio output level (range 0-100).
      • ECO Mode: Reduces power consumption when activated.
      • OSD Setup: Configures the OSD itself, including its horizontal and vertical position (range 0-100), timeout duration (10-120 seconds), DDC/CI function (enable/disable), and background transparency.
      • Information: Displays monitor-specific information.
      • Language: Offers 21 language options for the OSD, including English, French, German, Italian, Spanish, Dutch, Portuguese, Russian, Czech, Croatia, Polish, Romanian, Hungarian, Turkey, Simplified Chinese, Traditional Chinese, Japanese, Korean, Thai, Indonesia, and Persian.
      • All Reset: Allows restoring all settings to their default values.
  • Physical Adjustments: The monitor's arm/base allows for tilt adjustments from +20° to -5° for optimal viewing comfort. The stand should be held to prevent the monitor from falling during angle changes.

  • Connectivity: The monitor features multiple ports for versatile connections:

    • AC-IN port: For connecting the power cord.
    • Power Switch: To turn the display on and off.
    • DisplayPort: For connection to DisplayPort compatible devices.
    • HDMI ports (x2): For connection to HDMI compatible devices.
    • VGA port: A 15-pin port for PC VGA connection.
    • Audio-in port: For connecting a PC audio source using the bundled audio cable.
    • Earphone jack: Available for audio output when an HDMI/DisplayPort cable is connected.
  • Power Indicator: The power button doubles as an indicator, showing blue when the monitor is ON, amber in standby mode, and OFF when the monitor is off.

Maintenance Features

The user guide provides important safety and care instructions to ensure the longevity and proper functioning of the monitor:

  • General Care:

    • Always disconnect cables and the power cord before lifting or repositioning the monitor.
    • When lifting or carrying, grasp the edges of the monitor, not the stand or cord.
    • To clean the monitor, turn it off and unplug the power cord. Use a lint-free, non-abrasive cloth on the surface. For stubborn stains, a cloth dampened with mild cleaner can be used.
    • Avoid cleaners containing alcohol or acetone. Use a cleaner specifically intended for monitors. Never spray cleaner directly on the screen to prevent liquid from dripping inside and causing electric shock.
  • Safety Precautions:

    • Read all documentation before setting up the monitor.
    • Do not expose the monitor to rain or moisture to prevent fire or shock hazards.
    • Never attempt to open the monitor cabinet due to dangerous high voltages inside.
    • If the power supply is broken, contact a qualified service technician or retailer; do not attempt self-repair.
    • Ensure all cables are correctly connected and undamaged before use. Contact the dealer immediately if any damage is detected.
    • Do not block ventilation slots on the back or top of the cabinet. Avoid placing the product near radiators or heat sources without proper ventilation.
    • Operate the monitor only from the specified power source indicated on the label. Consult your dealer or local power company if unsure about your home's power supply type.
    • Use the appropriate power plug for your local power standard.
    • Do not overload power strips or extension cords to prevent fire or electric shock.
    • Avoid dust, humidity, and extreme temperatures. Do not place the monitor in wet areas. Place it on a stable surface.
    • Unplug the unit during lightning storms or prolonged periods of non-use to protect against power surges.
    • Never push objects or spill liquid into the monitor cabinet slots.
    • For satisfactory operation, use the monitor only with UL listed computers with appropriate receptacles marked 100-240V AC.
    • If technical problems arise, contact a qualified service technician or retailer.
  • Troubleshooting (FAQ): The manual includes a comprehensive troubleshooting section to address common issues such as:

    • Power LED not ON: Check power button, power cord connection, and monitor/computer ON status.
    • Power LED amber, no screen image: Verify monitor/computer ON status, signal cable connection, and inspect pins. Test with another monitor.
    • Screen image too light/dark: Adjust Contrast and Brightness via OSD.
    • Screen image not centered/sized properly: Use auto-adjustment (VGA only) or adjust H/V-Position via OSD.
    • Screen image bounces/wave pattern: Check signal cable, ensure proper connection, and move electrical devices causing interference.
    • Color defects: Inspect signal cable, perform All Reset, or adjust R/G/B color settings/Color Temperature via OSD.
    • Blurry/fuzzy image: Use auto-adjustment (VGA only) or adjust Phase and Clock settings via OSD.
    • No sound/low sound: Ensure HDMI cable connection, adjust monitor/HDMI device volume, and verify sound card driver installation/activation.
  • Detaching the Arm/Base (for VESA wall mount): Instructions are provided for detaching the monitor's arm/base to enable VESA wall mounting. This involves placing the monitor face down, removing rubber covers from screw holes, detaching the base, prying off the rear hinge cover, and unscrewing the hinge.

  • Recycling Information: ASUS provides takeback services for responsible recycling of products, batteries, components, and packaging materials. Users are directed to the ASUS CSR website for detailed recycling information specific to their region. The manual also includes the crossed-out wheeled bin symbol, indicating that the product should not be disposed of with municipal waste.

Asus VS278H Specifications

General IconGeneral
3D-
Aspect ratio4:3, 16:9
Display diagonal27 \
Native aspect ratio16:9
Viewing angle, vertical160 °
Contrast ratio (dynamic)80000000:1
Display number of colors16.78 million colors
Viewing angle, horizontal170 °
Digital vertical frequency50 - 76 Hz
Digital horizontal frequency30 - 83 kHz
Display brightness (typical)300 cd/m²
HDCPYes
USB Type-A downstream ports quantity0
RMS rated power4 W
CertificationEnergy Star®, BSMI, CB, CCC, CE, C-Tick, ErP, FCC, Gost-R, PSB, RoHS, UL/cUL, VCCI, WEEE, WHQL (Windows 8, Windows 7)
Product colorBlack
Market positioningGaming
Tilt angle range-5 - 20 °
Cable lock slot typeKensington
Panel mounting interface100 x 100 mm
AC input voltage100 - 240 V
AC input frequency50 - 60 Hz
Power consumption (standby)- W
Power consumption (typical)45 W
Power consumption (PowerSave)0.5 W
Sustainability certificatesENERGY STAR
Package depth175 mm
Package width725 mm
Package height541 mm
Package weight7200 g
Weight and Dimensions IconWeight and Dimensions
Depth (with stand)225 mm
Height (with stand)470.11 mm
Depth (without stand)50 mm
Width (without stand)648.86 mm
Height (without stand)393.23 mm
Weight (without stand)- g

Related product manuals