EasyManua.ls Logo

Atag XL140 User Manual

Atag XL140
72 pages
To Next Page IconTo Next Page
Page #1 background imageLoading...
Page #1 background image
8G.51.19.08 / 05.18 Changes reserved.
Installation & Servicing
Instructions
These instructions are to be retained by the user.
XL70
XL110
XL140
Question and Answer IconNeed help?

Do you have a question about the Atag XL140 and is the answer not in the manual?

Atag XL140 Specifications

General IconGeneral
BrandAtag
ModelXL140
CategoryBoiler
LanguageEnglish

Summary

1 Introduction

2 Regulations

3 Scope of delivery

4 Description

5 Installation and mounting

5.1 Wall-mounted in line

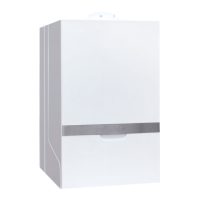
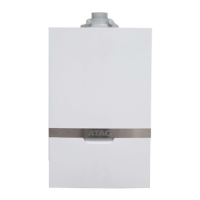
Step-by-step guide for mounting ATAG XL boilers in a wall-mounted configuration.

5.2 Free-standing in line

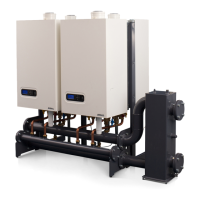
Instructions for installing ATAG XL boilers in a free-standing, in-line arrangement.

5.3 Free-standing back-to-back

Procedure for installing ATAG XL boilers back-to-back on a free-standing frame.

5.4 Connecting the boiler

Detailed steps for connecting the ATAG XL boiler to hydraulic and gas lines.

6 Hydraulic and gas pipe line system

6.1 Heating system

Guidance on installing the central heating (CH) system and connecting headers.

6.2 Expansion vessel

6.3 Water quality

6.4 Gas line

6.5 Condensate drain

6.6 Hot water supply

7 Flue gas system

7.1 Parallel boiler connection

Details on the standard parallel connection for flue gas and air supply.

7.2 Concentric boiler connection

Instructions for converting the boiler to a concentric flue gas connection.

7.3 Connecting the flue gas outlet-/air supply system

Guidance on connecting flue gas and air supply systems, including open/closed options.

7.4 Individual flue gas outlet

Information and recommendations for designing an individual flue gas outlet system.

7.5 Collective flue gas outlet

7.5.1 Collective flue gas outlet under-pressure

Diameter and venting lengths for collective flue gas outlets under negative pressure.

7.5.2 Collective flue gas outlet over-pressure

Diameter and venting lengths for collective flue gas outlets under positive pressure.

7.6 Condensate vent collective flue gas outlet system

8 Electrical connections

1. High voltage supply: 16 Connections

Details on connecting the 230V mains supply to the boiler.

2. High voltage switches: 6 Connections

Connecting voltage-free switches and relays for boiler control.

3. Low voltage sensors: 14 Connections

Wiring instructions for low voltage sensors like temperature and flow sensors.

4. Bus communication: 2-pole connector

Connecting cascaded boilers using the bus communication cable.

8.1 External controls

8.2 Wiring diagram

9 Boiler control

9.1 Operational status

Understanding the different operational status indicators and messages displayed.

9.2 Operation

How to operate the boiler using the control keyboard and its functions.

9.3 Commissioning

9.4 Setting the maximum flow water temperature with On/Off-control

9.5 Filling the heating system

10 Basic settings

Menu structure at Setting level

11 Parameters

Param Mode

Boiler param

Error

11.1 Activate factory settings

12 Put out of operation

13 Inspection and maintenance

13.1 Maintenance intervals

Recommended schedule for boiler maintenance based on hours or years.

13.2 Checks prior to commissioning

Essential checks to perform before initial boiler operation.

13.2.1 Emission check

13.2.2 Check O₂

13.3 Maintenance activities

13.4 Counter running hours

13.5 Warranty

14 Error report

Annex A Technical specifications

Annex B System water additives

Annex C Dimensions

Annex D Resistance table sensors

Annex E Declaration of conformity

GAS BOILER SYSTEM COMMISSIONING CHECKLIST

SERVICE RECORD

Related product manuals