10
5. Mounting the Main Unit to the Bracket or Stand
◇ Turn off the power (DC24V) before mounting.
Electrical shock may occur if the unit is mounted with the power
(DC24V) connected.
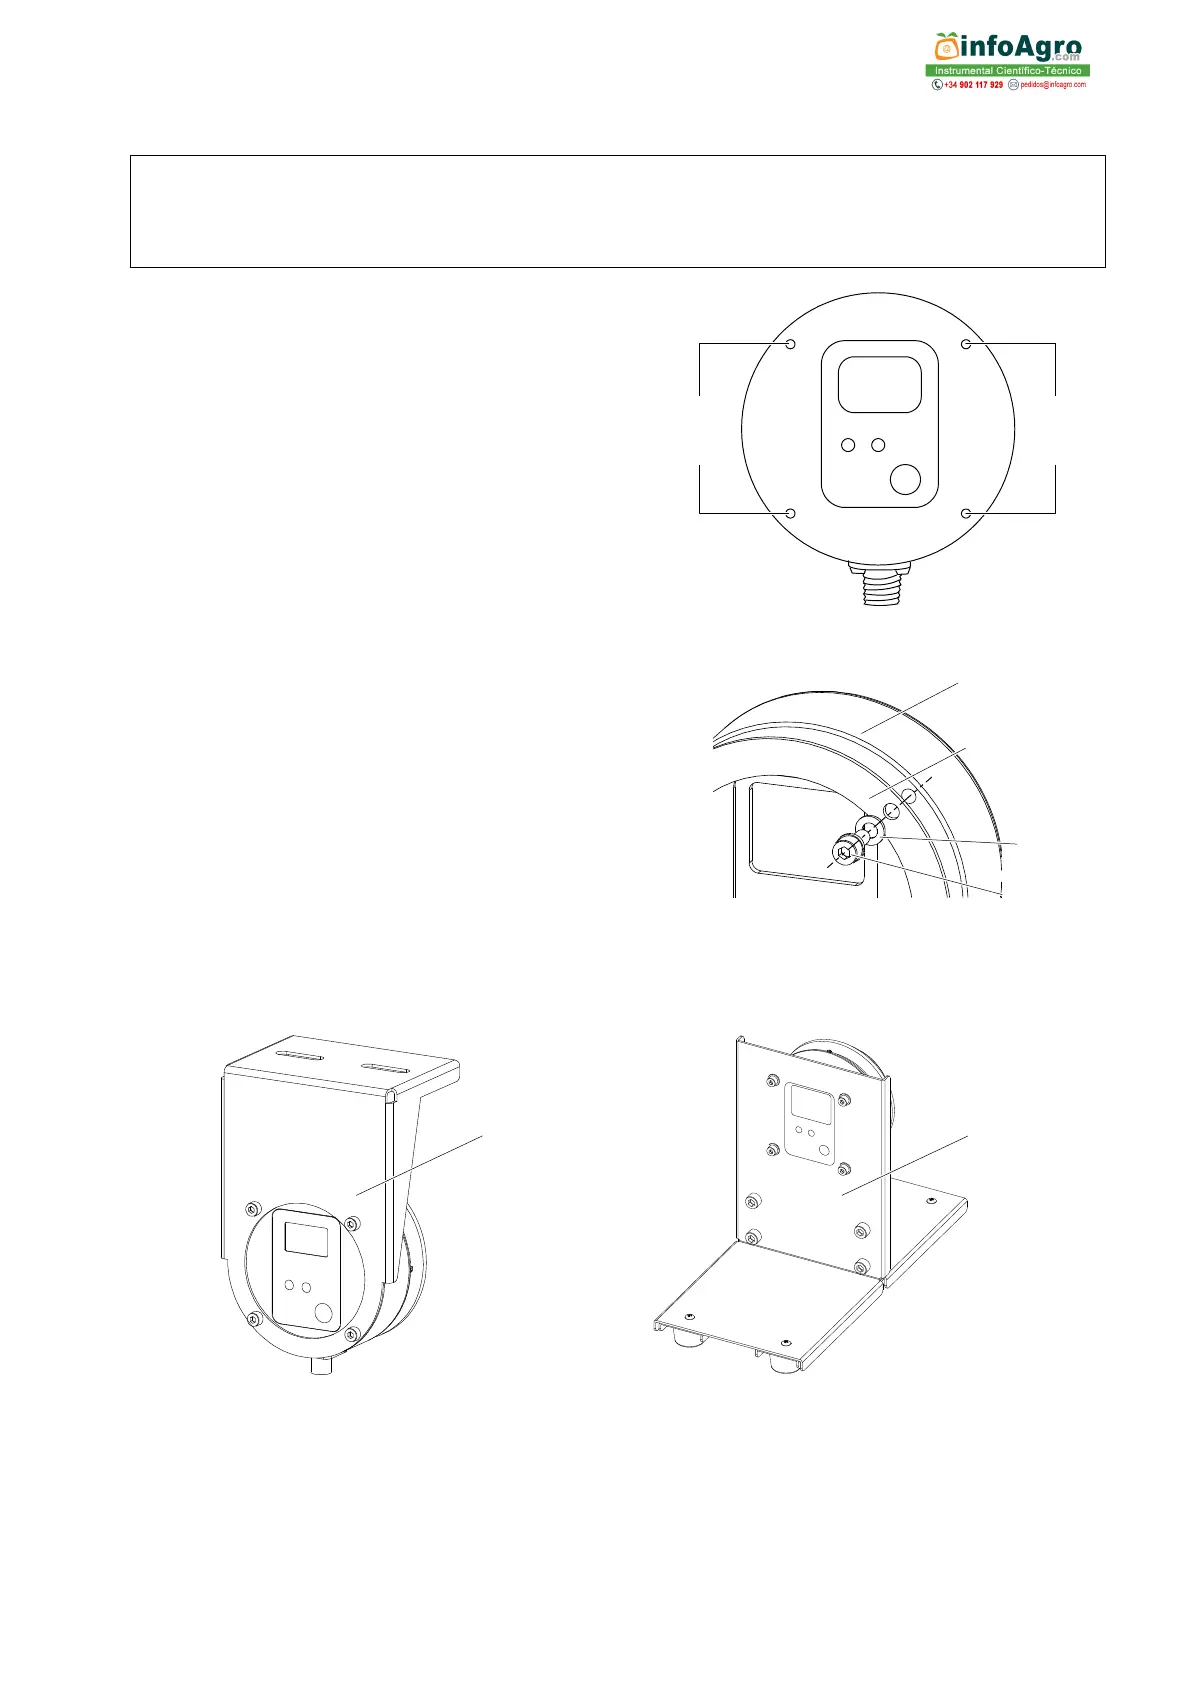
Screw mounting holes (Fig. 5-1)
The main unit have four mounting screw holes.
Use the mounting screw holes to mount the
main unit to the bracket (included), stand
(optional), etc.
Screw mounting example (Fig. 5-2)
① Main unit
② Bracket
③ Washer (M4)
④ Socket head cap screw with spring washer
M4x8
N Washers (M4) and socket head cap
screws with spring washers M4x8 are
included with the bracket.
Main unit mounted to the bracket or stand (optional) (Fig. 5-3,Fig. 5-4)
Install the bracket with the main unit to
the device, tank, etc.
m Install the bracket so that the
prism surface of the main unit is at
a right angle to the ground.
C For information on ordering the
stand (optional ), see page 23
"14.Consumable Parts and
Optional Items".