Sample Stage/
Sensor
3.
Press the
ZERO button
2.
Press the
START button
L L L
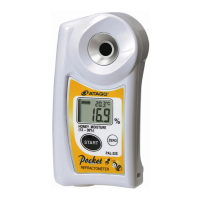
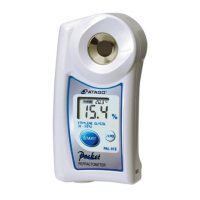
20.4
℃
Brix
0.0 0
Salt
0 0 0
Brix
0.0
Brix
0.0 0
Salt
20.4
℃
20.4
℃
0 0 0
Salt
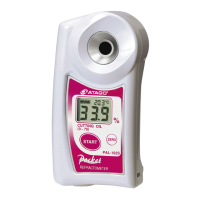
20.4
℃
5.3
1.2 7
Salt
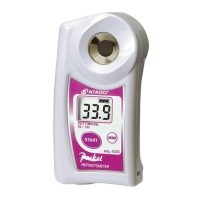
20.4
℃
- - -
- - -
- - -
Brix
Salt
Std
2. Apply the
sample.
3. Measurements
6.
Brix and Salt measurements
4. Low Sodium
index
Parts
Preparation①
Zero-Setting
Preparation
How To Measure
Measurement : not 0.00%
Measurement : 0.00%
Flash Light up
Flash Light up
Std
USr1 (Ur1)
USr2 (Ur2)
USr3 (Ur3)
USr4 (Ur4)
USr5 (Ur5)
Soup
N Do not use alcohol.
N
・Brix:Sample not enough.
・Temperature:Below the range.
L L L
・Brix:Zero-setting with other than water.
・Salt:Calibration with other than reference
solution.
A A A
H H H
・Creating user scales error.
E r r
・Brix and Salt(USr):Too Bright. Shade the
sample stage with your hand.
・Above the measurement range.
n n n
・Low sodium index error.
o o o
・The battery is low.
Lo
Error Messages
Brix
0.0 6
20.4
℃
Ratio
Press
the START
button
Press the Heart
button
Low Sodium index
Results
---Flash
25.3
0.8 7
Salt
20.4
℃
- - -
Brix
Salt
Ur1
Brix
Ur display
Std display
- - -
- - -
Brix
Salt
Std
Std display
Std display
2.
Clean with a
mild soap, and rinse
well with water.
3.Dry the area with
tissues thoroughly.
1. Wipe off the
sample.
Cleaning
std Usr2
sEt
USr1
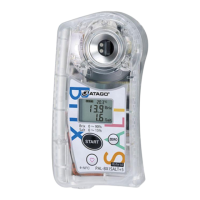
Measure Brix and Salt at the
same time!
Save time and space.
It’s even equipped with a data
communication function!
4922-E02
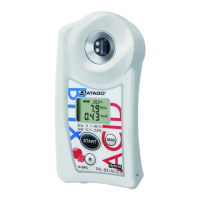
Digital Hand-held “Pocket” Brix-Salt Meter
PAL-
BX|SALT+5
Cat. No. 4922
Salt (Std scale): Default mode for measurement
and checking with reference solution.
Salt (USr scale): User scale of USr1 to USr5.
After creating the user scale, it is possible to
measure soy sauce and sauce with the undiluted solu-
tion.
Salt reduction index: Salt ÷ Brix. Brix to
Salt ratio.
About Scale
4. Apply tap
water.
5. Press
the START
button.
Brix: Zero-setting
Brix: Zero-setting
Salt: Zero-setting
-Zero-setting is required.-
Press the ZERO button.
The instrument is
zero-set correctly.
Press the START
button.
Measurement: not 0.0 Brix
Measurement: 0.0 Brix
Proceed to
measurement.
Rub strongly with
dry tissue paper
To turn off the display,
press and hold for
more than 2 seconds.
Wash under running water (<50℃).
Do not submerge
in water.
R
Instruction Manual
tape
MADE IN JAPAN
-
+
Remove the tape from the battery
compartment and close the cover.
mThe cover must be closed properly to
maintain water resistance. Keep the
batteries in during storage.
Closed
Open
O
P
E
N
C
L
O
S
E
O
P
E
N
C
L
O
S
E
The warranty period
extension method
1 year 2 years
The warranty period
will be extended
from 1 year to 2
years when you
QR code
register customer information.
ATAGO Logger NFC can also
be downloaded at the same
time.
Preparation② Select A Scale Number.
Scale Number List
2. Select a Scale Number.
3. Press the Heart
button to confirm
the selection.
1. Press and hold
the Heart button
for 5 seconds
(while the unit
is powered on).
Use the ZERO
button to move the
number upward.
Use the START
button to move the
number downward.
Scale Number displayScale Number display
SET display
1. Clean the
sensor.
1. Clean the sensor
(with nothing on
the sensor).
At least 0.6mL
At least 0.6mL
The instrument is
zero-set correctly.
※Recommended on a daily basis.
Mild
soap
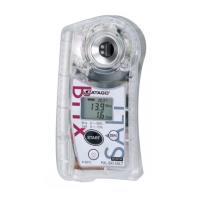
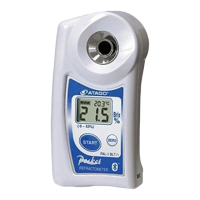
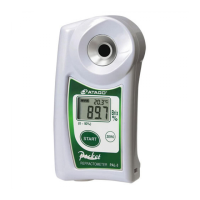
LCD
START Button
Heart Button
Battery Compartment
ZERO Button
Lanyard Hole
www.GlobalTestSupply.com
Find Quality Products Online at: sales@GlobalTestSupply.com