Inserting the CMS Expansion Card
into the PC
Once you have taken the cover off your PC, you are ready to
insert the CMS expansion card.
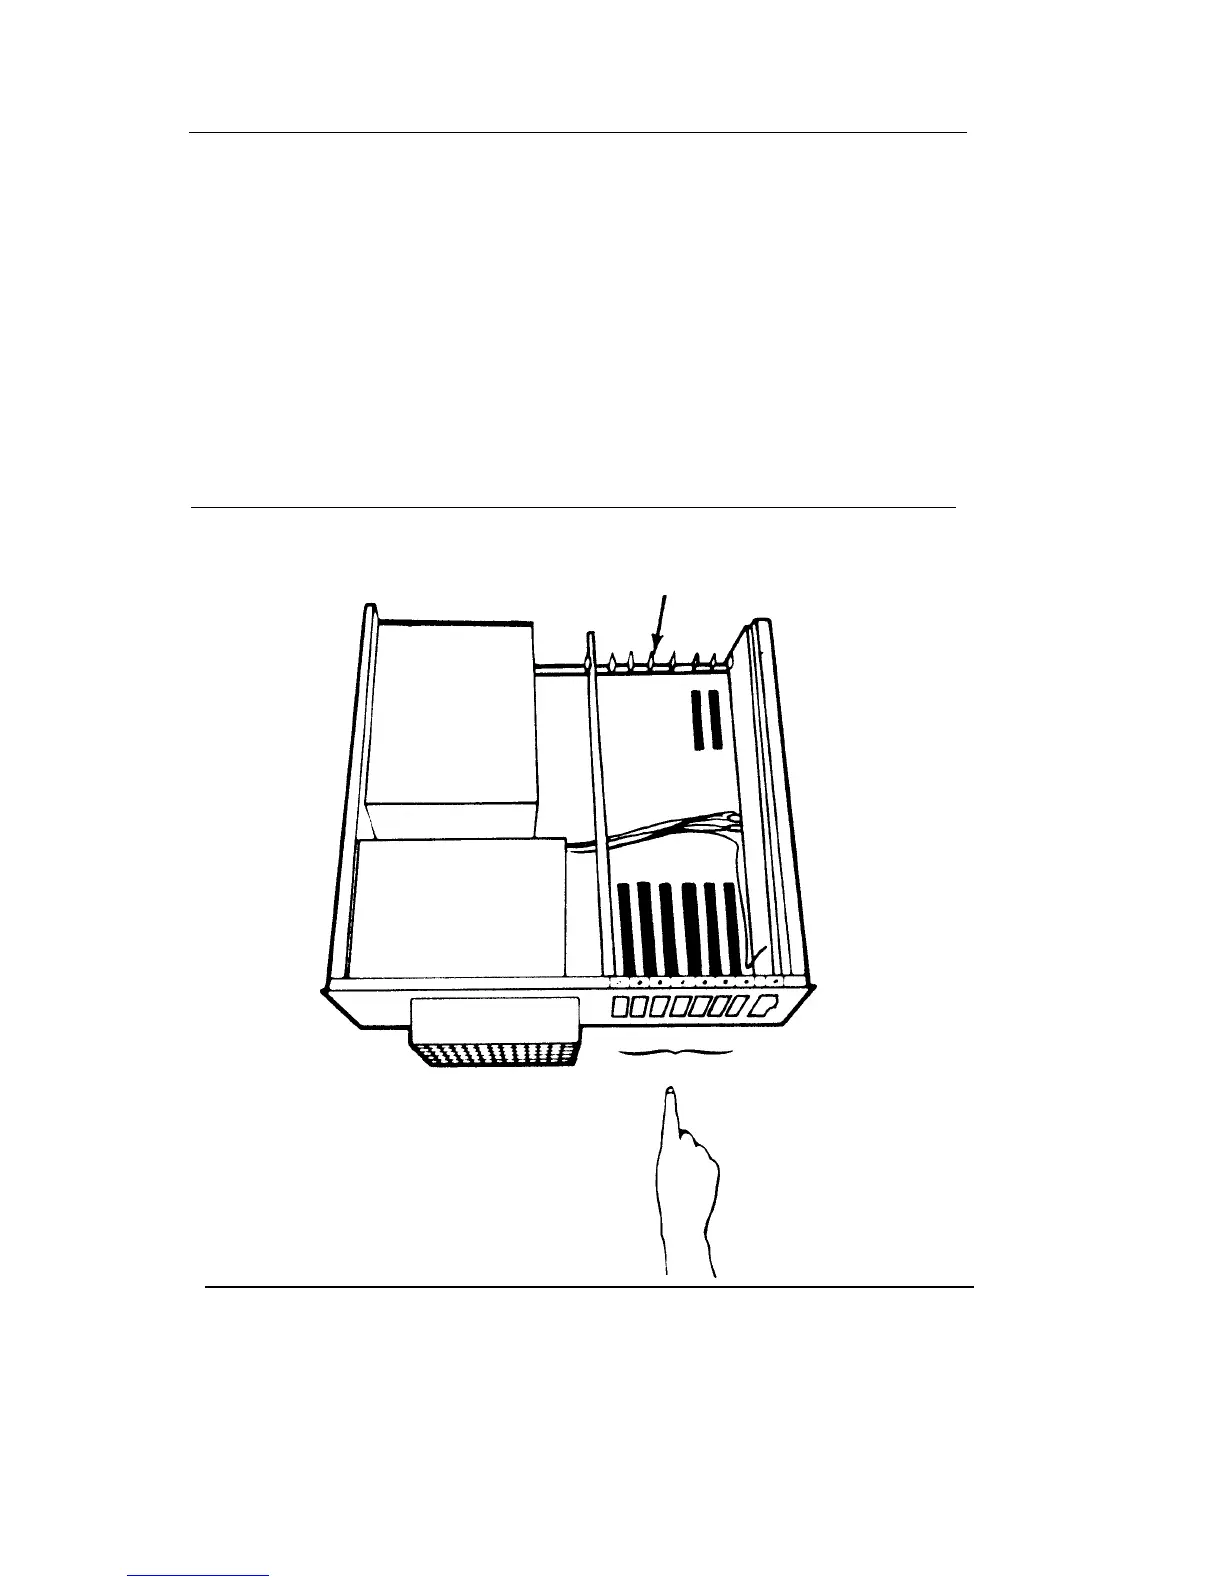
In your PC there are seven expansion slots numbered 1 through
7, as shown in Figure 5. There are plastic guides opposite the
expansion slots, in the front of the PC. The expansion card must
fit into an expansion slot receptacle and into a plastic guide.
FIGURE 5 The expansion slots in the PC
Plastic guide
7 6 5 4 3 2 1
Expansion slots
12
Call Management System Installation Guide
Before you begin to insert the expansion card in the PC, you
should note these important points:
❏
As you insert the card, be sure that you do not bend it.
❏
Avoid touching the gold "fingers" at the base of the card.
Always hold the card by its top corner edges.
To insert the CMS expansion card in one of the expansion slots,
follow these directions,
1
2
3
Choose an empty slot for the expansion card.
❏
If there are other expansion cards inside the unit, be sure
they do not interfere with the space you need for the
CMS card. After you install the CMS expansion card, be
sure that it does not touch any other card in the unit.
Using the flat-blade screwdriver, remove the screw from the
metal cover of the expansion slot that you have chosen. Set
the screw aside since you will need it again later.
Remove the expansion slot cover by sliding it up.
Call Management System Installation Guide 13
 Loading...