8
Screw down the CMS expansion card with the screw you
removed from the metal expansion slot cover, as shown in
Figure 8.
FIGURE 8 Screwing down the expansion card
Reassembling the PC
1
Face the front of the unit and lower the front of the cover so
that the rear is slightly higher than the front.
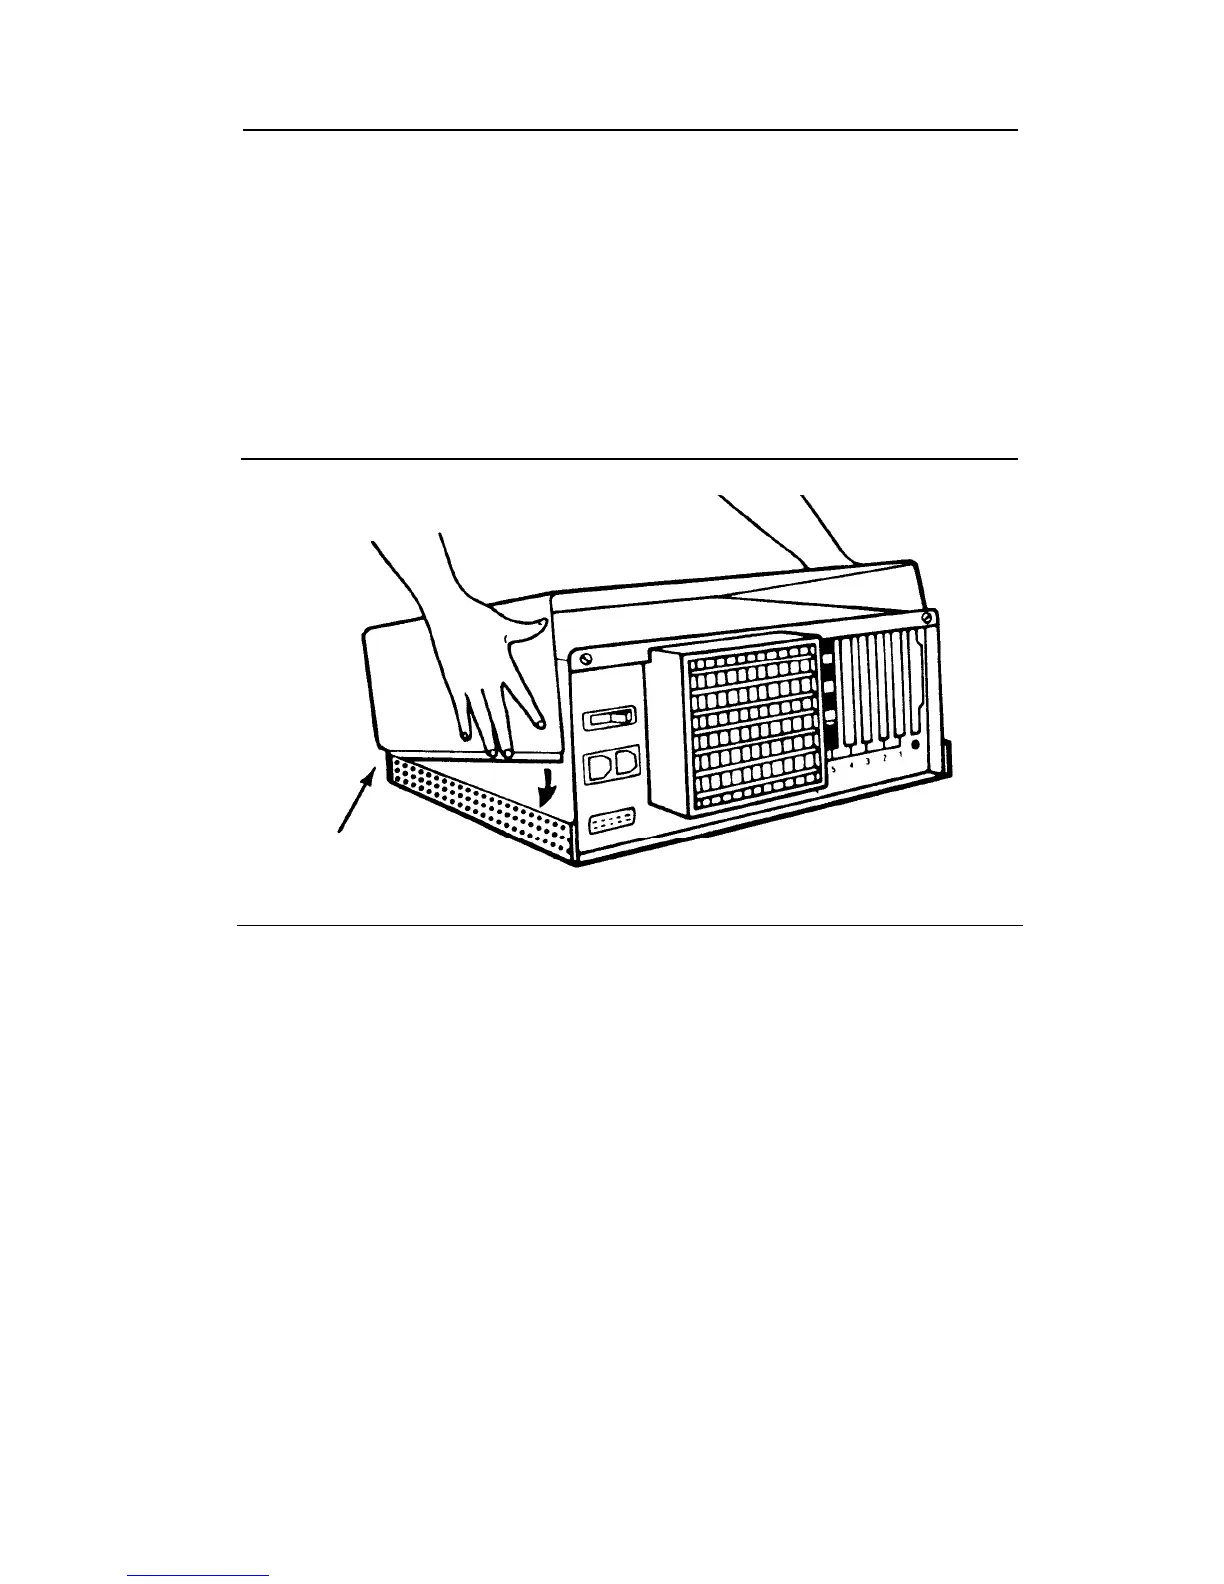
2
Align the front of the cover with the front of the base, as
shown in Figure 9. Make sure that the sides of the cover fit
within the base of the unit at the front, and that the plastic
tabs at the front of the cover are under the disk drive.
FIGURE 9 Replacing the cover of the PC
Slides must
fit within
base
16
Call Management System Installation Guide
3
4
5
6
7
8
Lower the back of the cover onto the base.
Slide the cover about 1/8 of an inch toward the front of the
unit.
Then, slide the cover toward the rear of the unit. The sides
of the cover should now fit within the base, and the top of
the cover should extend slightly beyond the rear of the unit.
Tighten the screws at the back of the unit.
Plug the computer into an ac outlet.
Reconnect the peripherals you disconnected in "Preparing the
PC for the CMS Hardware."
Call Management System Installation Guide 17
 Loading...