Connecting the PC to the Voice
Announcement Unit
Follow these procedures for connecting the PC to the voice
announcement unit. To connect the two units, you need a 14-
foot tape unit cord, provided in either the CMS hardware
package or the Voice Announcement package.
1
2
3
Set up your voice announcement unit by following the
instructions that came with the unit.
❏
❏
❏
❏
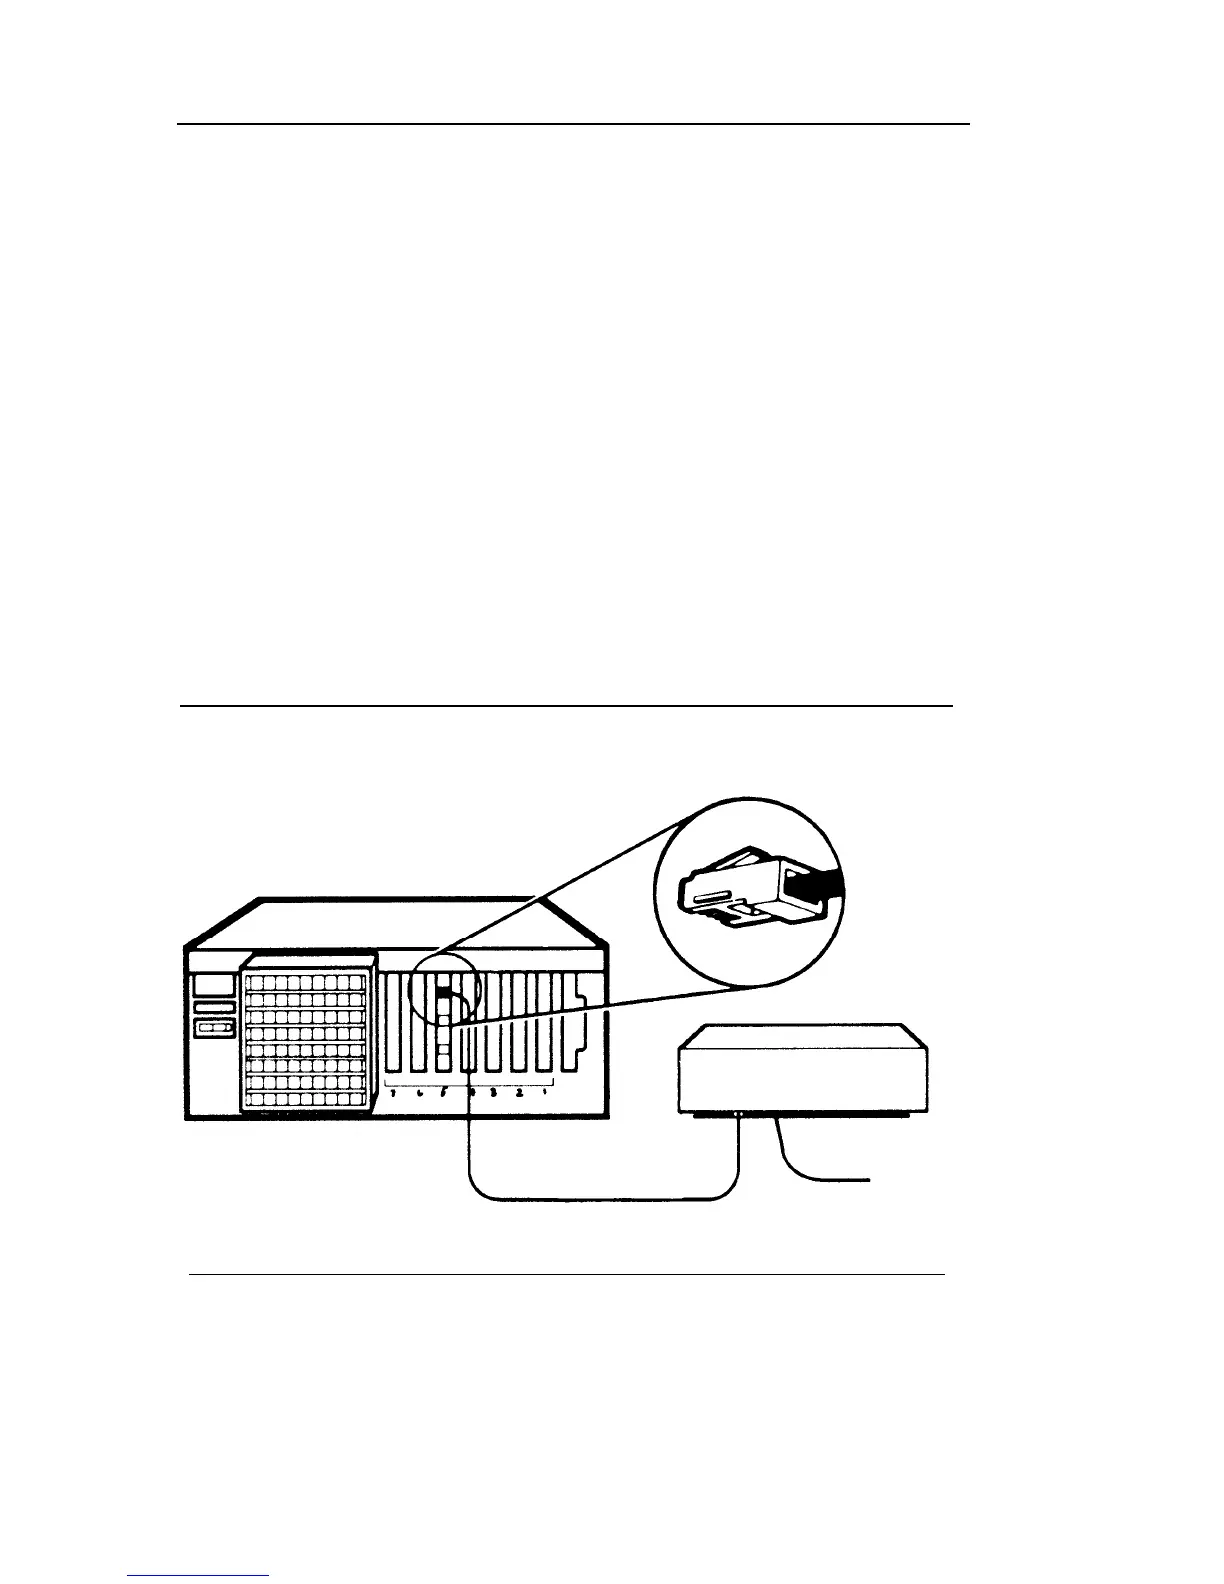
Turn your PC so you can see the three jacks in the CMS
expansion card.
Using the cord provided, connect the voice announcement
unit to the top jack (labeled AUX) on the expansion card.
Figure 11 shows how the voice announcement unit is connected
to the CMS expansion card.
FIGURE 11 Connecting the expansion card and the voice
announcement unit
What’s Next?
You are now finished installing the CMS hardware and
connecting the necessary equipment.
Before you can use your voice announcement unit, you must
record an announcement. Follow the instructions that came
with your unit to record a clear, informative message.
If you choose to connect the optional AT&T 473 printer,
follow the installation directions that come with that unit.
Before you can use your Call Management System, you must
install the CMS software, which comes in the CMS software
package. Instructions on installing and administering the
CMS software are in the section titled
Administration Manual
in the three ring binder that came with your CMS software
package.
Place this guide in the back of that binder and keep it handy
in case you need to refer to the installation instructions
again.
To ac
outlet
20
Call Management System Installation Guide
Call Management System Installation Guide 21
 Loading...