1.
Set up
Approximate time: 15 minutes
Please note that your U-verse TV, Internet, and Phone services will not operate during this process.
This includes recording TV shows.
A.
· Unplug power cord from
existing Wi-Fi Gateway
· Set power cord aside
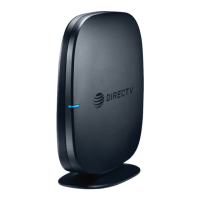
· Stand new Wi-Fi Gateway
side-by-side with existing
Wi-Fi
Gateway
B.
· Transfer one connection
at a time from the
existing Wi-Fi Gateway
to new Wi-Fi Gateway
C.
· Remove yellow sticker
covering the Power port
of new Wi-Fi Gateway
·
Connect new power cord to
Power port of new Wi-Fi Gateway
and into electrical outlet
Below is a completed setup. Your existing Wi-Fi Gateway and connections may vary.
Electrical
Outlet
Gray
Phone Cable
B
New Black
Power Cord
C
Yell ow
Ethernet Cable
B
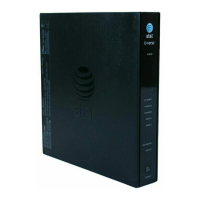
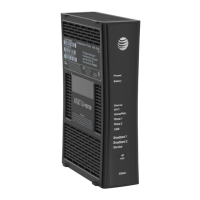
Existing Wi-Fi Gateway
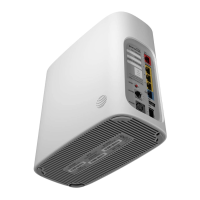
New Wi-Fi Gateway
Yell ow
Ethernet Cable
B
Green Data
Cable
B
Wireless
Access Point
(Optional)
and/or
DVR
(Not Shown)
(U-verse TV
Customers Only)
2.
Power up
Approximate time: 10-15 minutes
Your Wi-Fi Gateway is now powering up. During this time (up to 15 minutes),
do not unplug the power cord or the green data cable, as this can permanently
damage the Wi-Fi Gateway and signicantly delay your service activation.
When complete, the Service light will turn solid green for at least a minute.
If the Service light does not turn solid green or continues to blink aer 15 minutes,
see Having Trouble? on the back of this guide.
NOTE: Your TV may take a few minutes to display. Check your TV for service. If your TV
does not respond, refer to Having Trouble? on the back of this guide.
New Wi-Fi Gateway indicator
lights on front panel. Lights
may vary with setup.
3.
Go Wi-Fi
Approximate time: 10 minutes
New Wi-Fi setup:
A. Select only one option to begin the Wi-Fi setup.
Option 1: Connect using PC
·
Connect laptop or PC with an Ethernet
cable to your
Wi-Fi Gateway
· Continue to
B
Option 2: Connect using smartphone/tablet
·
Establish a temporary connection using new Wi-
Fi
settings located on yellow sticker on new Wi-Fi
Gateway
·
Open your device’s Wi-Fi connection settings and
select your
Wi-Fi Network Name and enter your Wi-Fi
Password to connect to your network
· Continue to
B
B.
Note: Please wait up to 10 minutes for the Wi-Fi Gateway to complete the power up process before attempting
to restore your settings.
· Open a browser and go to ux.att.com/restore
·
Log in to your account. If you forgot your User ID (primary AT&T email address) and Password,
help can be found on the account log-in screen.
· Follow the onscreen instructions to transfer the existing Wi-Fi settings.
·
Record existing Network Name and Wi-Fi Password on separate yellow sticker from kit.
· Place new yellow sticker over your new Wi-Fi Gateway’s yellow sticker.
NOTE: If you receive a “We were unable to restore your Wi-Fi Settings” message, the transfer may still
be in progress. Wait another 5–10 minutes to check your Wi-Fi connection to the network in case your
settings were restored.
NOTE: Any custom settings made for security cameras, game consoles, etc., on your
original Wi-Fi Gateway will also need to be made on your new Wi-Fi Gateway.
4.
Easy Return
(Refer to return instructions in your kit)
A.
Return your equipment at no
cost to you within 21 days to
avoid $150 charge.
B.
Take original Wi-Fi Gateway and
power cord to nearest The UPS
Store. Bring your AT&T account
number located on your packing
slip. Please do not return other
devices (e.g., backup battery, etc.).
C.
UPS will scan your equipment,
provide a receipt, pack, and ship
equipment to AT&T at no cost
to you.
5.
Smart Home Manager
(For AT&T Internet customers only)
Learn how the Smart Home Manager can help you manage your Wi-Fi network
information, connect devices to your network, and more.
The Smart Home Manager (SHM) Dashboard gives you easy access to all
the network information you need.
• View your Wi-Fi network and devices connected
• Easily reboot your Wi-Fi Gateway
• Change your Wi-Fi network name or password
Access the Smart Home Manager
Log in with your AT&T ID and password that manages your AT&T Internet
Account to have your network connections at your ngertips.
Need more control over your home network?
Go to https://myhomenetwork.att.com to see how you can easily manage
all the devices in your home.
SHM Dashboard
 Loading...