CONTROL TALKBACK
REF INUSB-C
1 3 5 7 9
2 4 6 8 10
11 13 15
12
1 3 5 7 9
2 4 6 8 10
11 1
12 214 16
17 19
18 20
ANALOG AUDIO INMULTIVIEW
CH 2
CH 1
SDI OUTPUTSSDI INPUTS
3G-SDI and 1/4” analog audio inputs on ATEM 2 M/E Constellation HD
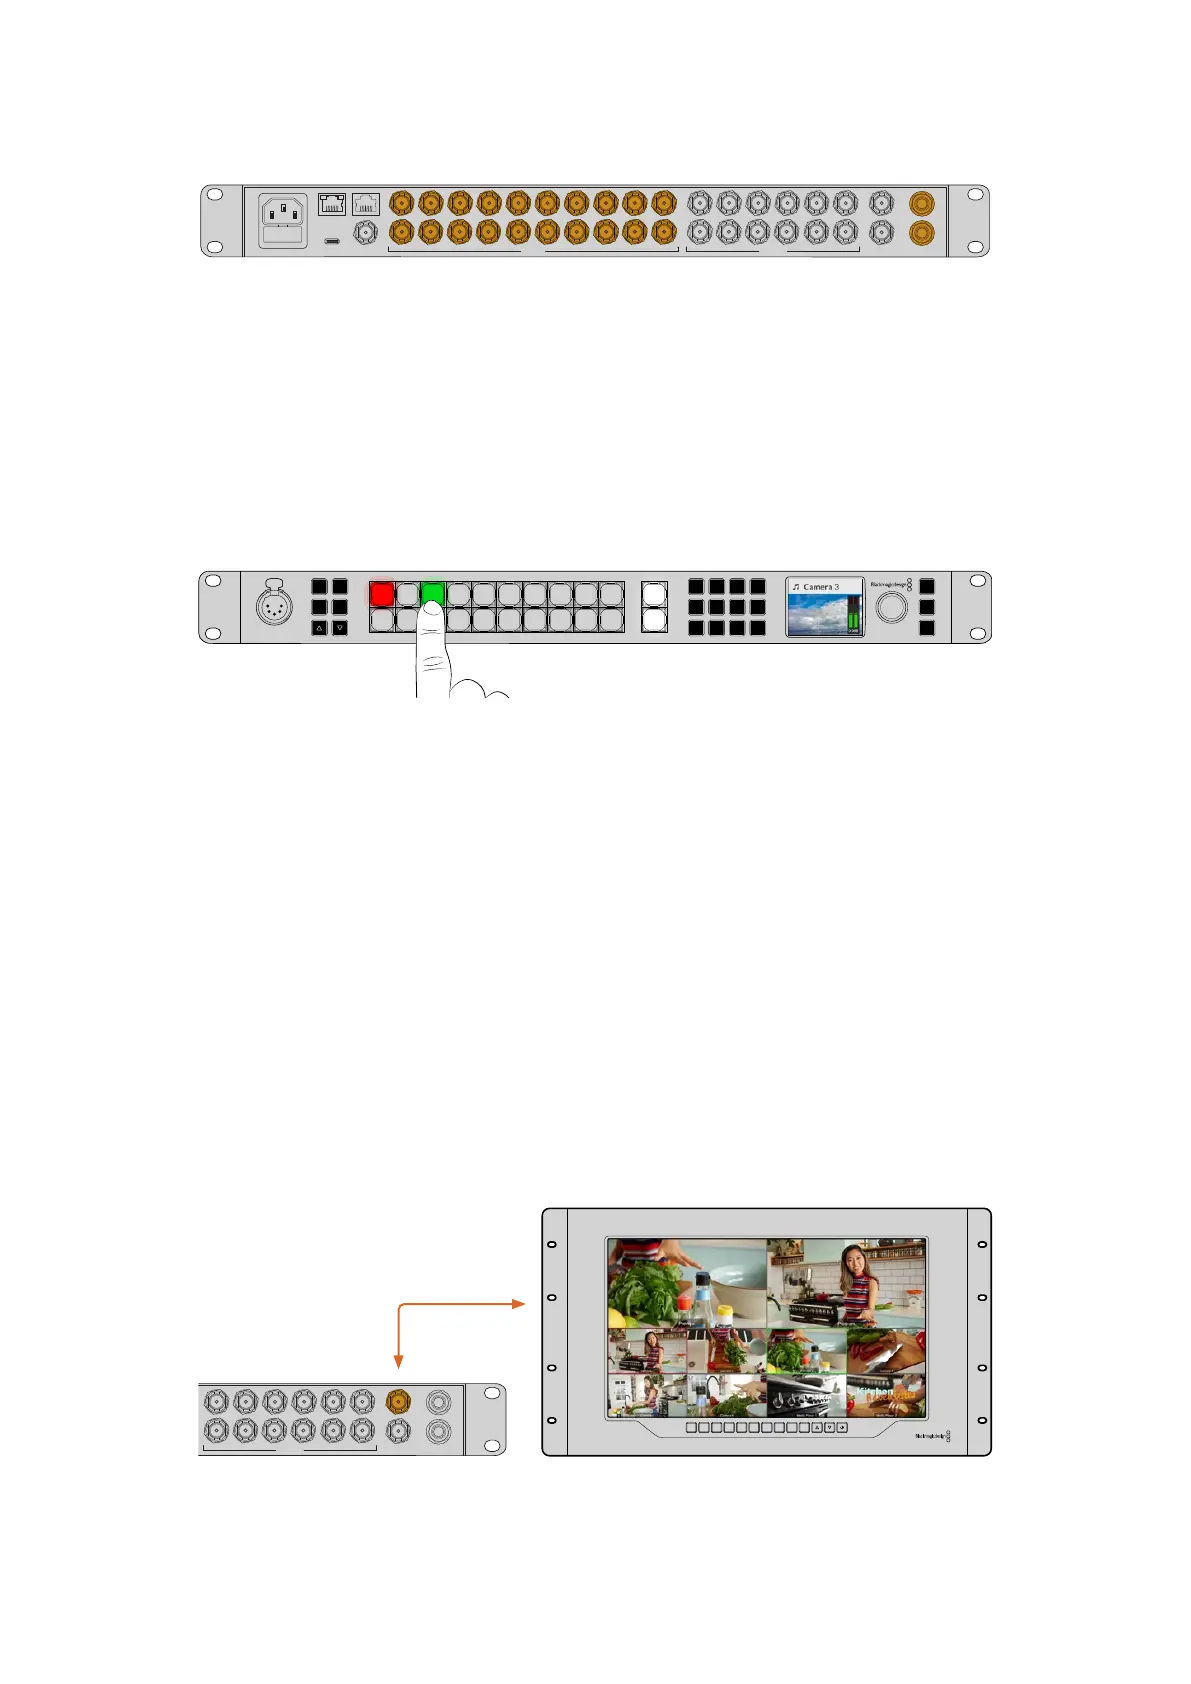
Once the video sources are connected, you can check the inputs via the front panel LCD. The
numbered buttons on the front panel correspond to the numbered inputs on the rear of the
switcher. As you select different sources you will will see them appear on the LCD. If a music
note appears to the left of the label, it means that the source contains audio and the levels will
appear on the audio meters.
Press the ‘cut’ button to switch the source to program. The LCD label will return to ‘master’
and the audio meter will reflect the master audio levels. You can see which input is currently
on the program and preview outputs because their respective buttons will be illuminated red
and green.
5
Amphenol
4 2
1
3
PUSH
LOCK
MENU
SET
KEY 1
MIX
DSK 1
MIX
BARS
MIX
BLACK
WIPE
DSK2
MIX
FTB
MP 1
DIP
MP 2
DVE
6 7 8 9 CUT
16 17 18 19
10
20 AUTO
1 2 3 4 5
11 12 13 14 15
PROD
TALK
ENG
TALK
CALL
PGM
MIX
When checking your sources, you can also check the levels of the audio via the LCD
Plugging In Audio
The built in audio mixer allows the use of embedded SDI audio from your cameras as well
as external audio from the dedicated 1/4” analog audio inputs or the MADI inputs on ATEM 4
M/E Constellation switchers. These audio inputs can be used for other audio sources such as
camera microphones and prerecorded audio.
Another way to check your inputs is to connect an SDI monitor to the multiview output.
Connecting the Multiview
Once the multiview output is connected to an SDI monitor, you should see 8 boxes and 2 larger
boxes on the display. Each box is a separate view and as you connect additional sources, they
will appear on the multiview. You can customize the look of the multiview to show up to 16 views
using ATEM Software Control. For more information, see ‘multiview settings’ later in this manual.
If you can see the multiview, then your ATEM is powered on and running fine and you can start
using your switcher.
INPUT DISP
H/V
DELAY
3D
LUT 1
BLUE
ONLY
ZOOM PEAK
3D
LUT 2
H
MARK
V
MARK
CONTROL TALKBACK
REF INUSB-C
1 3 5 7 9
2 4 6 8 10
11 13 15
12
1 3 5 7 9
2 4 6 8 10
11 1
12 214 16
17 19
18 20
ANALOG AUDIO INMULTIVIEW
CH 2
CH 1
SDI OUTPUTSSDI INPUTS
Connect your ATEM Constellation HD to an SDI display, eg Blackmagic SmartView 4K to view the
multiview output
10Getting Started
 Loading...