LOCK
MENU
SET
KEY 1
MIX
DSK 1
MIX
BARS
MIX
BLACK
WIPE
DSK2
MIX
FTB
MP 1
DIP
MP 2
DVE
6 7 8 9 CUT
16 17 18 19
10
20 AUTO
1 2 3 4 5
11 12 13 14 15
PROD
TALK
ENG
TALK
CALL
PGM
MIX
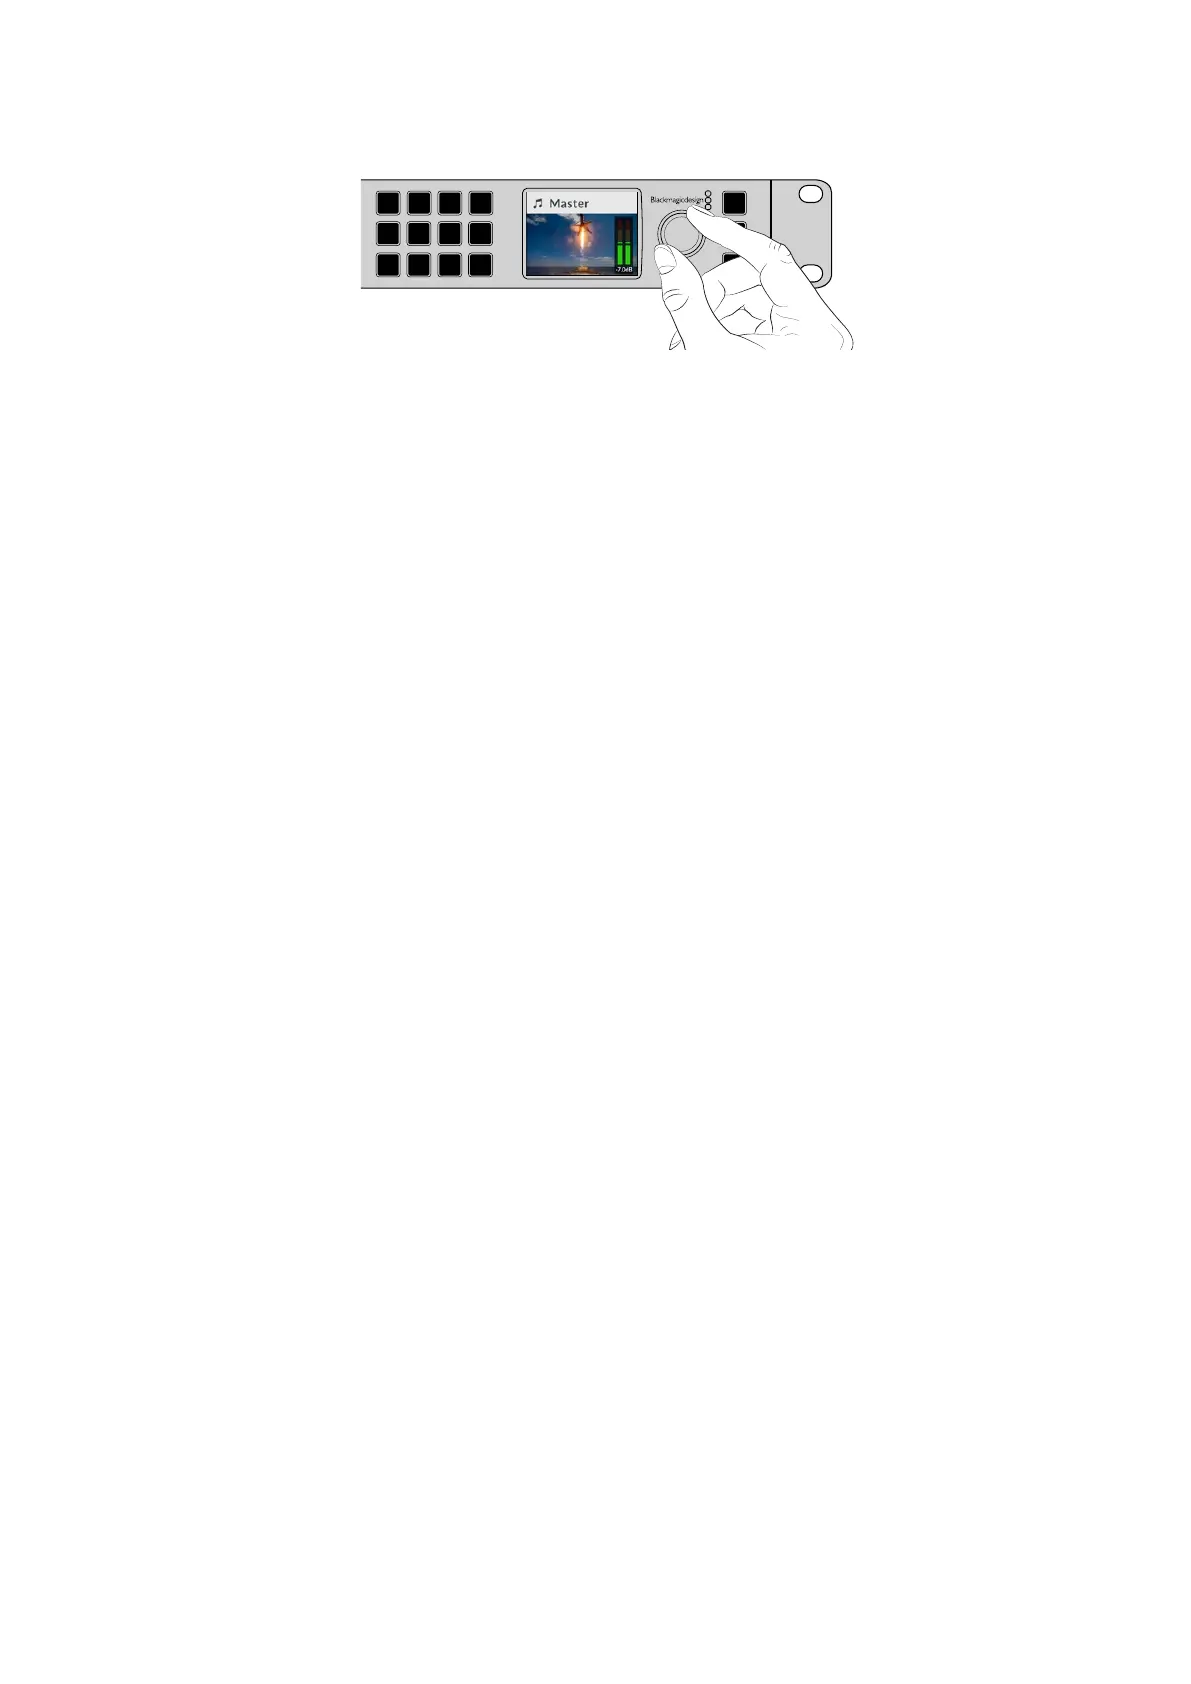
Use the knob to adjust the master audio level and you can see the
effect on the main audio meters in the LCD
If you want to adjust the audio for each of the SDI inputs, you can view and adjust the audio
levels individually through the menus on the LCD. This is a useful way to identify when the
main audio level is too high because single input is too high level. In this case you don’t want to
adjust the master audio level because all the other inputs will now become too low. You really
want to select the input audio level and adjust just that single audio level.
To adjust an input audio level, for example on input 4:
1 Select the input 4 button. This is easier when using program/preview mode as you can just
select it on the preview source.
2 The label on LCD will change to that input, for example input 4, to show you’re adjusting the
level for that specific input.
3 Adjust the knob and you will see the audio meter on the LCD will reduce in level.
If this input is on air, the master audio output will be reduced because this input is being
lowered in level.
To go back to the master audio level:
1 Press the set button on the right side of the control panel and it will go back to master
immediately. If you don’t press ‘set’, the front panel will automatically switch itself back to
master after a few moments.
2 Now adjusting the knob will be adjusting the master audio output and the LCD has master
displayed.
This is a quick way to test audio channels when you setup your ATEM Constellation HD. For
fine control of individual audio channel parameters during production, we recommend you use
ATEM Software Control.
Switcher Keypad
The large keypads on the front of the switcher provide dedicated buttons for all the switcher
inputs along with buttons for keyers and media players. ATEM 2 M/E and 4 M/E models even
include dedicated buttons for transitions, however these can also be selected via the front
panel menu for all switcher models.
Performing a Transition
When checking your setup, the first step you may want to try is to perform a transition. The
group of large numbered buttons represent the inputs into the switcher. When you first turn on
the switcher, you will see input 1 is the button illuminated red. This means that input 1 is on air
and if you have a video source connected to input 1 it will appear on the program output.
Unlike a standard program/preview switcher control panel, these buttons on ATEM
Constellation HD switcher models serve as both preview and program source buttons and will
illuminate green and red to indicate which source. This section shows how to use the buttons to
switch content to the preview and program outputs.
14Using the Front Panel
 Loading...