8
ATOMIK-RC.COM
COPYRIGHT © 2013 ATOMIK RC
9
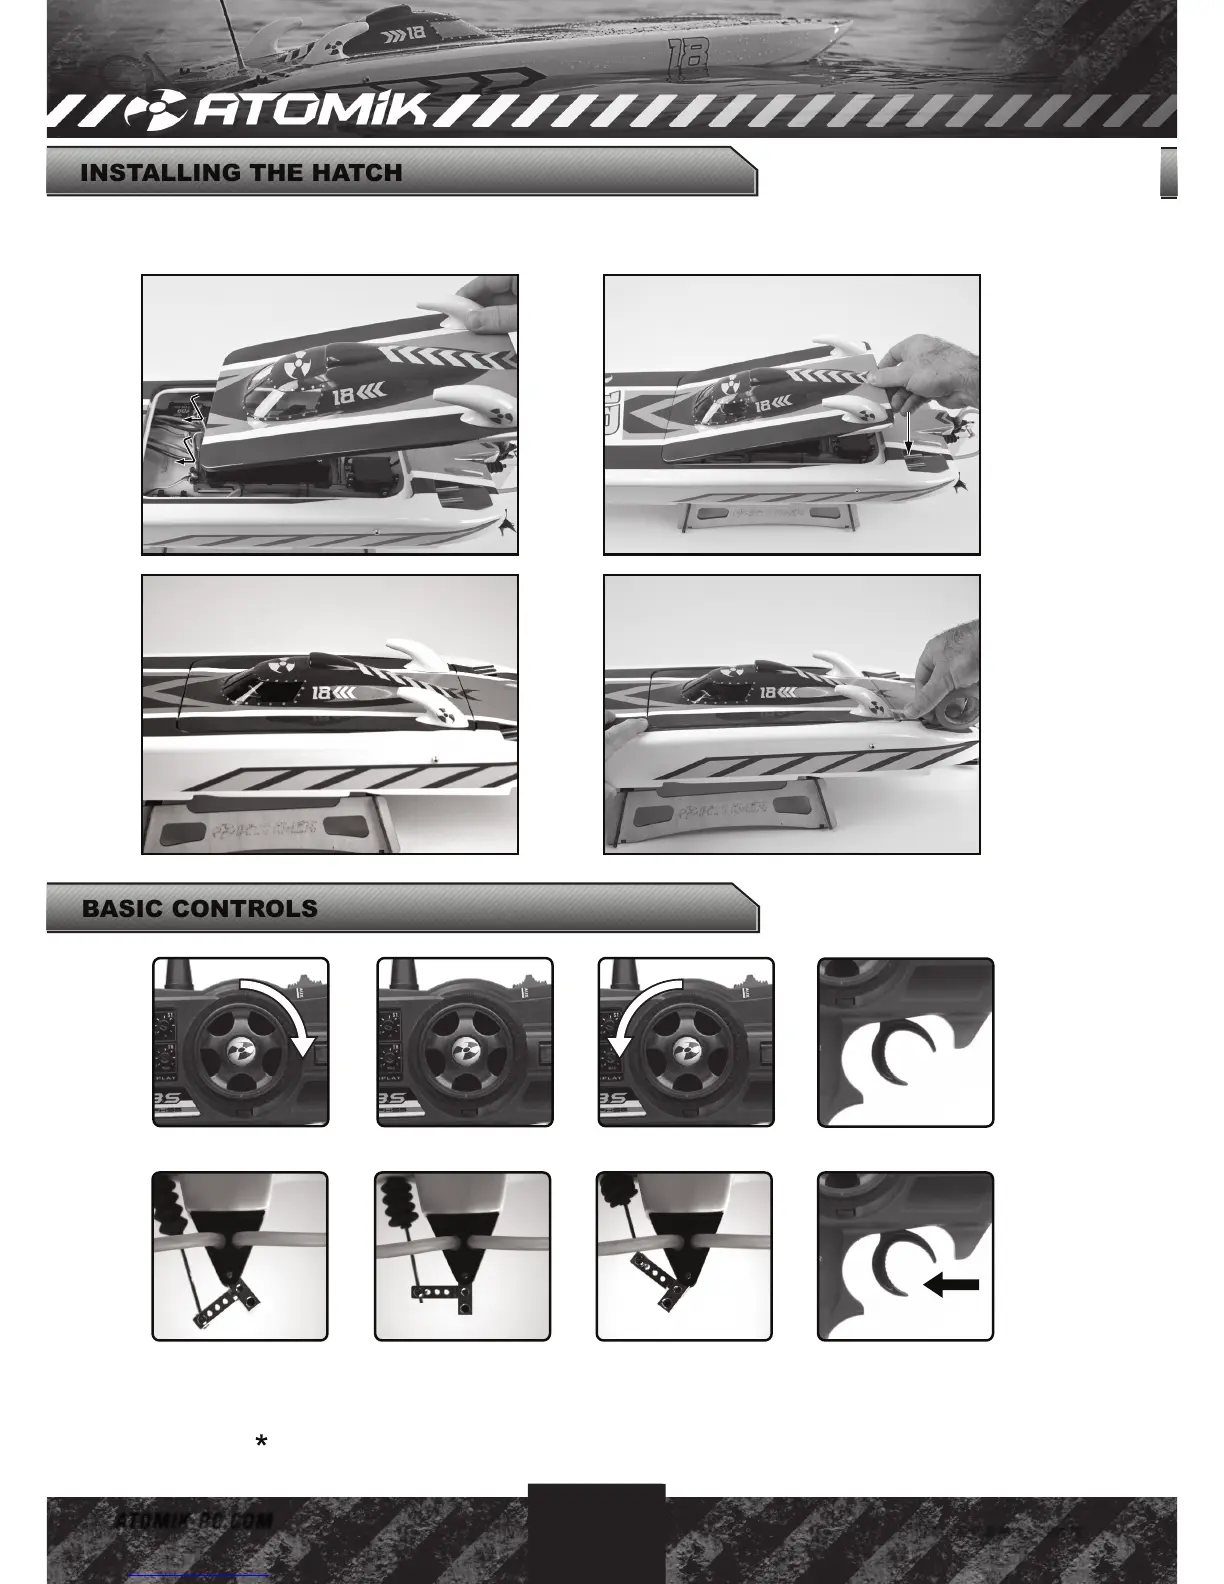
Secure the hatch by sliding the front pins into the holes at the front of the hull opening. The Hatch should drop easily
down so that the magnets hold the hatch in alignment. To waterproof the hatch, use strips of clear tape to seal the lid on
all four sides. **Note: Hatch magnets are for alignment only. Never rely solely on magnets for hatch retention.
INSTALLING THE HATCH
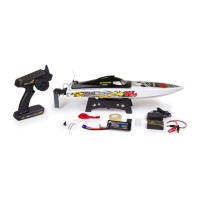
Use the steering dual rate to adjust the steering sensitivity.
NOTE: To avoid flipping the boat, reduce the throttle to slow the boat while turning.
Refer to the radio manual that came with your kit for complete instructions.
WHEEL RIGHT WHEEL LEFT NEUTRAL THROTTLEWHEEL STRAIGHT
RUDDER RIGHT RUDDER LEFT FULL THROTTLERUDDER STRAIGHT
2.5mm
Hex Driver
Needle Nosed Pliers
Follow the same steps used to install the props. If you are using aftermarket props, make sure they are sized for a 4mm
prop shaft. If you are not using a 4mm prop, you will need to shim the prop shaft or use an adapter to increase the
diameter to .187.
Loosen the drives using a pair of needle nose pliers and a 2.5mm Hex Driver. Adjust the drive up or down to change the
running angle of the boat. Use degree markings on the outdrive to adjust the drive angle. Be sure both drives are set at
the same angle to prevent erratic running.
The alignment of the propeller shaft is parallel to the bottom of
the hull (Keel) which is considered zero degrees (0 deg) and a
neutral setting. The thrust of the propeller is in line with the
center of the hull and has no effect on the hull ride angle.
LEFT RIGHT
TUNING GUIDE
REPLACING/ UPGRADING THE PROPS
ADJUST AND MEASURE THE DRIVE SHAFTS
NEUTRAL THRUST ANGLE (0 DEGREES)
NOTE:
Adjusting the drive strut will effect the drive dog gap.
Always check the drive dog gap after adjusting the
drive shaft angle.