18
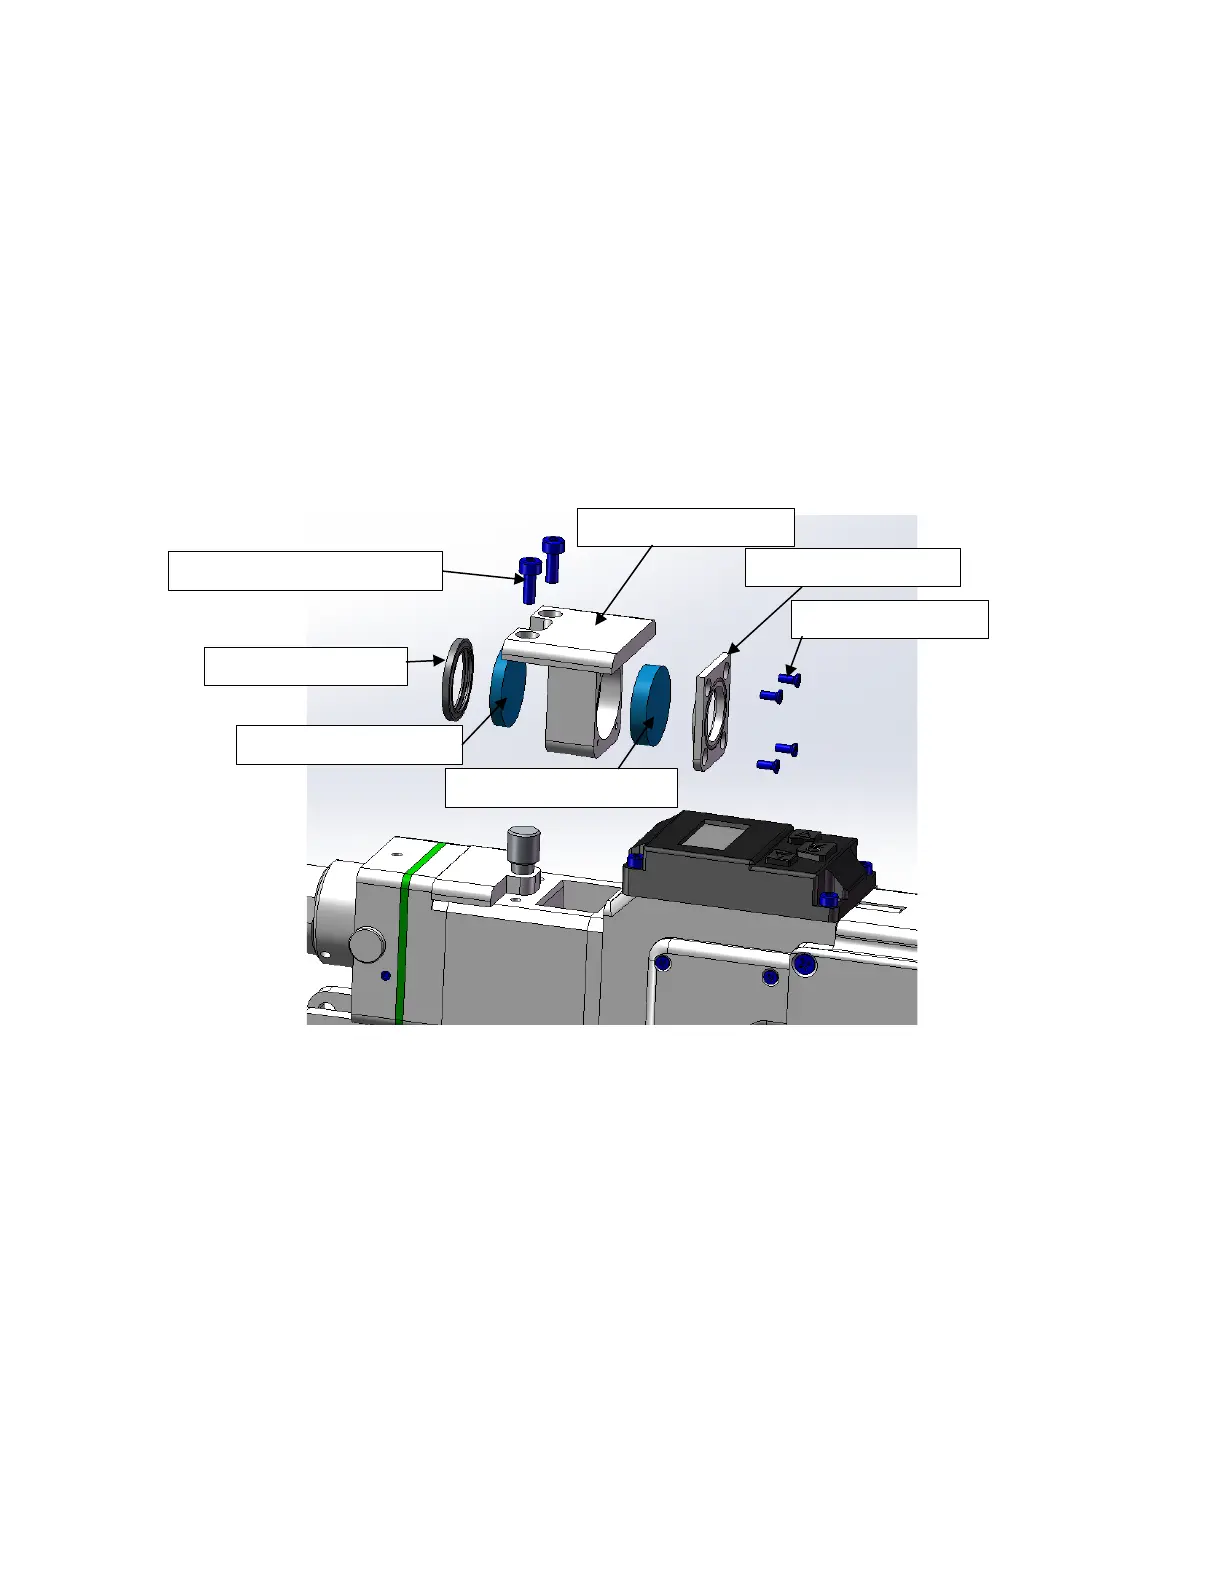
(1)As shown in Figure 11, loosen two M3X8 Hexagon socket screws, pinch both
sides of the drawer-type lens holder and slowly pull out the focusing lens drawer;
(2)Remove focusing lens: use a small cross screw to loosen four M2X5 Phillips
screws, remove the focusing lens cover; take out the focusing lens D20-F150
(3)Remove the protective glass: carefully remove the D20.55 sealing ring, and take
out the protective glass D20X3.
(4)Install the cleaned (or replaced) lens into the focus lens drawer
(5)Reinstall the focusing lens cover and D20.55 sealing ring.
(6)Reinsert the focusing lens drawer back into the welding head, and tighten the
locking screw.
Figure 11 Split diagram of upper protective glass and focusing lens on HW970
Replace the copper nozzle:
In the process of laser welding, the nozzle will touch the welding pieces and rub against
the metal parts. Nozzle is consumable accessory and needs to be replaced after a
period of use. The nozzle equipped is a combination nozzle, which is composed of a